
Image Source: i.ytimg.com
How To Regrout Kitchen Tile Counter: Easy DIY Steps
Yes, you can regrout your kitchen tile counter yourself! Regrouting your kitchen tile counter is a manageable DIY project that can revitalize its look and protect it from stains and moisture. This guide will walk you through everything you need to know, from gathering your tools to applying the finishing touches.
Why Regrout Your Kitchen Countertops?
Over time, the grout between your kitchen tiles can become stained, cracked, moldy, or even crumble away. This not only looks unsightly but also compromises the integrity of your countertop. Water and food particles can seep into the damaged grout, leading to unsanitary conditions and potential damage to the underlying subfloor. Regrouting addresses these issues, offering a fresh, clean, and hygienic surface. It’s a cost-effective alternative to full kitchen tile resurfacing or replacing your countertops altogether.
When is it Time to Regrout?
Several signs indicate it’s time for a grout refresh:
- Staining: Grout is porous and can absorb spills, leading to persistent stains that cleaning won’t remove.
- Cracking or Crumbling: If your grout is breaking apart, it’s no longer providing adequate protection.
- Mold or Mildew: Persistent mold or mildew growth within the grout lines can be a health concern.
- Discoloration: Even without obvious stains, grout can darken and become dull with age and use.
- Loose Tiles: Damaged grout can contribute to tiles becoming loose.
Gathering Your Tools and Materials
Before you begin, ensure you have all the necessary supplies for DIY regrouting countertops.
Essential Tools:
- Safety Gear: Safety glasses, gloves, and a dust mask are crucial to protect yourself from dust and chemicals.
- Grout Removal Tool: This could be a specialized grout saw, a utility knife with a fresh blade, or a multi-tool with a grout removal attachment.
- Vacuum Cleaner: For removing dust and debris.
- Stiff Brush: For cleaning grout lines.
- Sponge: For cleaning and wiping down the tiles.
- Bucket: For water.
- Putty Knife or Scraper: For scraping away loose grout.
- Clean Cloths or Rags: For drying and polishing.
- Painter’s Tape: To protect adjacent surfaces.
- Trowel or Grout Float: For applying the new grout.
- Grout Sealer: Essential for protecting the new grout.
Essential Materials:
- New Grout: Choose the best grout for kitchen counters. Consider sanded grout for wider joints (1/8 inch or larger) and unsanded grout for narrower joints (less than 1/8 inch). Epoxy grout is highly durable and stain-resistant, making it an excellent choice for kitchens, though it can be trickier to work with. Cementitious grouts are common and more affordable.
- Water: For mixing the grout and cleaning tools.
- Grout Additive (Optional): Some additives can improve grout strength and flexibility.
Step-by-Step Guide to Regrouting
Follow these easy DIY steps for a successful kitchen tile grout repair.
Step 1: Prepare Your Workspace and Ensure Safety
- Clear the Countertop: Remove all items from your kitchen counter.
- Protect Surrounding Areas: Use painter’s tape to mask off edges of the countertop, sinks, backsplashes, and cabinets. This prevents accidental damage and makes cleanup easier.
- Ventilate: Open windows to ensure good airflow, especially if using chemical grout removers.
- Wear Safety Gear: Put on your safety glasses, gloves, and dust mask.
Step 2: Removing Old Kitchen Grout
This is a critical step for a clean and lasting repair. The goal is to remove the old grout without damaging the tiles.
Methods for Removing Old Grout:
- Grout Saw/Blade: This is the most common method.
- Hold the saw at an angle to the grout line.
- Gently saw back and forth to cut through the grout.
- Work slowly and carefully to avoid scratching or chipping the tiles.
- Aim to remove about 90-95% of the old grout.
- Utility Knife: For very fine grout lines or touch-ups.
- Use a sharp blade.
- Score the grout line repeatedly.
- This method is slower and requires more patience.
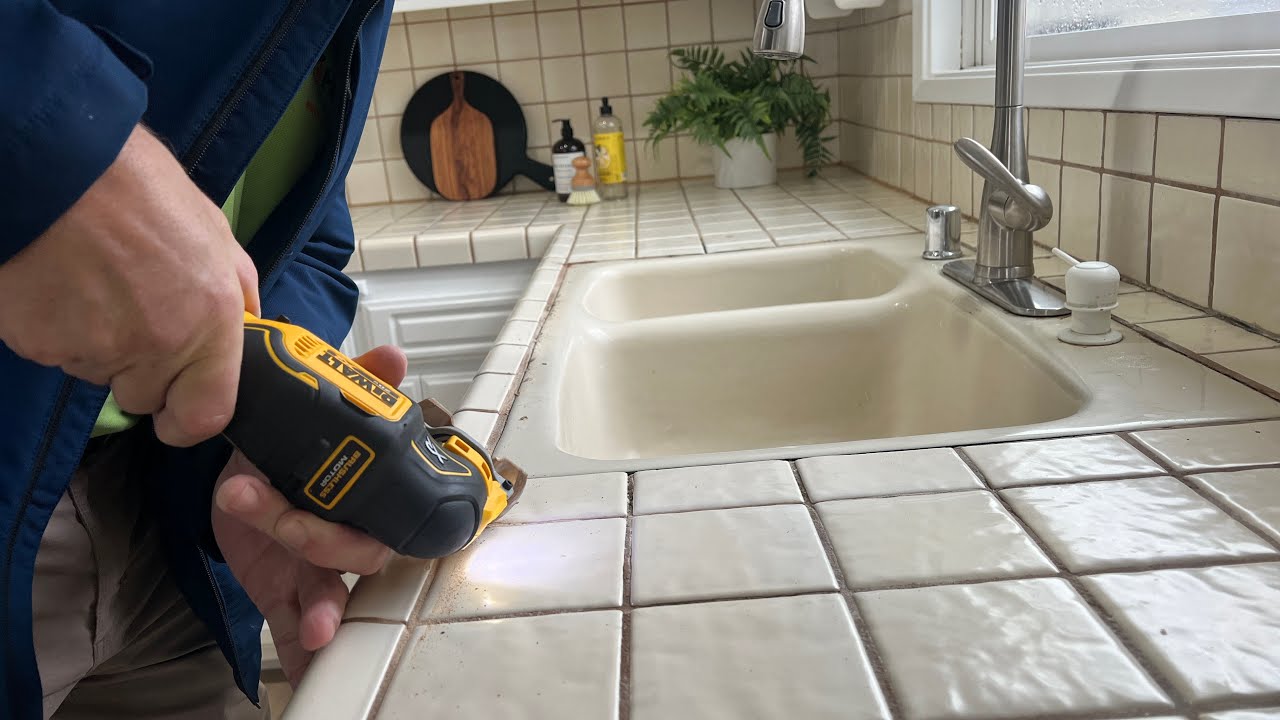
- Multi-tool: If you have a multi-tool with a grout removal attachment, it can speed up the process considerably.
- Follow the tool’s instructions carefully.
- Maintain a steady hand to control the depth.
Tips for Removing Grout:
- Work in Sections: Don’t try to remove all the grout at once. Tackle small areas at a time.
- Depth Matters: Aim to remove grout to a depth of at least 1/8 inch to allow the new grout to set securely.
- Be Gentle: The tiles are fragile, so avoid applying excessive force.
- Clean as You Go: Periodically vacuum up the loosened grout and dust.
Step 3: Cleaning the Grout Lines and Tiles
Once the old grout is removed, thorough cleaning is essential for the new grout to adhere properly.
- Vacuum Thoroughly: Use your vacuum cleaner with a crevice tool to suck up all the dust and debris from the removed grout.
- Scrub the Lines: Use a stiff brush and a damp cloth to scrub any remaining dust or residue from the grout lines.
- Wipe Down Tiles: Clean the surface of the tiles with a damp sponge or cloth to remove any film or dirt.
- Allow to Dry: Ensure the grout lines and tiles are completely dry before proceeding to the next step. Any moisture can interfere with the new grout’s curing process.
Step 4: Applying New Tile Grout
This is where your kitchen tile grout repair truly begins to take shape.
Mixing the Grout:
- Follow Manufacturer Instructions: Grout mixes vary, so always read and follow the specific instructions on the grout packaging.
- Consistency: Aim for a consistency similar to peanut butter or thick toothpaste. It should be moldable but not runny.
- Mix in Small Batches: Grout begins to harden once mixed with water, so only mix what you can use within 15-20 minutes.
Applying the Grout:
- Using a Trowel or Grout Float: Scoop a generous amount of mixed grout onto your trowel or grout float.
- Spread and Press: Hold the float at a 45-degree angle to the tile surface. Spread the grout across the tiles, forcing it into the cleaned grout lines.
- Diagonal Motion: Work in a diagonal motion across the grout lines. This helps ensure the lines are filled completely and excess grout is pushed off the tile surface.
- Overfill Slightly: It’s better to slightly overfill the grout lines at this stage, as you’ll be smoothing them down.
- Clean Excess Grout: After covering a section, use the edge of your float held at a steeper angle (almost perpendicular to the tile) to scrape off the excess grout from the tile surfaces.
Tips for Applying Grout:
- Work in Small Sections: Especially if you are new to this, work on one manageable area at a time.
- Fill Completely: Ensure every grout line is packed tightly with new grout.
Step 5: Smoothing and Finishing the Grout Lines
This step refines the look of your kitchen tile grout repair.
-
Initial Cleaning (Grout Haze Removal):
- Wait about 15-30 minutes (or as recommended by the grout manufacturer) for the grout to set slightly.
- Dip a clean sponge into a bucket of clean water. Wring the sponge out thoroughly – it should be only slightly damp, not wet.
- Gently wipe across the tiles in a circular motion, cleaning off the excess grout. Rinse the sponge frequently in clean water.
- Change the rinse water often to avoid spreading dirty water back onto the tiles.
- Be careful not to dig into the fresh grout lines.
-
Final Smoothing:
- Once the grout has firmed up further (check manufacturer guidelines, usually after an hour or two), you can use a damp cloth to gently smooth the grout lines to a consistent depth.
- A grout finishing tool or even a gloved finger can be used for this if done carefully.
Step 6: Allowing the Grout to Cure
This is a crucial waiting period for the applying new tile grout to become strong.
- Initial Set: Grout typically sets within 24 hours, but this is just the initial hardening.
- Full Cure: It can take anywhere from 3 to 7 days, or even longer depending on the type of grout and environmental conditions (humidity, temperature), for grout to reach its full strength.
- Avoid Heavy Use: Refrain from heavy cleaning or placing heavy items on the countertop during the curing period.
- Keep it Dry: Try to keep the countertop as dry as possible during the initial curing phase.
Step 7: Sealing the Grout
This is a vital step to protect your newly regrouted countertop and is key for tile grout maintenance.
- When to Seal: Wait until the grout has fully cured according to the manufacturer’s instructions. This is typically 3-7 days after application.
- Choose the Right Sealer: Select a high-quality grout sealer specifically designed for kitchen use. Look for sealers labeled as “penetrating” or “impregnating” as they offer the best protection against stains and moisture. A grout sealer for kitchens is essential.
- Application:
- Apply the sealer with a small brush, roller, or applicator bottle, focusing on the grout lines.
- Wipe away any excess sealer from the tile surfaces immediately with a clean, lint-free cloth before it dries.
- Follow the sealer manufacturer’s instructions for drying times and the number of coats needed. Some may require a second coat after the first has dried.
Step 8: Ongoing Tile Grout Maintenance
Proper tile grout maintenance will extend the life and beauty of your regrouted countertop.
- Wipe Up Spills Immediately: Don’t let liquids sit on the grout.
- Use Mild Cleaners: Avoid abrasive cleaners or harsh chemicals that can break down the grout or sealer.
- Regular Sealing: Reapply grout sealer periodically (usually every 6-12 months, depending on use and the sealer type) to maintain its protective qualities.
Can I Regrout a Backsplash?
Yes, the process for regrout a backsplash is very similar to regrouting a countertop. The tools and steps are largely the same. You will still need to remove the old grout, clean the lines, apply new grout, and seal it. The main difference might be working on a vertical surface, which can be a bit more challenging to manage grout application and prevent sagging, so working in smaller sections and ensuring the grout is the correct consistency is key.
What is the Best Grout for Kitchen Counters?
When selecting the best grout for kitchen counters, consider durability, stain resistance, and ease of cleaning.
- Epoxy Grout: Offers superior stain and chemical resistance, making it ideal for kitchens. It’s also very durable. However, it is more expensive and can be more difficult to work with than cementitious grouts.
- Cementitious Grout with Additives: Standard cementitious grouts are common. For enhanced performance, look for pre-mixed grouts or those that allow for the addition of latex or polymer additives. These improve flexibility, strength, and water resistance.
- Sanded vs. Unsanded Grout: For kitchen countertops, joints are typically 1/8 inch or wider, making sanded grout the preferred choice. It’s stronger and more durable for these larger gaps. For very narrow grout lines (less than 1/8 inch), unsanded grout is used to prevent scratching the tile edges.
How to Clean Tile Grout
Proper how to clean tile grout techniques are essential for maintaining its appearance, whether it’s new or old.
- Regular Cleaning: Use a soft brush or an old toothbrush with a solution of warm water and a mild dish soap. Gently scrub the grout lines.
- For Stubborn Stains:
- Baking Soda Paste: Make a paste of baking soda and water. Apply it to the grout lines, let it sit for 10-15 minutes, then scrub with a brush and rinse.
- Hydrogen Peroxide: For mold or mildew, apply a 3% hydrogen peroxide solution directly to the grout. Let it sit for about 10 minutes, then scrub and rinse.
- Commercial Grout Cleaners: Use these cautiously and always follow the manufacturer’s instructions. Some can be harsh.
- Avoid: Steel wool, abrasive scrubbers, and strong acid-based cleaners, as these can damage the grout and its sealant.
Kitchen Tile Resurfacing vs. Regrouting
While regrouting is a fantastic way to refresh your countertops, kitchen tile resurfacing is a different process. Resurfacing typically involves applying a new coating or material over the existing tile and grout. This can include epoxy coatings, concrete overlays, or even new tile being laid directly over the old. Regrouting specifically addresses the grout lines themselves, repairing or replacing the material that binds the tiles together. Regrouting is generally less intensive and more budget-friendly than a full resurfacing project.
Frequently Asked Questions (FAQ)
Q1: How long does it take to regrout kitchen tile countertops?
A1: The time it takes can vary depending on the size of your countertops, the complexity of the layout, and your experience level. For a standard-sized kitchen, removing old grout might take a few hours, applying new grout can take another few hours, and the curing and sealing process extends over several days. Plan for at least a full weekend.
Q2: Do I need to seal grout on kitchen counters?
A2: Yes, absolutely. Sealing the grout is a critical step for kitchen tile grout repair. It protects the porous grout from stains, moisture, and bacteria, making it easier to clean and prolonging its lifespan.
Q3: Can I regrout over old grout?
A3: No, you must completely remove the old grout before applying new grout. Applying new grout over old grout will result in a weak bond, poor adhesion, and a very short-lived repair.
Q4: How do I choose the right color for my new grout?
A4: Grout color can significantly impact the look of your tiles. Lighter grouts can make tiles appear brighter and more uniform, while darker grouts can highlight the tile shape and provide a more dramatic contrast. Consider the color of your tiles and the overall aesthetic of your kitchen. Always test a small area if you are unsure.
Q5: My tiles are very close together. What kind of grout should I use?
A5: If your grout lines are narrower than 1/8 inch, you should use unsanded grout. Sanded grout contains fine sand particles that can scratch the edges of delicate tiles or create a rougher texture in very fine joints.
Q6: How often should I reseal my grout?
A6: The frequency of resealing depends on the type of sealer used, the amount of traffic and use your countertops receive, and the cleaning products you use. Generally, it’s recommended to reseal every 6-12 months for optimal protection. A simple test is to place a drop of water on the grout; if it beads up, the sealer is still effective. If it soaks in, it’s time to reseal.
Regrouting your kitchen tile countertops is a rewarding DIY project that can dramatically improve the appearance and hygiene of your kitchen. By following these detailed steps, you can achieve professional-looking results and enjoy a refreshed countertop for years to come.