
Can you paint kitchen cabinets without brush marks? Yes, absolutely! Achieving a smooth, factory-like finish on your kitchen cabinets is not just for professionals. With the right preparation, materials, and cabinet painting techniques, anyone can transform their cabinets and avoid those tell-tale brush strokes. This guide will walk you through every step, ensuring your DIY cabinet refinishing project results in a beautiful, smooth finish.
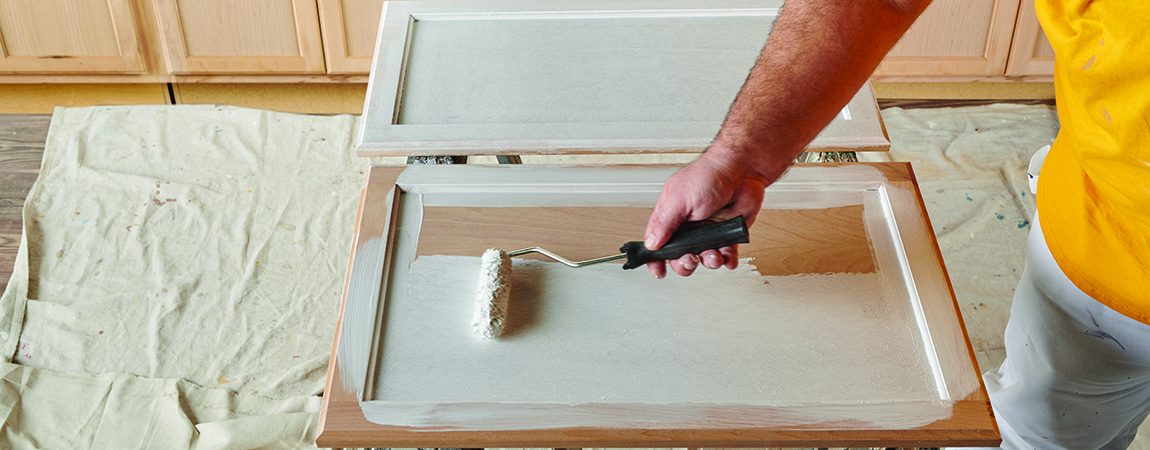
Image Source: certapro.com
Why Aim for a Brush-Mark-Free Finish?
Faded, outdated, or just plain disliked kitchen cabinets can drag down the entire look of your home. Painting them is a cost-effective way to give your kitchen a major facelift. However, the fear of ending up with a streaky, unprofessional result often holds people back. A smooth finish not only looks better but also makes your cabinets easier to clean and more durable. It’s about achieving that polished, high-end look without the hefty price tag.
Comprehending the Enemy: What Causes Brush Marks?
Before we dive into solutions, let’s understand why brush marks happen.
- Paint Viscosity: Paint that is too thick doesn’t flow out smoothly.
- Brush Quality: Cheap brushes with uneven bristles can leave streaks.
- Application Technique: Applying too much pressure, inconsistent strokes, or overworking the paint can embed brush marks.
- Drying Time: If the paint starts to dry before you can level it out, brush marks become permanent.
- Surface Imperfections: Uneven surfaces can catch brush bristles and create marks.
The Cornerstone of Success: Meticulous Cabinet Prep for Painting
No matter how good your paint and tools are, skipping or rushing the cabinet prep for painting is the fastest way to a poor result. This is the most crucial stage, and it’s where many DIYers falter.
Step 1: Remove Cabinet Doors and Hardware
- Take It All Off: Carefully remove all cabinet doors, drawer fronts, and any visible hardware (knobs, pulls).
- Label Everything: This is key! Use painter’s tape and a pen to label each door and drawer front with its location (e.g., “Upper Left,” “Drawer 3”). This will save you immense frustration when it’s time to reassemble.
- Organize Hardware: Put screws and hardware in a labeled baggie for each door, or use a compartmentalized organizer.
Step 2: Deep Cleaning is Non-Negotiable
Grease, grime, and food splatters are the arch-nemesis of paint adhesion and a smooth finish.
- Degreaser: Use a strong degreaser like TSP (trisodium phosphate) substitute or a dedicated cabinet cleaner. Wear gloves and ensure good ventilation.
- Scrub Gently: Use a soft sponge or cloth. Avoid abrasive pads that can scratch the surface, especially on wood.
- Rinse Thoroughly: Wipe down all surfaces with a clean, damp cloth to remove any degreaser residue. Let them dry completely.
Step 3: Sanding for Adhesion and Smoothness
Sanding creates a slightly rough surface for the primer and paint to grip onto. It also helps smooth out any existing imperfections.
- Type of Sandpaper:
- Initial Sanding (if needed): For glossy or heavily coated surfaces, start with 100-150 grit sandpaper.
- Final Sanding: For most surfaces, 180-220 grit is ideal. This provides enough tooth for adhesion without creating deep scratches.
- Sanding Technique:
- Orbital Sander: For flat cabinet doors and drawer fronts, an orbital sander can speed things up. Use a light touch.
- Sanding Blocks/Pads: For cabinet frames and detailed areas, use sanding blocks or pads to control pressure and avoid sanding too much in one spot.
- Sand with the Grain: Always sand in the direction of the wood grain (if applicable) to minimize visible scratches.
- Dust Removal: This is critical. After sanding, wipe down all surfaces with a tack cloth or a slightly damp microfiber cloth to remove all dust particles. Dust left behind will create bumps and imperfections in your paint job.
Step 4: Repairing Imperfections
- Fill Holes: Use wood filler for any dings, dents, or old hardware holes. Let it dry completely according to the product instructions.
- Sand Repairs: Once dry, sand the filled areas smooth and flush with the surrounding surface. Again, remove all dust.
Step 5: Deglossing (Optional but Recommended for High Gloss)
If your cabinets have a very high-gloss finish, even sanding might not provide enough “tooth” for the paint. A liquid deglosser can chemically etch the surface, creating a better bonding surface without heavy sanding. Follow the product’s instructions carefully.
Step 6: Priming: The Foundation for a Flawless Finish
Primer seals the surface, blocks stains, and provides an even base for your paint. This is especially important for wood cabinets that might bleed tannins or for painting laminate cabinets.
- Choose the Right Primer:
- Oil-Based/Shellac-Based Primers: Excellent for blocking stains, tannins, and providing superior adhesion, especially on wood or previously painted surfaces. They have strong fumes, so ventilation is crucial.
- Water-Based (Acrylic) Primers: Lower odor and easier cleanup. Good for surfaces that aren’t prone to heavy staining. Look for “high-adhesion” formulas.
- Hybrid Primers: Combine features of both oil and water-based for good adhesion and stain blocking.
- Application Methods:
- Sprayer: For the absolute smoothest finish, especially on doors, a sprayer is ideal. It lays down a very thin, even coat.
- Roller: A high-quality small foam roller is the next best option for doors and flat surfaces.
- Brush: Use only for edges and corners where rollers or sprayers can’t reach.
- Apply Thin Coats: Two thin coats of primer are better than one thick coat.
- Light Sanding Between Coats: Once the primer is completely dry, lightly sand with 220-grit sandpaper. This will knock down any imperfections and provide a super-smooth surface for paint. Wipe away dust with a tack cloth.
Selecting the Best Paint for Cabinets
Choosing the best paint for cabinets is crucial for durability and that desired smooth finish. You need a paint that is tough, durable, and levels out well to avoid brush strokes.
Key Paint Characteristics to Look For:
- Sheen:
- Satin: Offers a slight sheen, good durability, and hides imperfections well. It’s a popular choice for cabinets.
- Semi-Gloss: More durable and easier to clean than satin, but the higher sheen will highlight imperfections more.
- Gloss: The most durable and easiest to clean, but it will show every single flaw. Not typically recommended for DIYers aiming for a smooth finish unless using a sprayer.
- Type:
- Alkyd (Oil-Based) Enamels: Historically the go-to for durability and a hard, smooth finish. However, they have strong odors, require mineral spirits for cleanup, and can yellow over time.
- Water-Based Acrylic Lacquers/Enamels: Modern advancements have made high-quality water-based paints excellent options. They offer great durability, low VOCs, easy cleanup, and excellent leveling properties, making it easier to achieve no brush strokes. These are often the best choice for DIYers.
- Hybrid Enamels: Combine the best of both worlds – the durability of oil with the ease of water-based cleanup.
Recommended Paint Types:
- Cabinet-Specific Paints: Brands often offer lines specifically formulated for cabinets. These typically have excellent adhesion, durability, and leveling properties.
- High-Quality Interior Enamels: Look for premium brands that advertise smooth finishes and durability.
Achieving a Smooth Finish: Application Techniques
Now for the moment of truth! How do you apply the paint to get that flawless, no brush strokes look?
Method 1: The Sprayer – For the Ultimate Factory Finish
Spray cabinet doors and drawer fronts for the most professional and smoothest results.
- Types of Sprayers:
- Airless Sprayers: Powerful, fast, and good for large areas. Can be overkill for just cabinets and require practice.
- HVLP (High Volume, Low Pressure) Sprayers: Ideal for cabinets. They use less air pressure, which means less overspray and more control, allowing for a finer finish. You can get turbine-driven or compressor-driven HVLP sprayers.
- Setting Up Your Spray Area:
- Ventilation: Essential! Open windows, use fans, and wear a respirator mask rated for paint fumes.
- Protection: Cover EVERYTHING you don’t want painted with plastic sheeting and painter’s tape. Floors, walls, appliances, countertops – everything.
- Spray Booth (Optional): For doors and drawer fronts, consider setting them up on sawhorses or in a makeshift spray booth made from cardboard or plastic sheeting. This helps control overspray and allows you to spray both sides without moving them too much.
- Spraying Technique:
- Practice First: Before touching your cabinets, practice on cardboard or scrap wood. Get a feel for the trigger control, distance, and speed.
- Thin Coats: Apply multiple thin coats rather than one thick one. This prevents runs and sags and allows each coat to flash off properly.
- Consistent Distance: Hold the sprayer a consistent distance from the surface (usually 8-12 inches).
- Steady Motion: Move your arm in a smooth, consistent motion, overlapping each pass by about 50%. Start and stop the spray trigger off the surface.
- Horizontal and Vertical Passes: Apply one coat horizontally, let it dry for the manufacturer’s recommended time, then apply a second coat vertically. This helps achieve an even, smooth finish.
- Drying Time: Allow adequate drying time between coats as per the paint manufacturer’s instructions. Light sanding with 320-grit sandpaper between coats can further enhance smoothness, but ensure the paint is fully cured for sanding.
Method 2: The Roller – Excellent Results Without a Sprayer
The roller cabinet painting method can yield fantastic results if done correctly.
- High-Quality Roller: Use a high-density foam roller specifically designed for smooth finishes or a high-quality microfiber roller (around 1/4″ to 3/8″ nap). Avoid standard fuzzy rollers.
- Paint Tray: Use a good quality paint tray.
- Technique for Doors/Drawer Fronts:
- Work on a Flat Surface: Lay doors and drawer fronts flat on sawhorses or a protected table.
- Apply Paint: Load the roller evenly, but don’t over-soak it.
- Roll in Sections: Apply paint to a section using long, even strokes, working in one direction.
- “Lay Off” the Paint: After applying paint to a section, use a high-quality brush (like a Purdy or Wooster angled sash brush) to “lay off” the paint. This means making light, even strokes in the direction of the grain over the rolled section to smooth out any texture and remove roller marks.
- Work Systematically: Move from one section to the next, overlapping slightly.
- Technique for Cabinet Frames:
- Use a High-Quality Brush: For edges, corners, and inside the frames, use a good quality angled sash brush.
- Brush Strokes: Apply paint in the direction of the wood grain. Use light, even pressure. Avoid overworking the paint. Load the brush with just enough paint to cover the section.
- “Laid Off” with a Brush: Even when brushing, a light, final pass with the brush held at a slight angle can help smooth out any initial brush marks.
- Thin Coats are Key: Again, multiple thin coats are far superior to one thick coat.
Method 3: The Brush – Challenging but Possible for a Smooth Finish
While sprayers and rollers are preferred for the smoothest finish, it’s possible to get good results with just brushes if you’re meticulous.
- Use the Best Brushes: Invest in high-quality synthetic bristle brushes for latex/acrylic paints and natural bristle brushes for oil-based paints. Angled sash brushes are great for control.
- Paint Consistency: Ensure your paint is the correct consistency. If it’s too thick, thin it slightly with the recommended thinner (water for latex, mineral spirits for oil).
- Apply Thinly: Load your brush with paint and apply it in long, smooth strokes, always following the direction of the wood grain.
- Avoid Overworking: Don’t go back and forth endlessly. Apply the paint and move on.
- “Lay Off” the Paint: This is crucial. After applying a section of paint, use a clean, dry brush and make light, long, even strokes in the direction of the grain to blend the paint and remove any visible brush marks. Imagine you are gently smoothing the paint.
- Work in Sections: Paint one small area at a time, laying off the paint as you go.
Important Tips for Achieving No Brush Strokes:
- Temperature and Humidity: Avoid painting in extreme temperatures or high humidity. This can affect drying times and paint flow. Ideal conditions are typically between 60-75°F (15-24°C) with moderate humidity.
- Adequate Lighting: Good lighting helps you see any imperfections or missed spots as you work.
- Patience: This is a marathon, not a sprint. Rushing will lead to mistakes.
- Cleanliness: Keep your brushes, rollers, and sprayers impeccably clean between coats. Any dried paint can transfer and cause issues.
- Ventilation: Ensure good airflow throughout the process, especially when using oil-based products or spraying.
Painting Laminate Cabinets: Special Considerations
Painting laminate cabinets requires a specific approach due to the non-porous nature of laminate.
- Thorough Cleaning: Crucial for removing any surface treatments or grease.
- Sanding: Light sanding (180-220 grit) is still important to create a profile for the primer to adhere to. Be careful not to sand through the laminate layer.
- Adhesion-Promoting Primer: Use a high-quality primer specifically designed for laminate or difficult-to-adhere surfaces. Kilz Adhesion or Zinsser B-I-N are good options. Apply one or two thin coats, allowing proper drying time.
- Light Sanding Between Priming Coats: Lightly sand with 220-320 grit and wipe clean.
- Paint Choice: High-quality acrylic enamels or hybrids work best. Avoid oil-based paints as they may not adhere as well long-term.
- Thin Coats: Apply paint in thin, even coats using a sprayer or a high-density foam roller.
Frequently Asked Questions (FAQ)
Q1: Can I really get a smooth finish without a sprayer?
A1: Yes! While a sprayer offers the most foolproof factory finish, you can achieve excellent smooth results with high-quality foam rollers and brushes, combined with proper technique and meticulous prep work. The key is thin, even coats and “laying off” the paint with a brush.
Q2: What is the best type of paint for kitchen cabinets?
A2: High-quality acrylic enamel or hybrid paints are generally considered the best for DIY cabinet painting. They offer excellent durability, adhesion, low VOCs, and good leveling properties for a smooth finish. Cabinet-specific paints are also a great choice.
Q3: How many coats of paint do I need?
A3: Typically, you’ll need at least two coats of primer (if needed) and two to three coats of paint for full coverage and durability. Thin coats are always better than thick ones.
Q4: How long does it take to paint kitchen cabinets?
A4: This varies greatly depending on the size of your kitchen, the number of doors/drawers, and your chosen method. However, factor in at least a full weekend for prep, and then allow 3-5 days for priming, painting, and drying between coats, plus reassembly. Patience is key!
Q5: What’s the best way to avoid drips and runs?
A5: Apply paint in thin, even coats. Don’t overload your brush or roller. If using a sprayer, maintain a consistent distance and speed. If you do get a drip, try to gently smooth it out immediately with your brush before it dries.
Q6: Can I paint over melamine or laminate cabinets?
A6: Yes, but careful preparation is crucial. You’ll need to clean thoroughly, sand lightly, and use a high-adhesion primer specifically designed for these surfaces to ensure the paint sticks properly.
Conclusion: Your Kitchen Cabinets Await Transformation
Transforming your kitchen cabinets with a beautiful, smooth finish is an achievable and rewarding DIY project. By focusing on meticulous cabinet prep for painting, choosing the best paint for cabinets, and employing the right application techniques – whether spraying cabinet doors or using a high-quality roller cabinet painting method – you can say goodbye to brush marks and hello to a stunning, refreshed kitchen. Embrace the process, be patient, and enjoy your revitalized cabinets!