
Can you paint over existing paint on kitchen cabinets? Yes, you absolutely can paint over existing paint on kitchen cabinets, and it’s a fantastic way to give your kitchen a fresh new look without the cost of replacement. This guide will walk you through the entire process, from preparation to the final coat, ensuring a beautiful and durable finish for your kitchen cabinet repainting project. Whether you’re tackling a full kitchen cabinet makeover or just refreshing a few cabinets, these cabinet painting tips will help you achieve professional-looking results.
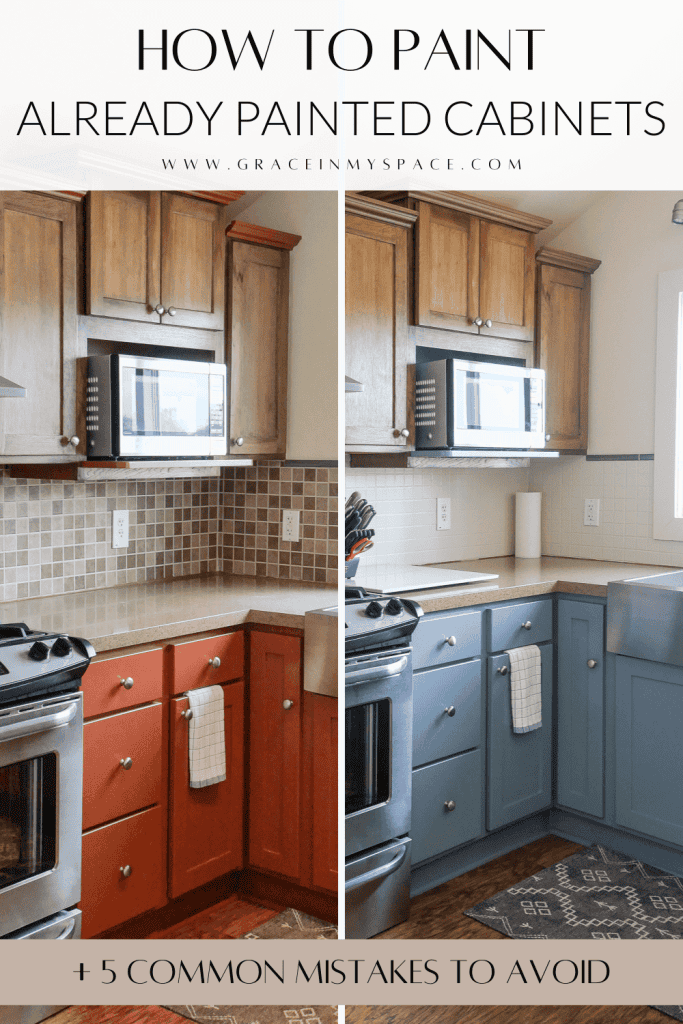
Image Source: graceinmyspace.com
Why Repaint Existing Kitchen Cabinets?
Refinishing cabinets that are already painted is a smart move for several reasons. It’s significantly more affordable than buying new cabinets. It’s also an environmentally friendly option, as you’re giving existing materials a new life rather than discarding them. Plus, it’s a rewarding DIY project that can dramatically transform the heart of your home. Painting laminate cabinets, in particular, can be a great way to update a look that has become dated.
Getting Started: Essential Supplies for Cabinet Painting
Before you dive in, gather all your necessary supplies. Having everything ready will make the process smoother.
What You’ll Need:
- Screwdriver: To remove cabinet doors and hardware.
- Drop cloths or old sheets: To protect your floors and countertops.
- Painter’s tape: For masking off areas you don’t want to paint.
- Degreaser/All-purpose cleaner: For thorough cabinet cleaning before painting.
- TSP (Trisodium Phosphate) or a TSP substitute: For deeper cleaning and preparing the surface.
- Sanding sponges or fine-grit sandpaper (120-220 grit): For light sanding and scuffing the surface.
- Tack cloths: To remove dust after sanding.
- Primer: High-quality cabinet primer is crucial for adhesion and a smooth finish.
- Paint: Cabinet-grade enamel paint (alkyd or acrylic latex) is recommended for durability.
- Paint brushes: High-quality angled brushes for cutting in and detail work.
- Paint rollers: Small foam or microfiber rollers for smooth application on flat surfaces.
- Paint trays: For your primer and paint.
- Rags and paper towels: For wiping up spills and excess paint.
- Optional: Small putty knife, wood filler (if repairing minor damage).
Step 1: Cabinet Cleaning Before Painting – The Crucial First Step
This is arguably the most important step in the entire cabinet painting process. Proper cabinet cleaning before painting ensures that your new paint will adhere properly and last for years. Any grease, grime, or residue left on the cabinets will prevent the primer and paint from sticking.
Thorough Cleaning Process:
- Remove Doors and Hardware: Use your screwdriver to carefully remove all cabinet doors and drawers. Lay them out on a protected surface. Don’t forget to remove all hinges and handles. Keep the hardware in a safe place, perhaps in a labeled bag.
- Initial Wipe-Down: Start with an all-purpose cleaner or a degreaser. Mix it with warm water and use a clean cloth or sponge to wipe down every surface of the cabinets and doors. Pay close attention to areas around the handles and corners where grease tends to accumulate.
- Deeper Cleaning with TSP (or Substitute): For a more thorough clean that also slightly etches the surface for better adhesion, use TSP or a TSP substitute. Mix according to the product’s instructions. Wear gloves and eye protection. Wipe down all surfaces again, ensuring you get into all the nooks and crannies.
- Rinse Thoroughly: This is vital. After using TSP, you must rinse the cabinets thoroughly with clean water and a clean cloth. Any residue left from the cleaner will interfere with paint adhesion. You may need to rinse several times.
- Dry Completely: Allow the cabinets to air dry completely. You can speed this up with a clean, dry cloth or a fan. Ensure no moisture remains before moving to the next step.
Step 2: Preparing the Surface for a Flawless Finish
Once your cabinets are clean and dry, it’s time to prepare the surface for primer and paint. This stage involves minor repairs and sanding.
Surface Preparation Techniques:
- Inspect for Imperfections: Look for any dents, scratches, or gouges.
- Minor Dents/Scratches: You can often fill these with a small amount of wood filler. Apply it with a putty knife, pressing it firmly into the imperfection. Let it dry according to the product instructions.
- Larger Damage: For deeper gouges or holes, you might need a wood filler designed for larger repairs.
- Sanding for Adhesion: The goal here isn’t to remove the existing paint but to create a smooth, slightly dulled surface for the primer to grip onto.
- Use a sanding sponge or fine-grit sandpaper (around 120-220 grit).
- Lightly sand all the surfaces you plan to paint. You’re aiming to scuff the surface, not sand down to the bare wood.
- If you have glossy paint, you need to sand it until it’s no longer shiny.
- For doors and drawer fronts, sanding by hand or using a sanding block will give you the most control.
- Dust Removal: After sanding, there will be a fine layer of dust. This is where tack cloths come in handy.
- Wipe down all surfaces with a tack cloth. These sticky cloths are designed to pick up even the finest dust particles.
- Go over everything thoroughly to ensure a completely dust-free surface. This step is critical for preventing a gritty paint finish.
- Repair Sanding: If you used wood filler, let it dry completely. Then, lightly sand the filled areas until they are smooth and flush with the surrounding surface. Again, use fine-grit sandpaper.
- Final Dust Removal: After sanding any repaired areas, use your tack cloth one last time.
Step 3: Priming for Durability and Coverage
Priming is a non-negotiable step when refinishing cabinets. A good cabinet primer will:
- Promote Adhesion: It creates a surface that paint can easily bond to.
- Block Stains: It prevents any underlying colors or tannins from bleeding through your new paint.
- Provide an Even Base: It ensures a uniform color and finish, especially important if you’re going from a dark color to a light one.
- Smooth Out Imperfections: It can help fill minor scratches and create a smoother surface.
Choosing the Right Cabinet Primer:
- Oil-based primers: Offer excellent adhesion and stain blocking but can have strong fumes and require mineral spirits for cleanup. They are great for wood cabinets and cabinets with potential stain bleed-through.
- Water-based (latex or acrylic) primers: Easier to use, with low VOCs and easy soap-and-water cleanup. Many high-quality water-based primers are formulated for cabinetry and offer good adhesion and durability. Look for primers specifically labeled for use on cabinets or furniture.
- Shellac-based primers: Excellent stain blockers, especially for knots or dark stains. They dry very quickly.
Application of Cabinet Primer:
- Apply Thin, Even Coats: Don’t try to get full coverage in one thick coat. Apply the primer in thin, even layers.
- Use Brushes and Rollers: Use your angled brush for edges and detailed areas. Use a small foam roller for the flat surfaces of cabinet doors and drawer fronts.
- Work in Sections: For cabinet doors, work on one side at a time. Paint the edges first, then the flat surfaces.
- Allow Proper Drying Time: Let the primer dry completely according to the manufacturer’s instructions before applying a second coat or the topcoat. This is usually a few hours, but check the can.
- Light Sanding Between Coats (Optional but Recommended): Once the primer is dry, lightly sand it with very fine-grit sandpaper (220-320 grit) and wipe down with a tack cloth. This creates an even smoother surface for your paint and helps the paint adhere even better.
Step 4: Painting Your Kitchen Cabinets – Achieving a Professional Look
Now for the exciting part – applying the paint! The key to a professional finish is patience and thin, even coats.
Selecting the Right Paint for Kitchen Cabinets:
- Enamel Paints: These are formulated for durability and a hard finish.
- Water-based (Acrylic Latex Enamels): Modern acrylic enamels are excellent choices. They offer good durability, flexibility, and easy cleanup. Look for “cabinet enamel” or “high-performance enamel” formulations.
- Oil-based (Alkyd Enamels): Traditionally, oil-based paints were preferred for their hardness and smooth finish. However, they have strong fumes, longer drying times, and require mineral spirits for cleanup. They can also yellow over time, especially in areas without much light.
- Sheen:
- Satin or Semi-Gloss: These sheens are most commonly recommended for kitchen cabinets. They are more durable, easier to clean, and resist moisture better than matte finishes. Semi-gloss is more durable but can highlight imperfections more than satin.
- Matte or Flat: Generally not recommended for kitchen cabinets due to lower durability and difficulty in cleaning.
Cabinet Painting Techniques:
- Apply Thin, Even Coats: Just like with the primer, resist the urge to apply thick coats of paint. Thin coats dry faster, are less prone to drips, and build up to a smoother, more durable finish.
- Use the Right Tools:
- Brushes: Use a high-quality angled synthetic brush for cutting in edges and detailed areas.
- Rollers: A short-nap foam roller or a microfiber roller is best for smooth surfaces. Avoid fuzzy rollers.
- Painting Technique for Doors and Drawer Fronts:
- Lay cabinet doors flat on a protected surface (e.g., sawhorses with painter’s pyramids).
- Paint the edges first, then the flat surfaces.
- For flat surfaces, load your roller evenly and roll in one direction. Overlap your strokes slightly to avoid lines.
- Try to maintain a “wet edge” to prevent lap marks. This means painting into the unpainted section of the surface.
- Avoid over-rolling.
- Painting the Cabinet Boxes (Frames):
- Use painter’s tape to protect any areas you don’t want to paint (e.g., countertops, adjacent walls).
- Use your angled brush to “cut in” the edges and corners.
- Use your small roller for the main surfaces of the cabinet boxes.
- Work in sections and try to maintain a consistent technique.
- Drying Between Coats: This is critical for a durable finish. Allow each coat of paint to dry thoroughly according to the manufacturer’s instructions. This can range from 4 to 24 hours depending on the paint type and humidity. Rushing this step can lead to peeling or a soft finish.
- Light Sanding Between Coats (Highly Recommended): After the first coat of paint is dry, lightly sand all surfaces with 220-320 grit sandpaper or a sanding sponge. This smooths out any imperfections, dust nibs, or brush strokes. Wipe down thoroughly with a tack cloth after sanding. Repeat this process between subsequent coats.
- Apply Multiple Coats: Most cabinet painting projects require at least two coats of paint, and often three, to achieve full coverage and durability.
Step 5: The Final Touches – Reassembly and Enjoyment
Once the last coat of paint is dry and you’ve done your final light sanding and cleaning, it’s time to put everything back together.
Reassembly Tips:
- Allow Sufficient Cure Time: While paint might feel dry to the touch within a few hours, it takes much longer for paint to fully cure (harden). Check the paint can for specific cure times, which can be anywhere from 7 to 30 days. Avoid heavy use or cleaning of your cabinets during this period to prevent damage.
- Reattach Hardware: Carefully reattach your cabinet hinges, knobs, and pulls. If you’re updating the hardware, now is the time to install the new pieces.
- Hang Cabinet Doors and Drawers: Rehang your doors and reinsert your drawers. Ensure they are aligned correctly and open and close smoothly. You may need to adjust hinges for perfect alignment.
- Clean Up: Remove all painter’s tape and drop cloths. Clean your brushes and rollers immediately if using water-based paint. For oil-based paints, use mineral spirits.
Special Considerations for Different Cabinet Materials
While the general principles apply to most kitchen cabinets, some materials require specific attention.
Painting Laminate Cabinets:
Painting laminate cabinets can be tricky because laminate has a very smooth, non-porous surface that paint doesn’t easily adhere to.
Key Steps for Painting Laminate Cabinets:
- Preparation is Paramount: Thorough cleaning and degreasing are even more critical for laminate.
- Scuff Sanding: You need to scuff the surface more aggressively to create “tooth” for the primer to grip. Use a coarser grit sandpaper (like 100-120 grit) initially, then move to finer grits (180-220 grit).
- Specialized Primer: Use a high-adhesion primer specifically designed for laminate or slick surfaces. Often, a bonding primer or a shellac-based primer is recommended.
- Paint Type: High-quality acrylic enamel paint is usually best for laminate.
- Patience: Allow ample drying and curing time between coats.
Painting Thermofoil Cabinets:
Thermofoil cabinets have a vinyl film bonded to particleboard. This film can be prone to peeling or bubbling if not prepared correctly.
What to Know About Painting Thermofoil:
- Potential for Delamination: Heat and moisture can cause the thermofoil to peel. If you notice any peeling, you must address it by carefully removing loose pieces and sanding the edge to create a smooth transition.
- Adhesion Issues: Similar to laminate, thermofoil is very smooth.
- Recommended Approach: Thorough cleaning, scuff sanding, and a high-adhesion primer are essential. Some sources suggest that painting thermofoil can be less durable than other materials, and the vinyl can sometimes show through or react with certain paints. Test in an inconspicuous area first.
Painting Wood Cabinets:
These are generally the most straightforward to paint, but there are still nuances.
Wood Cabinet Painting Nuances:
- Grain Filling: If you want a super smooth finish on wood cabinets with a prominent grain, you might consider a grain filler after your initial sanding.
- Tannin Blocking: If you have wood species like oak or cherry, they can have tannins that bleed through paint. A good quality stain-blocking primer (oil-based or shellac-based) is a must.
Common Cabinet Painting Challenges and Solutions
Even with the best intentions, you might encounter a few snags. Here’s how to tackle them.
Table: Common Cabinet Painting Problems & Fixes
| Problem | Cause | Solution |
|---|---|---|
| Paint Not Sticking | Poor cleaning; inadequate prep sanding. | Thoroughly clean and degrease. Sand the surface to create “tooth.” Use a high-adhesion primer. |
| Drips and Runs | Paint applied too thickly; excess paint on brush/roller. | Apply paint in thin, even coats. Avoid overloading your brush or roller. Work systematically, maintaining a wet edge. |
| Brush Strokes Visible | Using the wrong brush; paint drying too quickly; too much pressure. | Use a high-quality synthetic brush. Work with thin coats. Avoid over-brushing. Consider using a paint extender to slow drying time. |
| Roller Marks/Texture | Using a fuzzy roller; uneven roller pressure; paint applied too thick. | Use a fine-foam or microfiber roller. Ensure the roller is evenly loaded. Apply consistent, light pressure. Thin coats are key. |
| Peeling Paint | Poor adhesion; painting over dirt/grease; inadequate curing. | Ensure proper cleaning and priming. Allow adequate drying and curing time between coats. |
| Uneven Color/Coverage | Not enough coats; inconsistent application. | Apply multiple thin coats. Ensure each coat is dry before applying the next. Maintain consistent application technique. |
| Hardware Not Aligning | Paint buildup on screw holes; incorrect reassembly. | Clean screw holes before reattaching hardware. Ensure doors are hung level before final tightening of hinges. |
Can I Use Chalk Paint on Kitchen Cabinets?
Yes, you can use chalk paint on kitchen cabinets! Chalk paint is popular for its matte finish and minimal prep work, as it often doesn’t require sanding or priming.
Pros of Using Chalk Paint:
- Minimal Prep: Less sanding and priming required, saving time.
- Matte Finish: Creates a soft, velvety look.
- Easy to Distress: If you like a shabby chic or vintage look, chalk paint distresses beautifully.
Cons of Using Chalk Paint:
- Durability Concerns: The matte finish is more prone to scuffs and water damage without a proper topcoat.
- Requires a Topcoat: You absolutely must seal chalk paint with a wax or polycrylic topcoat for kitchen cabinets to protect them from moisture and wear. This adds an extra step and cost.
- Not Always Ideal for High-Traffic Areas: While a good topcoat helps, the underlying finish might still be less durable than a traditional enamel.
Tips for Using Chalk Paint on Kitchen Cabinets:
- Clean Thoroughly: Even with minimal prep, clean cabinets are essential.
- Apply Thin Coats: Apply thin, even coats of chalk paint.
- Use a Wax or Polycrylic Topcoat: This is the most critical step. Apply at least two coats of a durable clear wax or a water-based polycrylic in a satin or semi-gloss finish for protection.
- Reapply Topcoat as Needed: The topcoat is what protects your cabinets, so be prepared to reapply it periodically, especially in high-wear areas.
When to Consider Professional Refinishing
While DIY cabinet painting is achievable, there are times when hiring a professional is a better choice.
Signs You Might Need a Professional:
- Extensive Damage: If your cabinets have significant water damage, peeling veneer, or structural issues.
- Complex Finishes: If you desire a sprayed-on factory finish or intricate decorative painting.
- Lack of Time or Patience: Professional painters have the experience and equipment to complete the job efficiently and to a high standard.
- Valuable or Antique Cabinets: If your cabinets are antique or made of a very valuable wood, you might want to entrust their refinishing to experts to avoid costly mistakes.
Frequently Asked Questions (FAQ)
Q1: How long does it take to paint kitchen cabinets?
A1: The entire process, from cleaning to reassembly, can take anywhere from a long weekend to a week or more, depending on the number of cabinets, drying times, and your pace. Allow at least 2-3 days for thorough preparation and multiple thin coats of primer and paint, including drying time between each.
Q2: What is the best paint finish for kitchen cabinets?
A2: Satin or semi-gloss finishes are generally recommended for kitchen cabinets. They offer a good balance of durability, washability, and a pleasant aesthetic, resisting moisture and grease better than matte finishes.
Q3: Do I need to sand before priming and painting cabinets?
A3: Yes, even if the cabinets are already painted, you need to lightly sand the surface. This process, often called “scuff sanding,” dulls the existing finish and creates a surface for the primer and new paint to adhere to properly.
Q4: How many coats of paint do I need?
A4: Most cabinet painting projects require at least two coats of primer and two to three coats of paint for full, even coverage and durability. Always apply thin coats and allow adequate drying time between each.
Q5: Can I paint my cabinets without removing the doors?
A5: While technically possible, it’s not recommended for a professional finish. Removing doors and drawers allows for much easier and more thorough application of primer and paint, ensuring all surfaces, edges, and sides are covered evenly. It also makes it easier to avoid drips and obtain a smooth finish.
Q6: What is the best way to clean kitchen cabinets before painting?
A6: The best way to clean kitchen cabinets before painting is to use a good degreaser or an all-purpose cleaner mixed with warm water. For a deeper clean that also helps prep the surface, use TSP (Trisodium Phosphate) or a TSP substitute, followed by a thorough rinse and complete drying.
Q7: Can I paint over existing oil-based paint with water-based paint?
A7: Yes, you can, but it’s crucial to prepare the surface correctly. Clean, lightly sand the oil-based paint to create a dull surface, and then apply a high-quality bonding primer specifically designed to adhere to oil-based surfaces. Then, you can proceed with your water-based paint.
Q8: What are some good cabinet primer options?
A8: Excellent cabinet primer options include oil-based primers (like Zinsser B-I-N or Kilz Original) for superior stain blocking and adhesion, shellac-based primers (like Zinsser SealCoat) for fast drying and excellent stain blocking, and high-quality water-based primers specifically formulated for cabinetry or difficult surfaces.
By following these detailed steps and cabinet refinishing techniques, you can confidently tackle the project of painting kitchen cabinets that are already painted, achieving a beautiful, refreshed look for your kitchen. Happy painting!