
Yes, you can absolutely add texture to your kitchen! Texture is the secret ingredient that transforms a flat, uninspired space into a warm, inviting, and visually dynamic hub. It’s about creating interest through touch and sight, making your kitchen a place you want to spend time in. You can incorporate texture through a variety of DIY projects and smart styling choices. This guide will walk you through how to add texture in your kitchen to create a truly captivating environment.
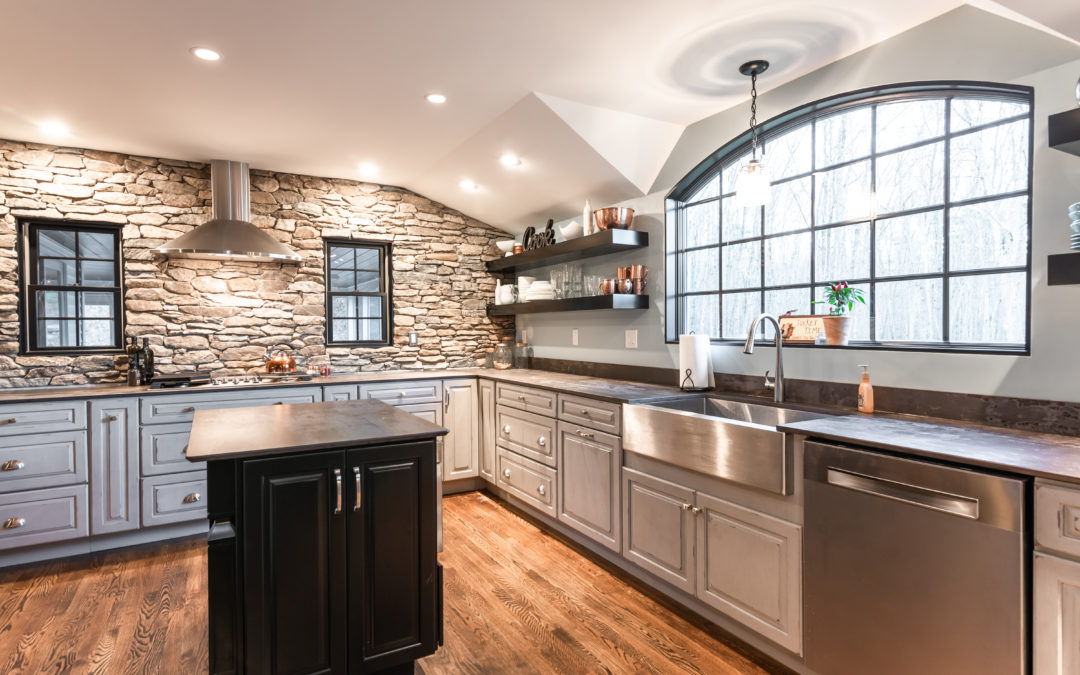
Image Source: fairviewkitchens.com
Why Texture Matters in Kitchen Design
A kitchen without texture can feel sterile, lacking personality. Texture brings life and character to a space. It’s what makes us want to reach out and touch surfaces, creating a more engaging and comfortable experience. Think about it: a sleek, glossy countertop might look modern, but adding a chunky wooden chopping board or a woven placemat instantly adds warmth and a sense of history.
Adding texture to your kitchen is crucial for several reasons:
- Visual Appeal: Texture adds visual depth, preventing the kitchen from looking like a flat, two-dimensional image. It creates layers of interest that the eye can move across.
- Tactile Experience: It introduces tactile surfaces that invite interaction. This is especially important in a kitchen where we are constantly touching and using various items.
- Warmth and Comfort: Certain textures, like wood and natural fibers, bring a sense of coziness and warmth, making the kitchen feel more inviting and comfortable.
- Aesthetic Interest: Texture can break up monotony and introduce dimensional details, making the space feel more curated and intentional.
- Hiding Imperfections: Some textured surfaces, like certain tiles or painted finishes, can be more forgiving and help camouflage minor wear and tear.
Bringing in the Tactile: Materials and Finishes
The foundation of adding texture lies in the materials and finishes you choose. Mixing and matching different textures is key to creating a rich and inviting atmosphere.
Cabinetry and Surfaces
Your kitchen cabinets are the largest surface area and a prime opportunity to introduce texture.
Wood Finishes
- Natural Wood Grain: Opt for cabinets with visible wood grain. Whether it’s a light oak with a subtle grain or a darker walnut with prominent patterns, the natural texture of wood is timeless.
- DIY Tip: If your current cabinets are a laminate or painted finish, consider refacing them with wood veneers or even solid wood. You can also achieve a similar effect with textured laminate sheets that mimic wood grain.
- Distressed or Reclaimed Wood: These finishes offer a handcrafted feel and a story. The imperfections and variations in distressed wood add significant character.
- DIY Tip: You can distress existing painted cabinets yourself using sandpaper or a wire brush after painting. Applying a glaze can also enhance the aged look.
- Open Shelving: Replacing some upper cabinets with open shelving made from wood or metal allows you to display textured items like pottery, cookbooks, and decorative bowls, further layering your kitchen’s textures.
Painted and Finished Surfaces
- Matte Finishes: Matte paints on cabinets or walls absorb light rather than reflecting it, giving a softer, more textured appearance compared to high-gloss finishes.
- Textured Paints and Finishes: Explore paints with special effects, like limewash or chalk paint. These create subtle rough surfaces and a beautifully muted aesthetic.
- DIY Tip: Limewash paint is relatively easy to apply and creates a naturally variegated, matte finish. It’s a fantastic way to add a unique, ancient-feeling texture.
- Appliance Finishes: Consider appliances with textured finishes. Stainless steel can have brushed or hammered textures. Some manufacturers offer matte or colored finishes that add a different visual and tactile quality.
Countertops
Countertops are another major surface where texture can make a big impact.
- Natural Stone: Granite, marble, and quartzites naturally possess unique veining and patterns that create inherent texture. Some stones can also be finished with a leathered or honed surface for a less reflective, more tactile feel.
- Honed vs. Polished: A honed finish is matte, while a polished finish is glossy. For more texture, opt for honed or even leathered finishes.
- Butcher Block: Wood countertops, especially butcher block, offer a warm and inviting texture. The grain and the potential for knife marks (which add character) make them a favorite for adding a handcrafted feel.
- DIY Tip: Installing butcher block countertops is a feasible DIY project. Regular oiling and maintenance will keep them looking beautiful and enhance their texture.
- Concrete: Concrete countertops can be cast with varying degrees of smoothness or even seeded with materials for added visual texture. They offer an industrial yet artisanal vibe.
- DIY Tip: Pouring your own concrete countertops is an ambitious but rewarding DIY. You can incorporate pigments and aggregates to customize their look and texture.
- Tile Backsplashes: Backsplashes are perfect for introducing intricate textures. Consider mosaic tiles, natural stone tiles, or tiles with varied finishes like crackle glaze or 3D patterns.
Backsplashes
The backsplash is a canvas for creativity and texture.
- Subway Tile with Textured Grout: Classic subway tiles can be elevated by using a contrasting or textured grout. A thicker grout line or a grout color that stands out from the tile can add visual texture.
- Mosaic Tiles: Tiny tiles in various materials (glass, stone, metal) create intricate patterns and a rich tactile surface.
- Natural Stone Slabs: Large slabs of marble or quartzite with dramatic veining offer a sophisticated textured statement.
- Metal Backsplashes: Stainless steel, copper, or tin backsplashes can add a sleek or a rustic metallic texture. Consider hammered or embossed metal for extra visual interest.
- Decorative Patterns: Many tiles come with decorative patterns in their surface, from geometric reliefs to floral motifs, all contributing to a textured look.
Layering Materials for Depth
The art of adding texture is often about layering layered materials to create a rich visual and tactile experience.
Flooring
Your kitchen floor can be a significant source of texture.
- Natural Stone Tiles: Travertine, slate, and natural stone tiles offer inherent texture and character. The variations in color and pattern add visual interest.
- Wood or Wood-Look Flooring: Hardwood floors, engineered wood, or high-quality LVT (Luxury Vinyl Tile) that mimics wood grain bring warmth and a natural texture.
- Ceramic or Porcelain Tiles with Texture: Many ceramic and porcelain tiles are designed to mimic natural materials like stone, wood, or even concrete, often with a textured surface for better grip and visual appeal.
- Patterned Tiles: Introduce decorative patterns with encaustic tiles or mosaic floor tiles. These can create a strong visual focal point and add intricate texture.
Walls
Don’t forget your walls!
- Textured Paint: As mentioned earlier, limewash, Venetian plaster, or even textured wallpaper can add a subtle or dramatic textural element to your walls.
- Shiplap or Beadboard: These wall treatments offer a classic, architectural texture that adds character and dimension. They are particularly effective in farmhouse or coastal-style kitchens.
- DIY Tip: Shiplap or beadboard paneling can be a great DIY project. It involves measuring, cutting, and fastening panels to the wall, then painting or staining.
- Exposed Brick or Stone: If you have exposed brick or stone walls, embrace them! They offer unparalleled natural texture and a rustic charm.
- DIY Tip: If you don’t have existing brick, consider faux brick veneer panels or brick-look wallpaper for a similar effect.
- Wainscoting: Adding wainscoting can introduce a decorative texture and visual break on your walls.
Introducing Natural Elements
Natural elements are a cornerstone of adding warmth and organic texture to any space, especially the kitchen.
Wood Accents
Beyond cabinets and countertops, think about smaller wood elements.
- Wooden Cutting Boards and Trays: These are functional art pieces. Display a variety of wood types and sizes for an immediate textural upgrade.
- Wooden Utensils and Bowls: Store wooden utensils in a crock or hang them. Wooden salad bowls or serving bowls add a rustic touch.
- Wooden Stools or Chairs: If you have an island or breakfast bar, wooden stools bring a significant textural element. Look for those with interesting shapes or finishes.
- Wooden Fruit Bowls or Baskets: These are simple yet effective ways to introduce wood texture and color.
Plants and Greenery
Plants bring life, color, and a soft, organic texture.
- Potted Herbs: Functional and beautiful, herbs on windowsills or countertops add a fresh, vibrant texture.
- Hanging Plants: Macrame hangers with trailing plants add a bohemian, textured vibe.
- Larger Potted Plants: A substantial potted plant in a corner can be a focal point and soften the hard lines often found in kitchens.
Stone and Ceramic
Think beyond countertops.
- Ceramic Vases and Pots: Handmade pottery or ceramic vases with matte or artisanal glazes add a handcrafted feel.
- Stone Coasters or Trivets: These are practical items that can contribute to the overall textural landscape.
- Terracotta Pots: For a Mediterranean or earthy feel, terracotta pots are perfect for herbs or small decorative plants.
Texture in Textiles and Decor
Soft furnishings and decorative items are your playground for adding playful and cozy textures.
Window Treatments
- Linen or Cotton Blinds/Shades: These natural fabrics offer a softer texture than vinyl or aluminum blinds.
- Textured Curtains: Opt for curtains in fabrics like burlap, linen blends, or even subtly patterned weaves.
Soft Furnishings
- Rug or Runner: A woven rug under a table or a runner in front of the sink adds immediate warmth and texture underfoot. Look for natural fibers like jute, sisal, or wool.
- Upholstered Seating: If you have a breakfast nook or dining area, consider chairs with textured upholstery – perhaps a linen, a tweed, or even a subtle geometric pattern.
- Dish Towels and Oven Mitts: Even these everyday items can contribute. Opt for textured weaves, embroidered details, or natural fibers like cotton or linen.
Decorative Accessories
- Woven Baskets: Perfect for storing produce, linens, or even trash bags. Baskets in rattan, wicker, or seagrass add a natural, tactile element.
- Ceramics and Pottery: Display a collection of handcrafted feel ceramic pieces, from mugs to decorative bowls. Look for varied finishes – matte, glazed, or even rough unglazed pieces.
- Metal Accents: Copper, brass, or wrought iron accessories like trays, candle holders, or decorative bowls add a different kind of metallic texture.
- Glassware: Textured glassware, like fluted or hobnail designs, can catch the light and add subtle visual texture.
DIY Texture Projects for Your Kitchen
Ready to get hands-on? Here are some DIY projects to inject texture into your kitchen:
1. Faux Limewash on Cabinets or Walls
- Materials: Limewash paint or chalk paint, large brush, fine-grit sandpaper (optional), wax or sealant (optional).
- Process:
- Clean cabinets or walls thoroughly.
- Apply the limewash paint using long, sweeping strokes in varying directions to create an irregular, matte finish.
- For a more textured look, you can lightly sand some areas once dry.
- Seal if desired, though many limewash finishes are left unsealed for a more natural look. This creates lovely rough surfaces.
2. Textured Stenciling on a Backsplash or Floor
- Materials: Stencil with a desired pattern (geometric, floral, etc.), textured paint or grout additive, painter’s tape, sponge or stencil brush, sealant (for floors).
- Process:
- Apply painter’s tape to secure the stencil firmly to the surface.
- If stenciling on a backsplash, use a thick, textured paint. For a floor, you can use specialized floor paint or even a textured grout additive mixed with paint.
- Dab the paint onto the stencil, ensuring even coverage without bleeding.
- Carefully remove the stencil while the paint is still slightly wet.
- Repeat the process, allowing ample drying time between sections.
- Seal the area, especially if it’s a floor or high-traffic backsplash. This is a great way to add decorative patterns.
3. DIY Wood Plank Backsplash or Accent Wall
- Materials: Thin wood planks (pine, cedar, or reclaimed wood), wood stain or paint, nails or strong adhesive, saw, sandpaper.
- Process:
- Cut wood planks to the desired size.
- Sand the planks smooth or leave them with a slightly rough texture.
- Stain or paint the planks in your chosen color.
- Apply adhesive or nails to the back of each plank.
- Press planks firmly onto the wall, staggering them for a more natural look. This brings in natural elements and adds dimensional details.
4. Updating Hardware with Textured Finishes
- Materials: Cabinet knobs and pulls, metallic spray paint (hammered finish, antique brass, etc.), sandpaper, degreaser.
- Process:
- Remove existing hardware.
- Clean thoroughly with a degreaser.
- Lightly sand the hardware to create a surface for the paint to adhere to.
- Apply several thin coats of textured metallic spray paint. Look for finishes like “hammered metal” or “aged iron” to add interesting textures.
- Allow to dry completely before reattaching.
Creating Contrast with Texture
The most effective way to highlight texture is by creating contrast. Juxtapose different textures to make them stand out.
- Smooth Accents against Rough Surfaces: Pair a smooth marble countertop with a rustic, visibly grained wooden island base.
- Glossy Finish against Matte Finish: A glossy tiled backsplash can be beautifully complemented by matte cabinetry.
- Natural Elements alongside Man-made Materials: Combine the organic texture of plants and wood with the clean lines of stainless steel appliances.
- Fine Detail against Bold Texture: Delicate patterned wallpaper can be paired with simple, smooth cabinetry for a balanced look.
Texture in Different Kitchen Styles
The way you apply texture can also reflect your chosen kitchen style:
- Modern: Think sleek, smooth surfaces with pops of texture from natural wood accents, subtle concrete finishes, or minimalist metal details. Smooth accents can define the modern aesthetic.
- Farmhouse/Rustic: Embrace rough surfaces, reclaimed wood, natural fibers like cotton and linen, and ceramic pottery. A strong handcrafted feel is key.
- Industrial: Exposed brick, raw wood, concrete, and matte black metals are your go-to for texture.
- Bohemian: Layer various natural textures – woven baskets, macrame, plants, and a mix of wood grains and varied finishes.
Frequently Asked Questions (FAQ)
Q1: How can I add texture to a small kitchen?
In a small kitchen, focus on high-impact areas and avoid overwhelming the space. Consider a textured backsplash, a wooden chopping block on the counter, a woven placemat, or a small potted herb. Matte finishes on cabinets can also make the space feel cozier without adding visual clutter. Using dimensional details sparingly is effective.
Q2: What are some easy DIY ways to add texture to my kitchen?
Easy DIY options include updating cabinet hardware to textured finishes, swapping out plain dish towels for ones with interesting weaves, displaying decorative wooden items like bowls and cutting boards, or painting a wall with a limewash or chalk paint. Adding layered materials through simple decor is also a great start.
Q3: Can I mix too many textures in my kitchen?
Yes, it’s possible to overdo it. The key is balance and contrast. Aim for a few dominant textures and then add smaller, complementary textures. Too many competing textures can make a space feel busy and chaotic rather than inviting. Focus on creating a cohesive look with a variety of tactile and visual elements.
Q4: How important are natural elements for adding texture?
Natural elements like wood, stone, and plants are incredibly important for adding warmth and organic texture. They bring a sense of life and authenticity to a space, softening harder surfaces and creating a more inviting atmosphere. They are often the easiest way to introduce tactile surfaces.
Q5: What is the difference between adding visual texture and tactile texture?
Visual texture refers to how something looks like it would feel – for example, a picture of rough wood. Tactile texture is the actual physical feel of a surface. In kitchen design, you want to incorporate both. A subway tile backsplash might look visually textured due to its grout lines, but the tile itself might be smooth to the touch. A wooden countertop offers both visual and tactile texture. The goal is to create a rich sensory experience through layered materials.
Adding texture to your kitchen is a rewarding journey that enhances both its beauty and functionality. By carefully selecting materials, employing DIY techniques, and layering different elements, you can create a space that is not only visually stunning but also deeply inviting and comfortable. Embrace the opportunity to add dimensional details, varied finishes, and decorative patterns to make your kitchen a true reflection of your style.