
Can you salvage old kitchen cabinets? Yes, you absolutely can! Revitalizing your existing kitchen cabinets is a fantastic way to save money and create a fresh look for your cooking space. Instead of spending a fortune on brand-new units, you can refurbish kitchen cabinets with a little effort and creativity. This guide will walk you through budget-friendly tips to restore old cabinets and transform your kitchen. We’ll cover everything from simple cleaning to more involved kitchen cabinet repair and DIY cabinet renovation.
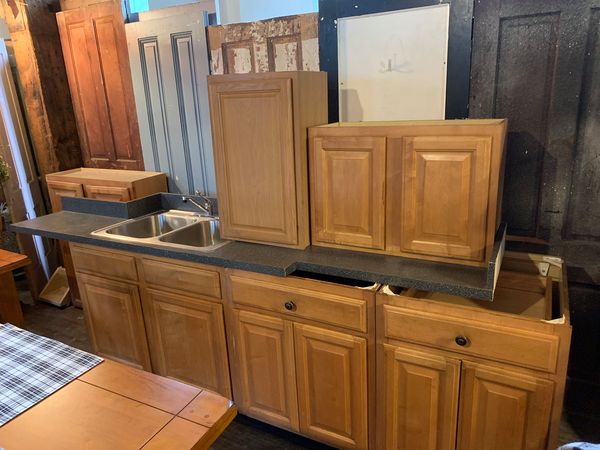
Image Source: historichousesalvage.com
Why Salvage Kitchen Cabinets?
Opting to upcycle kitchen cupboards offers numerous advantages. Firstly, it’s incredibly cost-effective. Buying new cabinets can be a significant expense, often running into thousands of dollars. By salvaging and restoring your current ones, you drastically reduce the budget required for a kitchen update.
Secondly, it’s an environmentally friendly choice. Extending the life of your cabinets means less waste in landfills. It’s a form of kitchen cabinet repurposing that benefits the planet.
Thirdly, it allows for a personalized touch. You can tailor the look of your cabinets to your exact taste, something that’s often more challenging with mass-produced new cabinets. This kitchen cabinet makeover will be uniquely yours.
Finally, it can be a rewarding DIY project, boosting your confidence and teaching you new skills. Mastering cabinet restoration techniques can be a great learning experience.
Assessing Your Cabinets: What Can Be Saved?
Before you dive in, take a good look at your existing cabinets. Not all cabinets are created equal, and some might be beyond the scope of a budget-friendly salvage.
Structural Integrity
- Check for Water Damage: Look for warped wood, bubbling veneer, or mold. Significant water damage can compromise the cabinet’s structure and may be too costly or difficult to repair.
- Inspect for Rot: Probe the wood, especially around the base and back, for any signs of soft, crumbly wood indicating rot.
- Test for Stability: Do the cabinets wobble? Are the joints loose? Loose joints are often fixable, but severely compromised structures might not be worth the effort.
- Examine Hinges and Drawer Slides: Are they rusted, bent, or broken? These are usually replaceable, but if the cabinet box itself is damaged around them, it’s a bigger issue.
Cosmetic Condition
- Surface Scratches and Dents: These are generally easy to fix.
- Worn Finishes: Peeling paint or worn varnish is a common issue and a prime candidate for refinishing.
- Outdated Style: This is often the main reason people want to replace cabinets, and it’s usually the easiest aspect to change.
Budget-Friendly Salvage Strategies
Here are practical ways to restore old cabinets without breaking the bank.
1. Deep Cleaning and Degreasing
Sometimes, the biggest transformation comes from simply a thorough cleaning. Kitchen cabinets are notorious for accumulating grease, grime, and food splatters.
What You’ll Need:
- Warm water
- Mild dish soap or a dedicated degreaser (e.g., Simple Green, Krud Kutter)
- Soft cloths or sponges
- Microfiber cloths for drying
- Optional: All-purpose cleaner for stubborn spots
How to Do It:
- Empty Cabinets: Remove everything from the cabinets.
- Wipe Down Surfaces: Start with a damp cloth and mild soap. For greasy areas, use your degreaser according to product instructions. Work in sections.
- Clean Inside: Don’t forget the inside of the cabinets. A quick wipe-down can make a surprising difference.
- Rinse and Dry: Wipe away any cleaning residue with a clean, damp cloth, and then dry thoroughly with a microfiber cloth to prevent water spots and streaks.
This simple step can reveal the true beauty of your cabinets and is the first stage of any successful kitchen cabinet makeover.
2. Hardware Upgrade: The Easiest Transformation
Changing out knobs and pulls is one of the most impactful and budget-friendly ways to upcycle kitchen cupboards. New hardware can instantly modernize the look of your cabinets.
What to Look For:
- Style: Modern, traditional, rustic, farmhouse – choose hardware that complements your desired kitchen aesthetic.
- Finish: Brushed nickel, matte black, brass, chrome, or even colored options can create a new vibe.
- Size and Spacing: Measure the distance between screw holes on existing pulls to ensure your new ones will fit without drilling new holes.
Where to Buy:
- Big Box Stores: Home Depot, Lowe’s often have a wide selection.
- Online Retailers: Amazon, Wayfair, Etsy offer vast choices, often at competitive prices.
- Specialty Hardware Stores: For unique or vintage-inspired pieces.
- Salvage Yards/ReStores: You might find incredible deals on gently used hardware.
Tip: If you’re replacing pulls with knobs, or vice-versa, you might need to fill old holes and drill new ones. A wood filler and a drill are your friends here.
3. Refinishing Kitchen Cabinets: A Fresh Coat
Refinishing kitchen cabinets is a popular method for kitchen cabinet repair and a complete facelift. This can involve painting or staining.
Painting Your Cabinets
Painting is a versatile and accessible way to give your cabinets a dramatic makeover.
What You’ll Need:
- Screwdriver (to remove doors and hardware)
- TSP (Trisodium Phosphate) cleaner or a strong degreaser
- Sanding block or orbital sander
- Medium-grit sandpaper (100-150 grit)
- Fine-grit sandpaper (220 grit)
- Tack cloths
- Primer (oil-based or water-based, depending on your paint and cabinet material)
- High-quality cabinet paint (latex, acrylic, or enamel)
- Paint rollers (foam or mohair)
- Paintbrushes (for edges and details)
- Paint trays
- Painter’s tape
Steps for Painting:
- Preparation is Key:
- Remove cabinet doors, drawers, and hardware.
- Label each door and drawer with its corresponding location (e.g., “Upper Left,” “Drawer 3”). This is crucial for reassembly.
- Clean the cabinets thoroughly with TSP or degreaser to remove all grease and grime. Rinse well and let dry.
- Sanding:
- Lightly sand all surfaces you intend to paint. This creates a “tooth” for the paint to adhere to. For most finishes, a 100-150 grit sandpaper is sufficient for the initial sanding.
- Wipe away all sanding dust with a shop vac or dry cloth, then use a tack cloth for a dust-free surface.
- Priming:
- Apply a thin, even coat of primer. Choose a primer suitable for your cabinet material and paint type. For wood or laminate, a good quality primer is essential. Allow the primer to dry completely according to the manufacturer’s instructions.
- Lightly sand again with fine-grit sandpaper (220 grit) after the primer dries. Wipe away dust with a tack cloth.
- Painting:
- Apply your first coat of paint. Use a high-quality cabinet paint for durability. For a smooth finish, use a foam roller for flat surfaces and a good paintbrush for edges and details.
- Avoid applying paint too thickly, as this can lead to drips and an uneven finish.
- Allow the first coat to dry completely.
- Second Coat (and Beyond):
- Once the first coat is dry, lightly sand any rough spots or imperfections with fine-grit sandpaper. Wipe away dust.
- Apply a second coat of paint. You may need a third coat for full coverage, especially with lighter colors over darker cabinets.
- Drying and Curing: Allow paint to dry thoroughly between coats. Full curing can take several days to a week, during which the paint will harden. Avoid heavy use of the cabinets during this time.
- Reassembly: Once the paint is fully cured, reattach the hardware and hang the doors.
Staining Your Cabinets
If your cabinets are made of good quality wood and you prefer a natural wood look, staining is a great option. This is a core cabinet restoration technique.
What You’ll Need:
- Screwdriver
- TSP cleaner or degreaser
- Sanding block or orbital sander
- Medium-grit sandpaper (100-150 grit)
- Fine-grit sandpaper (180-220 grit)
- Stain (oil-based or water-based)
- Pre-stain wood conditioner (optional, but recommended for even absorption)
- Foam brushes or lint-free cloths for applying stain
- Clean, lint-free cloths for wiping off excess stain
- Polyurethane or other clear topcoat (satin, semi-gloss, or gloss)
- Fine-grit sandpaper (220-320 grit) for between coats of topcoat
- Tack cloths
Steps for Staining:
- Preparation: Similar to painting, remove doors, drawers, and hardware. Label everything.
- Stripping (If Necessary): If your cabinets have a thick, dark finish or paint, you might need to strip them first using a chemical stripper or heavy sanding. This is more involved rebuilding kitchen cabinets territory.
- Sanding: Sand all surfaces thoroughly to remove the old finish. Start with medium-grit sandpaper and progress to finer grits. The smoother the surface, the better the stain will penetrate. Wipe away dust meticulously.
- Pre-Stain Treatment: Apply a pre-stain wood conditioner, especially on woods like pine or maple that tend to absorb stain unevenly. Follow product instructions.
- Applying Stain:
- Apply the stain evenly with a foam brush or lint-free cloth, working in the direction of the wood grain.
- Let the stain penetrate for the time recommended on the can (usually 5-15 minutes).
- Wipe off the excess stain with a clean, lint-free cloth, again following the grain. The longer you leave the stain on before wiping, the darker the color will be.
- Allow the stain to dry completely, usually 24-48 hours.
- Applying Topcoat:
- Once the stain is dry, apply a thin, even coat of polyurethane or your chosen topcoat using a brush or roller.
- Allow the first coat to dry thoroughly. Lightly sand with fine-grit sandpaper (220-320 grit) and wipe with a tack cloth.
- Apply subsequent coats (usually 2-3 total), sanding and wiping between each. The topcoat protects the stain and provides durability.
4. Cabinet Repair: Fixing the Flaws
Minor kitchen cabinet repair can make a big difference.
- Loose Joints: Use wood glue and clamps to re-secure loose joints. You might need to add small nails or screws for extra strength, especially in areas that bear weight.
- Dents and Scratches: For small dents, sometimes steaming the wood can make it swell back into place. For scratches, wood filler or a wax crayon in a matching color can work wonders. Follow up with sanding and refinishing.
- Warped Doors: Sometimes, warping can be gently corrected by clamping the door flat with weights for a period, especially after applying a bit of moisture or steam to the back. This is more advanced cabinet restoration techniques.
- Drawer Slides: Clean and lubricate old metal slides with a silicone spray. If they are too far gone, consider replacing them with modern, smoother slides. You can often find replacements that fit existing screw holes.
5. Refacing Cabinets: A Mid-Level Option
If the cabinet boxes are in good shape but the doors and drawer fronts are damaged or very outdated, refacing is a great option. This involves replacing only the visible parts of the cabinet doors and drawer fronts.
How it Works:
- Remove Old Doors/Drawer Fronts: Carefully detach the existing doors and drawer fronts.
- Purchase New Components: Order new doors and drawer fronts from a cabinet shop or online supplier. You can choose from various wood species, laminate, or thermofoil finishes.
- Attach New Components: Install the new doors and drawer fronts onto your existing cabinet boxes. You’ll likely need to re-drill holes for hinges and drawer pulls.
This is a step up from painting but still much cheaper than full cabinet replacement. It’s a form of DIY cabinet renovation that yields a like-new appearance.
6. Creative Cabinet Repurposing
Sometimes, you can repurpose parts of old cabinets for new uses.
- Open Shelving: Remove cabinet doors and paint or refinish the cabinet boxes to create open shelving.
- Cabinet Doors as Wall Art: Painted or decorated cabinet doors can be hung as unique wall decor.
- Drawer Units: Old drawers can be stacked and secured to create small storage units or repurposed as under-bed storage.
Advanced Techniques: When You’re Ready to Rebuild
If your cabinets are in rough shape, you might need to consider more intensive methods, verging on rebuilding kitchen cabinets.
Replacing Veneer
If the laminate or veneer on your cabinet doors is peeling or damaged, you can replace it.
What You’ll Need:
- Cabinet veneer (peel-and-stick or iron-on)
- Utility knife or craft knife
- Contact cement (if not peel-and-stick)
- Sanding block
- Primer and paint or stain and topcoat
How to Do It:
- Remove Old Veneer: Carefully peel or sand away the old veneer.
- Apply New Veneer: Follow the product instructions for applying the new veneer. If using contact cement, apply it to both surfaces, let it get tacky, then carefully press them together.
- Trim and Finish: Trim any excess veneer with a sharp knife and then sand and finish the surface as you would with new wood.
Reinforcing Cabinet Boxes
For cabinets with loose corners or sagging shelves, reinforcement is key.
- Corner Braces: Small L-shaped metal brackets can be screwed into the inside corners of cabinet boxes to add stability.
- Back Panels: If the back panel is flimsy or missing, replace it with a thin piece of plywood or hardboard. This adds significant rigidity.
- Shelf Supports: If shelves are sagging, add additional shelf pins or supports underneath.
Planning Your Kitchen Cabinet Makeover Project
A successful DIY cabinet renovation requires planning.
Budgeting
- Materials: Estimate costs for paint, primer, sandpaper, cleaners, brushes, rollers, hardware, wood glue, etc.
- Tools: Factor in the cost of any new tools you might need.
- Contingency: Always add a 10-15% buffer for unexpected expenses.
Time Commitment
- Cleaning and Prep: This can take a full weekend.
- Sanding and Priming: Another 1-2 days, depending on the number of cabinets.
- Painting/Staining: Allow 2-3 days for multiple coats and drying time between them.
- Hardware Installation: A few hours.
- Total: A thorough cabinet makeover can easily take a week of dedicated work or spread out over several weekends.
Choosing Your Finish
- Paint: Offers a wide color palette and a uniform look. Matte or satin finishes are best for cabinets as they hide imperfections better than high gloss.
- Stain: Highlights natural wood grain. Requires good quality wood.
- Glazes: Can add depth and an antique look over paint or stain.
- Distressing: Creates a vintage, worn appearance.
Tips for a Professional Finish
- Work in a Well-Ventilated Area: Especially when using paints, stains, or strippers.
- Use Quality Tools: Good brushes and rollers make a huge difference in the final appearance.
- Take Your Time: Rushing leads to mistakes. Allow adequate drying time between coats.
- Test Finishes: Before applying to your cabinets, test paint colors or stain shades on a scrap piece of wood or an inconspicuous area.
- Read Product Labels: Always follow the manufacturer’s instructions for primers, paints, stains, and sealers.
Frequently Asked Questions (FAQ)
Q1: How long does it take to refinish kitchen cabinets?
A: It typically takes a weekend for thorough cleaning and prep, and then 2-4 days for sanding, priming, and multiple coats of paint or stain, including drying time. If you’re doing repairs or refacing, it could take longer.
Q2: What is the best paint for kitchen cabinets?
A: High-quality enamel paints, especially those specifically formulated for cabinets or trim, are best. They offer durability, a smooth finish, and resistance to moisture and wear. Latex or acrylic enamels are popular choices.
Q3: Can I paint over old laminate cabinets?
A: Yes, but proper preparation is crucial. You’ll need to thoroughly clean, degrease, lightly sand the laminate to create a good surface for adhesion, and then use a high-quality primer designed for laminate or slick surfaces before applying your paint.
Q4: Do I need to sand if I’m just painting?
A: Yes, light sanding is almost always necessary. It scuffs up the surface, allowing the primer and paint to adhere much better, preventing peeling and ensuring a long-lasting finish.
Q5: What’s the difference between refinishing and refacing cabinets?
A: Refinishing involves cleaning, sanding, and reapplying a new finish (paint or stain) to the existing cabinet surfaces. Refacing means replacing the cabinet doors and drawer fronts with new ones, while keeping the original cabinet boxes.
By following these budget-friendly tips, you can successfully salvage kitchen cabinets, giving your kitchen a beautiful and updated look without a hefty price tag. Enjoy your transformed space!