
Can you pack kitchen appliances yourself for a move? Yes, you absolutely can pack most kitchen appliances yourself with the right preparation and materials. This guide will walk you through the process of safely packing each appliance, from large refrigerators to small blenders, ensuring they arrive at your new home in perfect condition.
Moving house is a significant undertaking, and one of the most daunting aspects is packing all your belongings. Among the most challenging items to pack are kitchen appliances. These bulky, often heavy, and sometimes delicate machines require specific attention to ensure they survive the journey without damage. This comprehensive guide will cover everything you need to know about how to pack kitchen appliances for moving, providing step-by-step instructions and helpful tips for each major appliance.
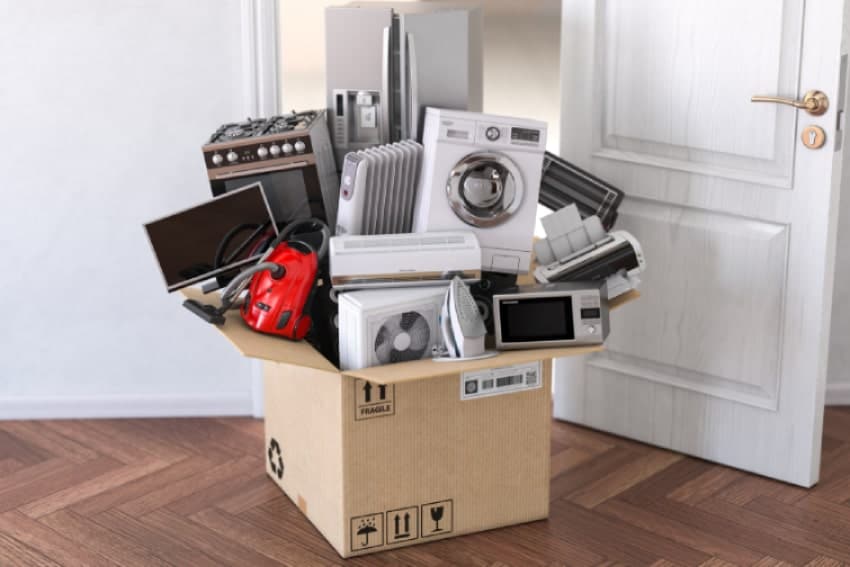
Image Source: wemovetheworld.com
Preparing Your Large Kitchen Appliances for the Move
Large kitchen appliances like refrigerators, ovens, and dishwashers are the heavy lifters of your kitchen. They require the most careful preparation before you can even think about loading them onto a truck.
Refrigerator Moving: A Step-by-Step Approach
Refrigerator moving is a critical task that demands attention to detail. Improper handling can lead to serious damage to the appliance, your floors, or even your health.
1. Defrost and Clean:
* Timeframe: Begin this process at least 24-48 hours before your moving day.
* Action: Unplug your refrigerator. If it has a freezer, empty it completely. Place towels or buckets at the base to catch melting ice.
* Cleaning: Once defrosted, thoroughly clean the interior shelves, drawers, and walls with a mild detergent and water. Dry everything completely to prevent mold or mildew during transit.
2. Secure the Doors and Cords:
* Doors: Use strong packing tape or moving straps to secure the refrigerator and freezer doors shut. Ensure the tape doesn’t damage the finish. You can also use moving blankets or cardboard to protect the surfaces before taping.
* Cords: Coil the power cord neatly and secure it to the back of the appliance with tape or a bungee cord.
3. Protect the Exterior:
* Moving Blankets: Wrap the entire refrigerator in moving blankets. Secure these with tape or plastic wrap. This protects it from scratches and dents during the move.
* Cardboard: For extra protection, especially for the corners and edges, you can add a layer of cardboard before wrapping in blankets.
4. Transporting the Refrigerator:
* Dolly: Always use a heavy-duty appliance dolly to move the refrigerator. Secure it to the dolly with straps.
* Upright Position: Whenever possible, transport the refrigerator in an upright position. If it must be tilted, limit the angle and duration. Tilting can cause internal oils and coolant to shift, potentially damaging the compressor.
* Professional Movers: If you’re unsure about handling heavy appliances, hire professional movers who have experience with refrigerator moving.
Dishwasher Packing: Keeping it Secure
Dishwasher packing requires similar care to other large appliances, focusing on internal components and external protection.
1. Disconnect and Drain:
* Water Line: Turn off the water supply valve to the dishwasher. Disconnect the water inlet hose. Have towels and a bucket ready to catch any residual water.
* Drain Hose: Disconnect the drain hose from the garbage disposal or sink plumbing.
* Power: Unplug the dishwasher or disconnect it from the electrical supply. Ensure you know how to safely disconnect the wiring if you’re comfortable with it. If not, a qualified electrician can assist.
2. Secure Internal Parts:
* Racks: Remove the dishwasher racks. Wrap them individually in bubble wrap or moving blankets. Store them separately or secure them inside the dishwasher if there’s a safe way to do so without them rattling or causing damage.
* Spray Arms: If possible, remove the spray arms and wrap them separately.
* Loose Components: Check for any other loose parts inside the dishwasher and secure them.
3. Protect the Exterior:
* Wrap: Wrap the dishwasher in moving blankets, paying close attention to the control panel and door.
* Secure: Use packing tape or plastic wrap to hold the blankets in place.
4. Moving the Dishwasher:
* Appliance Dolly: Use an appliance dolly to move the dishwasher.
* Level Transport: Try to keep the dishwasher as level as possible during transit.
Oven Disassembly: Preparing for the Journey
Oven disassembly is crucial, especially for freestanding ranges. Built-in ovens may require professional removal.
1. Electric vs. Gas:
* Electric Ovens: Turn off the power at the breaker. Disconnect the electrical wiring according to manufacturer instructions or hire an electrician.
* Gas Ovens: Turn off the gas supply valve for the oven. Disconnect the gas line. This is a task best left to a professional plumber or gas fitter to ensure safety.
2. Remove Oven Racks and Accessories:
* Racks: Take out all oven racks, baking sheets, and any other accessories. Wrap them in bubble wrap or towels and pack them separately.
* Doors: Some oven doors can be removed for easier transport. Check your oven’s manual for instructions. If you remove the door, label it and pack it carefully.
3. Clean and Secure:
* Clean: Thoroughly clean the oven interior, racks, and stovetop.
* Secure: Wrap the oven in moving blankets and secure with tape or plastic wrap. Pay attention to fragile parts like glass doors or control panels.
4. Transporting the Oven:
* Dolly: Use an appliance dolly for moving.
* Stable Position: Ensure the oven is secured in the moving truck to prevent it from tipping or shifting.
Packing Small Kitchen Appliances: Tips for Every Gadget
While large appliances are the main concern, your array of small kitchen gadgets also needs careful packing to avoid damage and ensure they’re ready to use in your new home.
Microwave Shipping: Small But Mighty
Microwave shipping might seem straightforward, but its glass turntable and internal components need protection.
1. Clean and Empty:
* Clean: Wipe down the interior and exterior of the microwave.
* Empty: Remove any food items, racks, or accessories.
2. Pack the Turntable:
* Separate: Wrap the glass turntable in bubble wrap or a soft towel.
* Secure: You can place it inside the microwave, cushioned by more bubble wrap, or pack it separately in a sturdy box.
3. Protect the Exterior and Interior:
* Bubble Wrap: Wrap the entire microwave in bubble wrap.
* Box: Place the wrapped microwave in a sturdy cardboard box. Use plenty of packing peanuts or crumpled paper to fill any empty space and prevent shifting.
* Cord: Coil the power cord and secure it with tape or a twist tie. Tuck it inside the box or tape it to the back of the microwave.
4. Label Clearly:
* Fragile: Mark the box “FRAGILE” and “THIS SIDE UP” prominently.
Blender Packing Tips: Guarding the Blades
Blender packing tips focus on protecting the sharp blades and the motor base.
1. Disassemble:
* Jar: Separate the blender jar from the motor base.
* Blades: If the blade assembly is removable, take it out. Be extremely careful with the sharp blades.
2. Protect the Blades:
* Cover: Place a thick piece of cardboard or a folded towel over the blades to protect them and anyone handling the blender. You can also use a blade protector if you have one.
* Secure: Wrap the blade assembly securely in bubble wrap.
3. Pack the Jar and Base:
* Jar: Wrap the blender jar in bubble wrap or a soft cloth. If it has a lid, secure it to the jar with tape.
* Base: Wrap the motor base in bubble wrap.
* Box: Place both the wrapped jar and base into a sturdy box. Fill any voids with packing material.
4. Consider the Original Box:
* If you still have the original packaging, it’s often the best option for protecting your blender.
Blender Packing Tips: Advanced Protection Strategies
Beyond basic blender packing tips, consider these advanced strategies for maximum safety:
- Multiple Layers: Use multiple layers of bubble wrap for both the jar and the base.
- Corner Protection: Add extra padding to the corners of the base.
- Secure Lid: Ensure the lid is tightly secured to the jar to prevent it from coming off and exposing the blades or causing leaks if any residue remains.
- Separate Boxes: For very delicate or expensive blenders, consider packing the jar and base in separate, well-padded boxes.
Toaster Oven Transport: A Delicate Balance
Toaster oven transport requires care due to the glass door and heating elements.
1. Clean and Unplug:
* Clean: Wipe down the interior and exterior.
* Unplug: Ensure the power cord is unplugged.
2. Secure the Door and Racks:
* Door: Use painter’s tape (which is less likely to leave residue) to secure the glass door shut. You can also use a piece of cardboard taped across the door.
* Racks: Remove internal racks and wrap them separately in bubble wrap or towels.
3. Pack for Protection:
* Bubble Wrap: Wrap the entire toaster oven in a generous amount of bubble wrap. Pay special attention to the glass door and any protruding knobs.
* Box: Place it in a sturdy box and fill all empty space with packing material like crumpled paper or packing peanuts.
Coffee Maker Packing: Preserving the Components
Coffee maker packing is relatively simple, but taking a few precautions will help.
1. Empty and Clean:
* Water Reservoir: Empty all water from the reservoir.
* Carafe: If you have a glass carafe, wash and dry it thoroughly.
* Filter Basket: Remove and clean the filter basket.
2. Pack the Carafe:
* Separate: Wrap the carafe in bubble wrap or a soft cloth. You can place it inside the coffee maker if it fits securely, or pack it in a separate box with other glassware.
3. Secure the Machine:
* Cord: Coil the power cord and secure it. You can tuck it into the coffee maker’s housing if there’s space.
* Wrap: Wrap the coffee maker in bubble wrap or a small moving blanket.
4. Box It Up:
* Place the wrapped coffee maker in a box, filling any gaps with packing material.
Food Processor Moving: Safeguarding Blades and Bowls
Food processor moving involves protecting multiple parts, especially the sharp blades and the main bowl.
1. Disassemble and Clean:
* Clean: Wash and thoroughly dry all parts: the motor base, bowl, lid, pusher, and blades.
* Disassemble: Separate the bowl, lid, and any accessories from the motor base.
2. Protect the Blades:
* Blade Safety: Place the blade assembly in its protective sleeve if you have one. If not, use thick cardboard or a folded towel to cover the blades and secure with tape. Handle with extreme care.
* Wrap: Wrap the blade assembly in bubble wrap.
3. Pack the Bowl and Lid:
* Bowl: Wrap the food processor bowl in bubble wrap. You can place smaller accessories like the pusher inside the bowl for compactness.
* Lid: Wrap the lid separately in bubble wrap.
4. Pack the Base:
* Wrap: Wrap the motor base in bubble wrap.
5. Box Everything:
* Place all wrapped components into a sturdy box. Ensure there’s enough cushioning to prevent them from knocking against each other.
Mixer Preparation: Securing Attachments
Mixer preparation for moving ensures that the motor, beaters, and bowls are protected.
1. Clean and Disassemble:
* Clean: Wipe down the mixer and its attachments.
* Attachments: Remove the mixing bowl, beaters, dough hooks, or whisk attachments.
2. Protect Attachments:
* Wrap: Wrap each attachment individually in bubble wrap or a soft cloth.
* Box: You can place them in a separate small box, or if they fit securely without rattling, inside the mixer’s bowl.
3. Secure the Mixer:
* Cord: Coil and secure the power cord.
* Head: If it’s a stand mixer, ensure the head is locked in place. If it has a tilt-head design, secure it with tape or a strap.
* Wrap: Wrap the entire mixer in bubble wrap or a moving blanket.
4. Box Safely:
* Place the wrapped mixer in a suitable box, using packing materials to prevent movement.
Small Appliance Shipping: General Best Practices
Regardless of the specific appliance, small appliance shipping follows a few universal rules for safety.
- Cleanliness: Always clean your appliances before packing. This prevents lingering food particles from causing odors or attracting pests.
- Original Packaging: If you still have the original boxes and packing materials, use them. They are designed to protect the appliance best.
- Secure Cords: Always coil and secure power cords. Loose cords can snag and damage the appliance or other items.
- Bubble Wrap is Your Friend: Use plenty of bubble wrap for all small appliances. Double-wrap if necessary.
- Sturdy Boxes: Use strong, corrugated cardboard boxes that are appropriately sized for the appliance. Don’t use boxes that are too large, as this can lead to shifting and damage.
- Fill Void Space: Use packing peanuts, crumpled paper, or towels to fill any empty space in the box. This prevents the appliance from moving around during transit.
- Label Clearly: Mark all boxes containing appliances as “FRAGILE” and indicate which appliance is inside (e.g., “KitchenAid Mixer,” “Ninja Blender”).
Packing Materials Checklist
To ensure you have everything you need for packing your kitchen appliances, consider this checklist:
- Moving Blankets
- Bubble Wrap (various sizes)
- Packing Tape
- Dish Soap and Sponges (for cleaning)
- Towels (for drying and padding)
- Sturdy Cardboard Boxes (various sizes)
- Packing Peanuts or Crumpled Paper
- Painter’s Tape
- Marker Pens
- Scissors or Box Cutter
- Appliance Dolly (for large items)
- Moving Straps
Frequently Asked Questions (FAQ)
Here are some common questions people have when packing kitchen appliances:
Q1: Do I need to remove my dishwasher myself?
A1: While you can remove a dishwasher yourself if you are comfortable with basic plumbing and electrical work, it is often safer and more efficient to hire a professional mover or a handyman for this task. They have the tools and expertise to disconnect it safely and without damaging your plumbing or the appliance.
Q2: Can I move my refrigerator on its side?
A2: It is strongly advised not to move your refrigerator on its side for an extended period. The internal oils and coolant can shift, and if they get into the cooling lines, it can cause significant damage to the compressor when the appliance is turned back on. If you must tilt it, do so for the shortest possible time and keep it as upright as you can. Allow the refrigerator to stand upright for at least 4-24 hours (check your manual) before plugging it back in after a move.
Q3: What is the best way to pack oven racks?
A3: Oven racks are best packed by wrapping them individually in bubble wrap or old towels. You can then either place them securely inside the oven itself (if there’s a way to prevent them from moving) or pack them in a separate, sturdy box labeled “Oven Racks” and “FRAGILE.”
Q4: Should I tape over the glass on my appliances?
A4: For appliances with glass doors or components, like microwaves or toaster ovens, it’s best to use painter’s tape to secure the door shut. Avoid using strong packing tape directly on the glass or sensitive surfaces, as it can leave residue or damage finishes. You can also use cardboard taped across the glass for an extra layer of protection.
Q5: How do I protect my stainless steel appliances from scratches?
A5: Stainless steel appliances are prone to scratching. Always use moving blankets to wrap them completely. For added protection, you can also use cardboard on the corners and edges. When taping blankets, try to tape the blanket to itself rather than directly to the appliance surface if possible, or use painter’s tape that is less likely to damage the finish.
Q6: Do I need to unplug my appliances before moving them?
A6: Absolutely. All electrical appliances must be unplugged from the power source before you attempt to move them. For some appliances like dishwashers and ovens, you may also need to disconnect water or gas lines, which should be done safely and, in the case of gas, by a professional.
By following these detailed instructions, you can confidently pack your kitchen appliances for a move, ensuring they arrive at your new home ready for use. Remember, proper preparation and the right packing materials are key to a successful appliance move.