
Yes, you can absolutely update your fluorescent kitchen lighting to a more energy-efficient and modern look. This often involves a fluorescent to LED conversion, which can be a straightforward DIY project or a task best left to a professional, depending on the complexity of your existing fixtures and your comfort level with electrical work. The goal is to replace outdated, harsh fluorescent lights with brighter, more versatile, and significantly more energy-saving options that enhance your kitchen’s ambiance and functionality.
Your kitchen deserves lighting that’s both practical and pleasant. Old fluorescent lights, with their characteristic hum and sometimes unflattering light quality, can make even the most stylish kitchen feel dated. Fortunately, you have many excellent options to upgrade your lighting, from simple bulb swaps to complete fixture replacements. This guide will walk you through the process of transforming your kitchen’s illumination from drab to dazzling, focusing on energy efficiency and modern aesthetics.
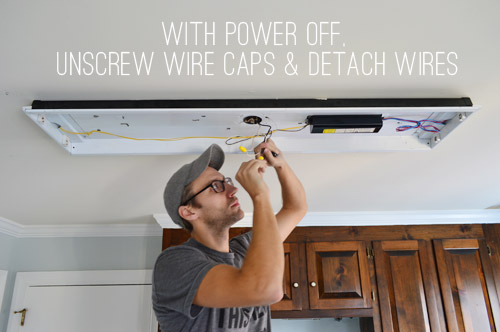
Image Source: images.younghouselove.com
Why Upgrade Your Fluorescent Kitchen Lighting?
Fluorescent lights have been a staple in kitchens for decades, primarily for their perceived energy savings over incandescent bulbs. However, technology has advanced significantly. Modern lighting solutions offer far superior performance and efficiency.
Energy Savings and Cost Reduction
The most compelling reason to update is energy efficiency.
* LEDs consume significantly less electricity than fluorescent tubes. A typical T8 fluorescent tube uses around 32 watts, while a comparable LED tube might use only 15-18 watts.
* Longer Lifespan: Fluorescent tubes have a limited lifespan, often needing replacement every 10,000-20,000 hours. LEDs, on the other hand, can last 50,000 hours or more. This means fewer replacements, less waste, and more money saved over time.
* Reduced Heat Output: LEDs generate much less heat than fluorescent lights. This can slightly reduce your air conditioning load in warmer months, leading to further energy savings.
Improved Light Quality and Ambiance
Beyond efficiency, the quality of light matters for your kitchen’s atmosphere.
* Better Color Rendering: Modern LEDs offer excellent color rendering indexes (CRIs), meaning they show colors more accurately and vibrantly. This makes your food look more appetizing and your kitchen colors true.
* Dimmable Options: Many LED fixtures and bulbs are dimmable, giving you control over the ambiance. You can brighten your kitchen for task lighting while cooking or dim it for a softer mood during meals.
* No Flickering or Hum: Unlike some older fluorescent fixtures that can flicker or produce an annoying hum, LEDs operate silently and consistently.
Modern Aesthetics and Design
Outdated fluorescent fixtures can detract from your kitchen’s overall style.
* Sleeker Fixture Designs: New kitchen light fixture upgrade options come in a vast array of modern styles, from minimalist track lighting to elegant pendant lights and stylish recessed lighting.
* Task Lighting Versatility: You can strategically place new lighting to illuminate specific areas, like countertops or your stovetop, enhancing both functionality and visual appeal.
Environmental Benefits
Choosing energy-efficient lighting is good for the planet.
* Lower Carbon Footprint: By using less electricity, you reduce your reliance on fossil fuels, contributing to a smaller carbon footprint.
* Reduced Waste: The extended lifespan of LEDs means less frequent disposal of bulbs and fixtures, reducing landfill waste.
Your Options for Updating Fluorescent Kitchen Lighting
There are several ways to tackle this upgrade, ranging from simple bulb replacements to full fixture overhauls.
Option 1: Replace Fluorescent Bulbs with LED Equivalents (The Easiest Path)
This is often the quickest and most affordable way to update your lighting. You can replace fluorescent bulbs directly with LED tubes designed to fit your existing fixtures.
Types of LED Tube Replacements:
- “Plug-and-Play” or “Ballast-Compatible” LEDs: These are designed to work with your existing fluorescent ballast. You simply remove the old fluorescent tube and install the LED tube. It’s a direct swap.
- Pros: Very easy installation, no electrical wiring required.
- Cons: The ballast is still present and consumes a small amount of energy. If the ballast fails, you’ll need to replace it, or upgrade the fixture.
- “Direct Wire” or “Ballast Bypass” LEDs: These require you to bypass the existing ballast and wire the LED tube directly to the power source. This is a more energy-efficient option as it removes the ballast entirely.
- Pros: Highest energy efficiency, eliminates ballast failure as a concern, often provides slightly brighter light.
- Cons: Requires basic electrical wiring knowledge and potentially modification of the fixture. Always turn off power at the breaker before attempting any wiring.
How to Choose the Right LED Tube:
- Tube Size: Fluorescent tubes come in standard sizes like T8 (1 inch diameter) and T12 (1.5 inch diameter). Measure your existing tubes or check the fixture label. T8 is the most common in modern homes.
- Length: Common lengths are 2 feet, 4 feet, and 8 feet.
- Color Temperature: This determines the “warmth” or “coolness” of the light.
- Warm White (2700K-3000K): Similar to incandescent bulbs, creates a cozy, inviting atmosphere. Good for dining areas within the kitchen.
- Cool White (3500K-4100K): Brighter, crisper light. Excellent for general task lighting and food preparation.
- Daylight (5000K-6500K): Very bright, cool light, mimicking natural daylight. Best for focused task areas where high visibility is needed.
- CRI (Color Rendering Index): Look for a CRI of 80 or higher for accurate color representation in your kitchen.
- Wattage: Compare this to your existing fluorescent bulb’s wattage to gauge energy savings.
- Voltage: Ensure it’s compatible with your home’s electrical system (usually 120V in North America).
Example: Replacing a 4-foot T8 Fluorescent Tube
| Feature | Old Fluorescent (T8) | Plug-and-Play LED | Direct Wire LED |
|---|---|---|---|
| Wattage | ~32 W | ~18 W | ~15 W |
| Lifespan | 10,000-20,000 hrs | 50,000+ hrs | 50,000+ hrs |
| Ballast Required | Yes | Yes (built-in) | No |
| Installation | Simple bulb swap | Simple bulb swap | Wiring required |
| Energy Efficiency | Moderate | High | Highest |
| Light Quality | Can be uneven/flicker | Good, consistent | Excellent |
Important Safety Note for Direct Wire LEDs:
If you opt for direct-wire LEDs, you must disable or remove the ballast and rewire the fixture. This involves working with live electrical wires. If you are not comfortable or experienced with electrical work, hire a qualified electrician. Always turn off the power to the circuit at your breaker box before starting any work.
Option 2: Replace the Entire Fixture (The Ultimate Makeover)
If your existing fluorescent fixtures are bulky, damaged, or you’re looking for a completely new aesthetic, replacing the entire fixture is the best route. This allows for a kitchen light fixture upgrade that perfectly matches your modern design goals.
Popular Modern Kitchen Lighting Fixtures:
- Recessed Lighting (Can Lights): These are installed flush with the ceiling, providing clean, unobtrusive illumination. They are great for general ambient lighting and can be positioned to eliminate shadows. Many modern recessed lights are LED integrated.
- LED Panel Lights: These are flat, thin fixtures that offer widespread, even lighting. They can be surface-mounted or recessed and are a popular choice for a contemporary look.
- Track Lighting: Versatile and adjustable, track lighting allows you to direct light precisely where you need it. You can have multiple spotlights on a single track.
- Pendant Lights: These hang from the ceiling and are often used as accent or task lighting over islands, peninsulas, or dining areas within the kitchen.
- Under Cabinet Lighting: This is crucial for task lighting on countertops. Options include LED strips, puck lights, and slim linear fixtures. Replacing old fluorescent under cabinet lighting replacement with LED strips is a very popular and effective upgrade.
- Flush Mount or Semi-Flush Mount Fixtures: These are decorative fixtures that sit close to the ceiling, offering a stylish alternative to dated fluorescent troffers.
Planning Your Fixture Upgrade:
- Assess Your Needs: How much light do you need? Where do you need it most? Consider task areas, general ambiance, and accent lighting.
- Choose Your Style: Select fixtures that complement your kitchen’s décor.
- Consider LED Integration: Many new fixtures come with integrated LEDs, meaning the light source is built-in. This eliminates the need for bulb replacements and often offers better efficiency and design flexibility.
- Professional Installation: For a complete fixture replacement, especially if you’re changing the type of lighting (e.g., from a long fluorescent fixture to multiple recessed lights), it’s highly recommended to hire a licensed electrician. They can ensure safe and proper installation, and may be able to help with wiring modifications if needed.
Option 3: Address the Ballast
In some cases, if a fluorescent tube has failed but the fixture itself is in good condition and you don’t want to switch to LED yet, you might need a ballast replacement.
What is a Ballast?
A ballast is a device that regulates the voltage and current to a fluorescent lamp. It provides the initial surge of voltage to start the lamp and then limits the current to keep it operating.
Signs of Ballast Failure:
- Flickering: Persistent flickering that doesn’t stop after the initial warm-up period.
- Humming: A loud or unusual humming sound from the fixture.
- Dimming: The light appears significantly dimmer than it should.
- No Light: The tube doesn’t light up at all.
- Discolored Tubes: The ends of the fluorescent tube may appear black or discolored.
Ballast Replacement Considerations:
- Matching the Ballast: You need to replace the ballast with one that is compatible with the specific type and wattage of your fluorescent tubes (e.g., for T8, T12, HO – High Output, etc.).
- Electronic vs. Magnetic: Modern fixtures use electronic ballasts, which are more energy-efficient and quieter than older magnetic ballasts.
- Energy Cost: Replacing a faulty ballast with another fluorescent ballast is still an option, but it won’t offer the energy savings of a fluorescent to LED conversion. Given the cost of ballasts and the long-term savings, switching to LEDs is usually the more cost-effective and future-proof solution.
DIY Kitchen Lighting Upgrade Steps
If you decide to undertake some of these upgrades yourself, here’s a general guide. Remember, safety first!
Step 1: Plan Your Project
- Identify Existing Fixtures: What type of fluorescent lights do you have? (e.g., long tubes, circular tubes, under-cabinet strips).
- Determine Your Goal: Are you just swapping bulbs, or replacing fixtures? What lighting effect do you want?
- Measure: Measure tube lengths, fixture dimensions, and ceiling areas.
- Budget: Set a budget for materials and potential professional help.
- Gather Tools: Screwdrivers, voltage tester, wire strippers, ladder, safety glasses, gloves.
Step 2: Safety Precautions
- Turn Off Power: ALWAYS turn off the power to the specific circuit at your breaker box before touching any wires or fixtures. Use a voltage tester to confirm the power is off.
- Work Safely on Ladders: Ensure your ladder is stable and you have a clear workspace.
Step 3: Bulb Replacement (Plug-and-Play LEDs)
- Turn off power.
- Remove the diffuser cover from the fluorescent fixture.
- Gently twist and remove the old fluorescent tube.
- Insert the new LED tube, ensuring it seats correctly in the fixture’s sockets.
- Replace the diffuser cover.
- Turn the power back on at the breaker.
- Test the light.
Step 4: Bulb Replacement (Direct Wire LEDs)
This requires electrical work and should only be done if you are comfortable and knowledgeable about electrical wiring.
- Turn off power at the breaker.
- Remove the diffuser cover.
- Remove the old fluorescent tube.
- Locate and disconnect the ballast. This often involves unplugging a connector or cutting wires. Carefully note or photograph the wiring before disconnecting.
- Wire the LED tube directly according to the manufacturer’s instructions. This typically involves bypassing the ballast and connecting the line and neutral wires to the designated pins on the LED tube.
- Secure all connections with wire nuts.
- Replace the diffuser cover.
- Turn the power back on at the breaker.
- Test the light.
Step 5: Fixture Replacement
This is best left to a qualified electrician unless you have significant DIY electrical experience.
- Turn off power at the breaker.
- Remove the old fixture. This usually involves unscrewing mounting screws and disconnecting wires.
- Mount the new fixture according to its instructions.
- Connect the wiring for the new fixture.
- Secure the new fixture.
- Turn the power back on at the breaker.
- Test the light.
Enhancing Your Kitchen Lighting with Layers
Modern kitchen lighting goes beyond just overhead fixtures. Creating layers of light provides functionality and ambiance.
Ambient Lighting
This is the general, overall illumination in your kitchen.
* Overhead Fixtures: Recessed lights, LED panels, or stylish flush mounts provide a consistent wash of light.
* Goal: To create a comfortable and inviting atmosphere.
Task Lighting
This is focused light for specific activities.
* Under Cabinet Lighting: Essential for illuminating countertops where food preparation happens. LED strips or puck lights are excellent choices for this.
* Pendant Lights: Over an island or sink, pendants can provide both task and decorative lighting.
* Goal: To provide bright, shadow-free light for cooking, chopping, and cleaning.
Accent Lighting
This highlights specific features or creates mood.
* In-Cabinet Lighting: Illuminates glassware or decorative items stored inside cabinets.
* Toe-Kick Lighting: Small LED strips along the base of cabinets can create a soft, floating effect.
* Goal: To add visual interest and depth to your kitchen.
Frequently Asked Questions (FAQ)
Q1: Can I really just swap fluorescent bulbs for LED bulbs?
Yes, you can! There are two main types of LED replacements for fluorescent tubes. “Plug-and-play” LEDs work with your existing ballast, making it a simple swap. “Direct wire” or “ballast bypass” LEDs require you to remove or bypass the ballast and wire the LED tube directly to the power, which is more energy-efficient but requires basic electrical knowledge.
Q2: Do LED tubes work in all fluorescent fixtures?
Most LED tubes designed as replacements are made to fit standard fluorescent fixtures (like T8 or T12). However, always check the specifications of the LED tube and compare them to your existing fixture and tubes (size, type) to ensure compatibility. Some very old or specialized fluorescent fixtures might not be compatible.
Q3: How much energy do I save by switching from fluorescent to LED?
You can save a significant amount of energy, often between 40% and 60%, and sometimes even more. For example, a 32-watt fluorescent tube replaced with an 18-watt LED tube results in a nearly 44% reduction in energy consumption for that light.
Q4: What is a ballast replacement for fluorescent lights?
A ballast is a component in a fluorescent fixture that regulates the power to the bulb. If your ballast fails, the light won’t work. You can replace a faulty ballast with a new one compatible with your fluorescent tubes. However, given the energy savings and lifespan benefits, most people opt for a fluorescent to LED conversion instead of just replacing the ballast.
Q5: How do I choose the right color temperature for my kitchen lights?
- Warm White (2700K-3000K): Best for a cozy, inviting feel, good for dining areas.
- Cool White (3500K-4100K): Excellent for general kitchen tasks, providing a bright, clean light.
- Daylight (5000K-6500K): Good for very specific task areas where maximum brightness and clarity are needed, like over a workbench, but can be too harsh for general use. For most kitchens, a cool white (around 4000K) is a popular choice for balancing brightness and comfort.
Q6: Is it safe to do a DIY fluorescent to LED conversion?
Swapping to “plug-and-play” LEDs is generally safe and easy. If you are doing a “direct wire” conversion (bypassing the ballast), it involves working with electrical wiring. If you are not comfortable or experienced with electrical work, it is strongly recommended to hire a qualified electrician to perform the conversion safely.
Q7: How long do LED lights last compared to fluorescent tubes?
LEDs have a significantly longer fluorescent tube lifespan is typically 10,000-20,000 hours, while LEDs can last 50,000 hours or more. This means LEDs last 2.5 to 5 times longer, requiring fewer replacements and reducing waste.
Q8: What are good options for under cabinet lighting replacement?
LED strips, LED puck lights, and slim LED bar lights are excellent replacements for old fluorescent under cabinet lighting replacement. They offer brighter, more even light with lower energy consumption and are often dimmable.
Q9: Can I make my kitchen ceiling lights dimmable?
Yes, many modern LED bulbs and integrated LED fixtures are designed to be dimmable. You may need to ensure your existing dimmer switch is compatible with LEDs, or you might need to replace the switch with an LED-compatible model for optimal performance.
Q10: What are the benefits of upgrading my kitchen light fixture upgrade?
Benefits include significant energy savings, reduced electricity bills, improved light quality (brighter, more accurate colors, no flickering), enhanced kitchen aesthetics with modern designs, and a longer lifespan for your lighting, meaning fewer replacements.
By upgrading your fluorescent kitchen lighting, you’re not just improving the look and feel of your kitchen; you’re making a smart investment in energy efficiency and long-term cost savings. Enjoy your brighter, more modern, and more efficient kitchen!