
Can you build your own kitchen base cabinets? Yes, you absolutely can! Building your own DIY kitchen cabinets is a rewarding project that can save you a lot of money and give you custom kitchen cabinets perfectly suited to your space. This comprehensive guide will walk you through the entire process, from choosing your materials to the final installation.
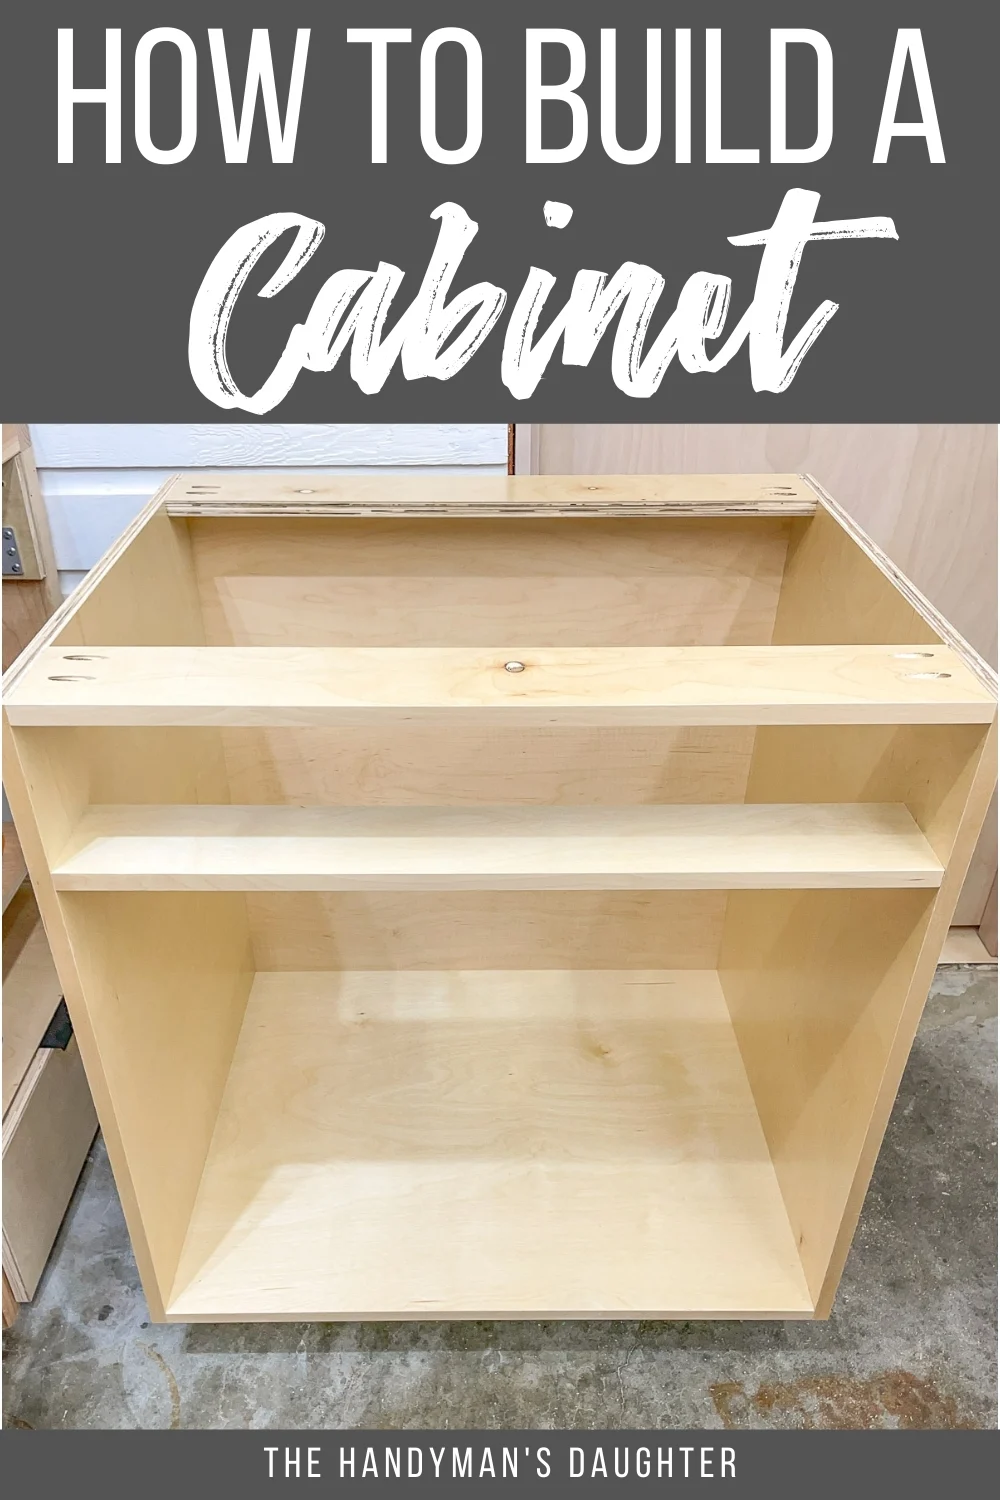
Image Source: www.thehandymansdaughter.com
Deciphering Your Kitchen Cabinet Blueprints
Before you even pick up a saw, you need a plan. This is where kitchen cabinet blueprints come in. Whether you download free woodworking cabinet plans or design your own, having clear dimensions and cut lists is crucial.
Planning Your Cabinet Layout
- Measure your kitchen: Accurately measure the space where your base cabinets will go. Note the height, width, and depth available.
- Consider appliance locations: Where will your refrigerator, dishwasher, and stove be placed? Account for their dimensions and any required clearances.
- Think about drawer and door styles: Decide if you want all doors, drawers, or a combination. This will affect the internal structure.
- Sketch your design: Draw a simple layout of your kitchen, marking the dimensions of each base cabinet.
Creating a Cut List
Once you have your blueprints, you’ll need a cut list. This is a detailed list of every piece of wood needed, including its dimensions.
Example Cut List for a Standard 30-inch Base Cabinet:
| Part Name | Material (Plywood) | Dimensions (H x W x D) | Quantity |
|---|---|---|---|
| Front Panel | ¾-inch | 30″ x 28½” x ¾” | 1 |
| Back Panel | ½-inch | 29¼” x 27½” x ½” | 1 |
| Left Side | ¾-inch | 34½” x 23¾” x ¾” | 1 |
| Right Side | ¾-inch | 34½” x 23¾” x ¾” | 1 |
| Bottom Panel | ¾-inch | 28½” x 23¾” x ¾” | 1 |
| Kick Plate | ¾-inch | 4″ x 27½” x ¾” | 1 |
| Toe Kick | ¾-inch | 4″ x 3″ x 3″ | 1 |
Note: These dimensions are for a standard cabinet. Adjust them based on your specific blueprints and desired finished size.
Selecting Your Materials
The choice of materials significantly impacts the look, durability, and cost of your DIY kitchen cabinets.
Wood Types
- Plywood: This is the go-to material for making cabinet carcasses. Look for high-quality cabinet-grade plywood, such as birch or maple. ¾-inch thickness is standard for cabinet boxes, while ½-inch is often used for backs.
- Solid Wood: Hardwoods like oak, maple, or cherry are excellent choices for cabinet doors, drawer fronts, and face frames due to their durability and beauty. Pine is a more budget-friendly option but is softer and can dent more easily.
Hardware and Supplies
- Screws: Wood screws are essential for assembly.
- Wood Glue: A strong wood glue is vital for creating durable joints.
- Drawer Slides: For smooth-opening drawers.
- Hinges: For cabinet doors.
- Handles and Knobs: For opening doors and drawers.
- Sandpaper: Various grits for smoothing surfaces.
- Finish: Paint, stain, or a clear protective coating.
Tools You’ll Need
A well-equipped workshop makes building cabinet construction methods much easier.
- Measuring Tape: For accurate measurements.
- Pencil: For marking.
- Circular Saw or Table Saw: For cutting plywood and solid wood. A table saw is ideal for precise, straight cuts.
- Miter Saw: For cutting angles and straight crosscuts.
- Jigsaw: For curved cuts or cutting out sink openings.
- Drill/Driver: For pre-drilling holes and driving screws.
- Router: For creating dadoes, rabbets, and decorative edges.
- Sander (Orbital or Belt): For smoothing surfaces.
- Clamps: Essential for holding pieces together while glue dries.
- Safety Glasses and Hearing Protection: Always prioritize safety.
Making Cabinet Carcasses: Building the Boxes
The “carcass” is the main body of the cabinet. This is where cabinet joinery techniques are critical for strength and longevity.
Step-by-Step Cabinet Construction Methods
-
Cut Your Plywood: Using your cut list and a table saw or circular saw with a guide, carefully cut all the plywood pieces for your cabinet boxes. Precision here is key. Ensure your cuts are square.
-
Cut Dadoes and Rabbets (Optional but Recommended):
- Dadoes: These are grooves cut into a piece of wood to accept another piece. For cabinet construction, you’ll often cut dadoes in the side panels to accept the bottom panel and shelves. A router with a dado stack or a table saw with a dado blade is used for this.
- Rabbets: These are L-shaped cuts along the edge of a piece. A common use is to create a rabbet on the back edges of the side and bottom panels to recess the back panel, providing a cleaner look and added strength.
-
Assemble the Sides and Bottom:
- Apply wood glue to the edges where the pieces will join.
- If you cut dadoes for the bottom panel, slide the bottom panel into the dadoes on the side panels.
- If not using dadoes, position the bottom panel between the side panels.
- Use clamps to hold the pieces firmly in place.
- Pre-drill pilot holes and drive screws through the sides into the edges of the bottom panel. You can also glue and screw the sides to the bottom.
-
Attach the Back Panel:
- If you cut a rabbet for the back panel, slide the ½-inch plywood back panel into the rabbets.
- If not, position the back panel flush with the back edges of the cabinet box.
- Apply glue to the edges and secure the back panel with screws or brad nails. The back panel adds significant rigidity to the cabinet box.
-
Add Shelves and Dividers (If Applicable):
- If your plans include fixed shelves, cut them to size and secure them using glue and screws. You can also create dadoes for shelves for a stronger connection.
- For adjustable shelves, drill shelf pin holes on the inside of the side panels before assembly.
-
Install the Kick Plate and Toe Kick:
- The kick plate is a horizontal piece at the bottom front of the cabinet.
- The toe kick is a recessed area at the bottom, allowing you to stand closer to the counter.
- Glue and screw these pieces into place, ensuring they are flush and square.
Cabinet Joinery Techniques for Strength
- Butt Joints with Screws and Glue: The most basic method. Ensure pilot holes are drilled to prevent splitting.
- Dado Joints: As mentioned, dadoes create a strong, interlocking joint. This is ideal for shelves and the cabinet bottom.
- Rabbet Joints: Useful for joining the back panel and for corner joints.
- Pocket Holes: A popular DIY method using a pocket hole jig. Holes are drilled at an angle, and special screws are used to join pieces. This is fast and strong.
Table of Joinery Methods and Their Applications:
| Joinery Type | Description | Strength | Ease of Use | Typical Application |
|---|---|---|---|---|
| Butt Joint | Two pieces of wood joined end to edge or end to face. | Moderate | Easy | Attaching kick plates, simple box assembly (with screws). |
| Dado Joint | A groove cut into one piece to accept another piece. | High | Moderate | Joining shelves and cabinet bottoms to sides. |
| Rabbet Joint | An L-shaped cut along the edge of a piece. | High | Moderate | Recessing back panels, joining cabinet corners. |
| Pocket Hole | Angled holes drilled into one piece to accept screws that join it to another piece. | High | Easy | General cabinet box assembly, face frames. |
| Dovetail Joint | Interlocking trapezoidal pins and tails. | Very High | Difficult | Drawer construction (rare in carcass assembly). |
Building Drawer Boxes
Most base cabinets include at least one drawer. Here’s how to build strong drawer boxes.
Drawer Box Construction Methods
- Cut Drawer Sides, Front, and Back: Use ¾-inch plywood or solid wood. The length of the front and back pieces will be the width of your drawer opening plus the thickness of the two drawer sides. The length of the drawer sides will be the desired depth of the drawer.
- Cut Drawer Bottom: This is usually a ¼-inch or ½-inch plywood panel. It needs to fit into grooves cut into the drawer sides, front, and back.
- Cut Grooves (Dadoes): Use a router or table saw to cut a groove ¼-inch to ½-inch up from the bottom edge of the drawer sides, front, and back. This groove will hold the drawer bottom.
- Assemble the Drawer Box:
- Apply wood glue to the ends of the drawer sides, front, and back.
- Join the pieces using your preferred joinery technique (pocket holes are excellent for drawers). Ensure the box is square.
- Slide the drawer bottom into the grooves.
- Secure the bottom panel with a few brad nails or screws into the bottom edge of the front and back pieces.
Attaching Drawer Slides
- Follow the manufacturer’s instructions for your chosen drawer slides. Most slides require precise placement and pre-drilling.
- Typically, one part of the slide attaches to the side of the drawer box, and the other part attaches to the inside of the cabinet carcass.
Adding Face Frames and Doors
Face frames give your DIY kitchen cabinets a finished, professional look and provide a mounting surface for doors and drawers.
Building Face Frames
- Materials: Use solid wood strips, typically 1½ inches wide and ¾ inch thick.
- Construction:
- Cut stiles (vertical pieces) and rails (horizontal pieces) to fit around your cabinet boxes.
- Join the stiles and rails using pocket holes, dowels, or mortise and tenon joints.
- Ensure the face frame is square.
- Attachment: Glue and screw the face frame to the front edges of the cabinet carcass. The face frame should typically overhang the carcass slightly.
Making and Installing Doors and Drawer Fronts
- Door Styles: Shaker, raised panel, or flat panel are common.
- Materials: Solid wood or MDF for painted doors.
- Construction:
- For Shaker style, create a frame with stiles and rails and insert a flat panel into a groove.
- For flat panel, simply use a solid piece of wood or MDF.
- Drawer Fronts: These are typically flat panels attached to the front of the drawer box.
- Hinging Doors:
- Mortise the hinges into the cabinet doors and the inside of the cabinet carcass (or the face frame).
- Adjust the hinges for proper door alignment.
- Attaching Drawer Fronts:
- Align the drawer front precisely with the drawer box and cabinet opening.
- Secure from the inside of the drawer box with screws.
Finishing Your Kitchen Cabinets
The finish protects the wood and provides the desired aesthetic.
Sanding
- Start with a coarser grit sandpaper (e.g., 100 or 120) to remove imperfections.
- Progress to finer grits (e.g., 150, 180, 220) for a smooth finish.
- Sand with the grain of the wood.
Staining and Sealing
- Stain: Apply wood stain evenly with a rag or brush. Wipe off excess stain. Let it dry completely according to the product instructions.
- Sealer/Topcoat: Apply multiple thin coats of polyurethane, lacquer, or a cabinet-specific topcoat. Sand lightly between coats with very fine-grit sandpaper (e.g., 320 or 400) for a smoother finish.
Painting
- If painting, use a high-quality primer.
- Apply several thin coats of cabinet-grade paint.
- Lightly sand between coats if recommended by the paint manufacturer.
Installing Cabinet Bases
Proper installation is crucial for a functional and aesthetically pleasing kitchen.
Preparing the Installation Area
- Check for Level and Plumb: Use a level to ensure your walls are plumb and your floor is level. You may need to shim cabinets to compensate for uneven surfaces.
- Locate Studs: Use a stud finder to locate wall studs. This is where you’ll anchor your cabinets.
- Mark Cabinet Placement: Use a level and tape measure to mark the exact positions for your cabinets on the wall.
Securing the Cabinets
- Position the First Cabinet: Start with a corner cabinet if possible. Place it in its final position.
- Level and Shim: Use your level to ensure the cabinet is perfectly level and plumb. Shim behind the cabinet where needed to make it plumb and level.
- Anchor to the Wall: Drive long wood screws (typically 2½ to 3 inches) through the back of the cabinet carcass and into the wall studs. You can also screw through the face frame into the studs for extra security.
- Joining Cabinets:
- If you are installing multiple base cabinets side-by-side, place them together once the first one is secured.
- Clamp the cabinets together to ensure they are flush.
- Drill pilot holes through the side panels of adjacent cabinets and join them with wood screws. You can also use specialized cabinet connecting screws.
Installing Countertops
- Once the base cabinets are securely installed and leveled, you can install your countertops.
- Follow the countertop manufacturer’s installation guidelines.
Frequently Asked Questions (FAQ)
-
What is the best wood for DIY kitchen cabinets?
For cabinet carcasses, cabinet-grade plywood (like birch or maple) is generally preferred for its stability and resistance to warping. For doors and drawer fronts, hardwoods like maple, oak, or cherry are excellent choices. -
Can I build kitchen base cabinets without a table saw?
Yes, you can. While a table saw makes cutting plywood much easier and more accurate, you can achieve good results with a high-quality circular saw and a straight edge guide. -
How do I make my DIY kitchen cabinets look professional?
Precision in your cuts, careful joinery, proper sanding, and a good finishing technique (stain or paint) are key to a professional look. Adding well-fitting doors, drawers, and hardware also makes a big difference. -
What is the typical depth of a kitchen base cabinet?
Standard kitchen base cabinets are typically 24 inches deep. -
What is the standard height of a kitchen base cabinet?
The standard height for base cabinets is 34½ inches, which, when topped with a 1½-inch countertop, results in a standard counter height of 36 inches. -
How do I ensure my cabinets are level?
Use a good quality level throughout the installation process. Shim the cabinets behind them where necessary to achieve a perfectly level and plumb installation.
Building your own kitchen base cabinets is a significant undertaking, but with careful planning, the right tools, and a step-by-step approach, you can achieve beautiful and functional custom kitchen cabinets. This DIY guide provides a solid foundation for tackling this rewarding woodworking project.