
Can you change your kitchen countertops without replacing them entirely? Absolutely! This blog post will guide you through various DIY methods to refresh your kitchen’s look without the hefty price tag and disruption of a full countertop replacement. We’ll explore practical techniques like kitchen countertop resurfacing, countertop refinishing, and painting kitchen countertops to achieve a stunning DIY countertop makeover.
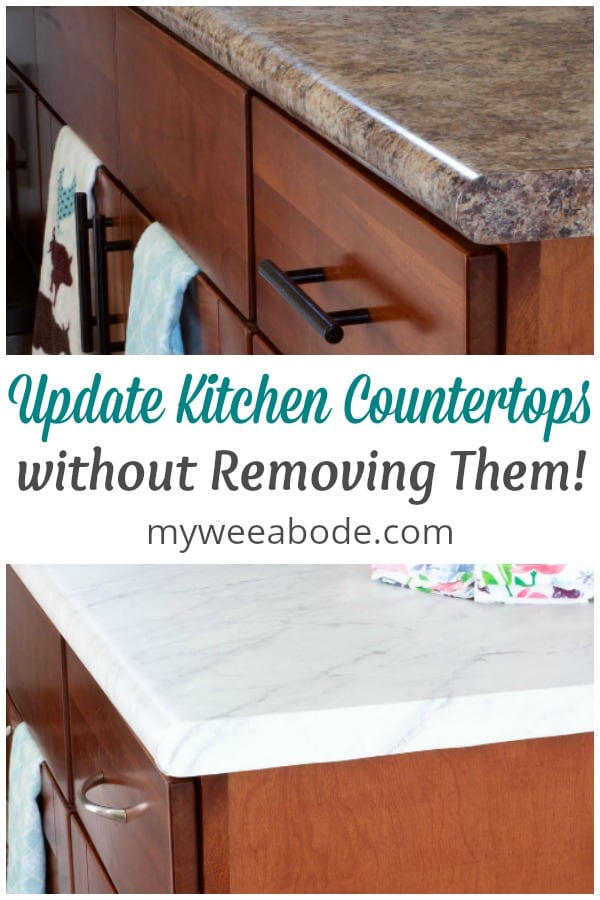
Image Source: myweeabode.com
Breathing New Life into Your Kitchen: The Art of Countertop Revitalization
A kitchen is often the heart of the home, and its countertops play a significant role in its overall aesthetic and functionality. Over time, even the most durable surfaces can show wear and tear. Scratches, stains, or simply an outdated style can make you dream of a remodel. However, a complete replacement is a major undertaking, both in terms of cost and effort. Fortunately, there are numerous DIY-friendly ways to transform your existing countertops, making them look brand new or even better than before. This is where the magic of countertop refurbishment comes in.
Why Consider DIY Countertop Updates?
There are compelling reasons to opt for a DIY approach to updating your countertops:
- Cost Savings: Professional replacement can cost thousands of dollars, depending on the material. DIY methods significantly reduce labor costs, allowing you to achieve a high-end look for a fraction of the price.
- Time Efficiency: You can often complete a DIY countertop update in a weekend or two, compared to the weeks or even months a full replacement might take.
- Customization: DIY projects offer the ultimate control over your design. You can choose colors, finishes, and even textures to perfectly match your kitchen’s style.
- Environmental Friendliness: By refurbishing your existing countertops, you’re reducing waste that would otherwise go to landfills from demolished materials.
- Sense of Accomplishment: There’s immense satisfaction in transforming your kitchen with your own hands.
Deciphering Your Current Countertop Material
Before you embark on your DIY journey, it’s crucial to identify your current countertop material. This will dictate the best methods and products for refurbishment. Common materials include:
- Laminate: Often found in older kitchens, laminate countertops are durable and come in a wide variety of patterns and colors.
- Laminate Countertop Update: Many DIY techniques are perfect for giving laminate a modern facelift.
- Butcher Block: Solid wood countertops offer warmth and a natural aesthetic.
- Butcher Block Countertop Refinish: Wood requires specific care and finishes.
- Tile: Ceramic or porcelain tiles can be a good candidate for a refresh.
- Tile Countertop Refresh: Grout cleaning and sealing or even tile painting are options.
- Solid Surface (e.g., Corian): These are typically seamless and can often be sanded and polished.
- Granite/Quartz: While more challenging for DIY, some coatings can be applied.
- Concrete: This material offers a modern, industrial look and can be coated or resurfaced.
- Concrete Countertop Overlay: A thin layer of concrete can be applied over existing surfaces.
- Laminates with a Decorative Overlay: Some newer laminates have a more textured or patterned surface.
Knowing your material will help you select the right primers, paints, sealants, or coatings for a successful and long-lasting result.
Popular DIY Countertop Makeover Techniques
Let’s dive into the most effective and popular DIY methods for transforming your countertops without replacing them.
1. Painting Kitchen Countertops: A Splash of Color and Style
Painting kitchen countertops is one of the most accessible and budget-friendly DIY countertop makeover options. With the right preparation and products, you can achieve a stunning, durable finish.
What You’ll Need:
- Degreaser and cleaner: For thorough surface cleaning.
- Sandpaper (various grits, e.g., 120, 220): For scuff sanding.
- Painter’s tape and drop cloths: For protecting surrounding areas.
- Primer (specific for countertops or laminate/melamine): Essential for adhesion.
- Countertop paint (e.g., acrylic latex, specialized countertop paint): Choose a durable, water-resistant formula.
- Optional: Stenciling supplies: For decorative patterns.
- Optional: Epoxy or polyurethane sealant/topcoat: For added durability and shine.
- Paintbrushes, rollers (foam rollers are good for smooth finishes), and trays.
The Process:
-
Preparation is Key:
- Clean Thoroughly: Remove all items from the countertops. Use a strong degreaser to remove any grease or grime. Rinse and let dry completely.
- Repair Imperfections: Fill any chips or cracks with a suitable filler and sand smooth once dry.
- Scuff Sand: Lightly sand the entire countertop surface with 120-grit sandpaper. This creates a slightly rough surface for better paint adhesion. For laminate, ensure you don’t sand through the decorative layer. Clean off all dust with a damp cloth or tack cloth.
- Mask and Protect: Use painter’s tape to carefully mask off edges, backsplashes, and sinks. Cover surrounding cabinets and floors with drop cloths.
-
Priming:
- Apply a thin, even coat of high-quality primer specifically designed for your countertop material (or a general-purpose bonding primer).
- Allow the primer to dry completely according to the manufacturer’s instructions. You might need a second coat for better coverage, especially if you’re painting over a dark color with a lighter one. Lightly sand between coats with 220-grit sandpaper if recommended for a smoother finish.
-
Painting:
- Apply your chosen countertop paint in thin, even coats. Avoid applying too much paint at once, as this can lead to drips and unevenness.
- Use a high-quality foam roller for a smooth finish or a good brush for edges and corners.
- Allow each coat to dry completely before applying the next. Follow the manufacturer’s recommended drying times.
- You may need 2-3 coats for full coverage. If you’re adding a pattern with stencils, do this after the base coats are dry.
-
Sealing (Crucial for Durability):
- Once the final coat of paint is dry, apply a clear sealant or topcoat. This is vital for protecting the paint from water, stains, and general wear.
- Choose a durable product like a polyurethane or a two-part epoxy countertop coating. These offer excellent protection and a beautiful finish.
- Apply the sealant in thin, even coats, allowing each to dry according to the product’s instructions. Again, light sanding with very fine-grit sandpaper (320-400) between coats can create a smoother finish, but ensure the paint is fully cured before sanding.
-
Curing:
- Most countertop paints and sealants require a curing period before they can be exposed to heavy use or moisture. This can range from a few days to a week. Be patient to ensure the longest-lasting results.
2. Laminate Countertop Update: Modernizing a Classic
Laminate countertops are fantastic candidates for a DIY countertop makeover, especially if yours are showing their age. A laminate countertop update can involve painting, using specialized laminate paints, or even applying a vinyl wrap.
Laminate Paint & Sealant:
This process is very similar to general countertop painting, with a focus on products formulated for laminate. Look for paints labeled for cabinets, laminate, or countertops. A good primer is essential to ensure the paint adheres properly to the slick laminate surface. The final sealant or topcoat is your best friend for longevity.
Vinyl Wrap or Contact Paper:
For a quick and temporary laminate countertop update, consider using a high-quality vinyl wrap or decorative contact paper.
- Pros: Extremely easy to apply, vast array of patterns (wood grain, marble, solid colors), can be removed with minimal residue.
- Cons: Not as durable as paint or epoxy; can peel or scratch with heavy use.
Application Steps:
- Clean and Dry: Thoroughly clean the laminate surface.
- Measure and Cut: Measure your countertop and cut the vinyl wrap, leaving a little extra for trimming.
- Peel and Stick: Peel a small section of the backing paper and carefully align the vinyl with the edge of the countertop.
- Smooth as You Go: Use a squeegee or credit card to smooth out any air bubbles as you slowly peel the backing and apply the vinyl. Work from the center outwards.
- Trim Edges: Use a sharp craft knife to trim away excess vinyl around the edges and any sink cutouts.
3. Butcher Block Countertop Refinish: Restoring Natural Beauty
A butcher block countertop refinish is all about bringing out the natural beauty of the wood and protecting it.
What You’ll Need:
- Sander (orbital or belt sander): With various grit sandpaper (80, 120, 220).
- Wood filler: For any gouges or deep scratches.
- Mineral spirits: For cleaning.
- Good quality wood finish: Food-grade mineral oil, beeswax, or a durable polyurethane for food-safe surfaces. If not used for food prep directly, a standard polyurethane or varnish is suitable.
- Applicator pads or clean cloths.
The Process:
- Empty and Clean: Remove everything from the countertop. Clean it with a mild detergent and water, then let it dry completely.
- Repair Imperfections: Fill any deep scratches or gouges with wood filler. Let it dry and sand it smooth.
- Sanding: Start with a coarser grit sandpaper (80-grit) to remove any old finish and smooth out major imperfections. Work your way up to finer grits (120, then 220) for a smooth surface. Always sand in the direction of the wood grain.
- Dust Removal: Thoroughly remove all sanding dust using a vacuum cleaner, followed by a tack cloth or a cloth dampened with mineral spirits.
- Apply Finish:
- For Food Prep Surfaces: Apply multiple thin coats of food-grade mineral oil, allowing each coat to soak in and wiping off excess. Follow this with a beeswax conditioner for added protection and a nice sheen.
- For Non-Food Prep Surfaces: Apply your chosen polyurethane or varnish according to the manufacturer’s instructions. This usually involves thin, even coats with light sanding (220-320 grit) between coats after they’ve dried.
4. Concrete Countertop Overlay: A Modern Transformation
A concrete countertop overlay can give your kitchen a sleek, modern, or industrial look without the weight or cost of solid concrete. These overlays are typically a thin layer of specially formulated cementitious material applied over your existing countertops.
What You’ll Need:
- Concrete overlay kit: Many brands offer DIY kits with all necessary components.
- Mixing buckets and trowels/spatulas.
- Concrete sealer and wax (if not included in the kit).
- Painter’s tape and drop cloths.
- Sanding pads or orbital sander with concrete-specific pads.
The Process:
- Preparation: Thoroughly clean your existing countertops. Mask off any areas you don’t want to cover.
- Mixing: Mix the concrete overlay material according to the kit’s instructions. It’s crucial to get the consistency right.
- Application: Using a trowel or spatula, apply the concrete mixture evenly over the countertop. Work in sections and try to achieve a consistent thickness.
- Texturing (Optional): You can create various textures using different trowel techniques or by pressing in patterns.
- Drying and Curing: Allow the overlay to dry and cure as per the manufacturer’s instructions. This is critical for strength.
- Sanding: Once cured, sand the surface to smooth it out and achieve your desired finish. Start with coarser grits and move to finer ones.
- Sealing: Apply multiple coats of a high-quality concrete sealer. This protects the surface from stains and moisture. A concrete wax can add an extra layer of protection and sheen.
5. Tile Countertop Refresh: Grout and Tile Revitalization
If you have tile countertops, a tile countertop refresh can make a significant difference.
Grout Cleaning and Sealing:
- Cleaning: Use a specialized grout cleaner and a stiff brush to scrub away grime and stains. For stubborn stains, a paste of baking soda and water or a commercial grout cleaner can be effective.
- Sealing: Once the grout is clean and completely dry, apply a grout sealer. This prevents future stains and makes cleaning easier.
Tile Painting:
- What You’ll Need: Tile primer, tile paint (or a good quality exterior acrylic paint), clear sealant, painter’s tape, brushes, rollers.
- Process: Clean the tiles thoroughly. Prime the tiles, then apply thin, even coats of tile paint. Finish with a durable sealant to protect the paint.
Tile Replacement (Selective):
If only a few tiles are damaged or chipped, you can selectively replace them. This involves carefully removing the damaged tiles, cleaning the area, and installing new ones using tile adhesive and grout.
6. Epoxy Countertop Coating: A Durable, High-Gloss Finish
An epoxy countertop coating is a popular choice for a modern, durable, and often dramatic transformation. Epoxy creates a seamless, non-porous surface that is highly resistant to stains, heat, and scratches.
What You’ll Need:
- Epoxy countertop kit: These kits usually include the epoxy resin, hardener, and sometimes pigments or metallic powders for decorative effects.
- Degreaser and cleaner.
- Sanding supplies (if needed for preparation).
- Painter’s tape and drop cloths.
- Mixing buckets, stir sticks, and a squeegee or roller.
- Heat gun or torch (for removing air bubbles).
- Protective gear: gloves, eye protection, respirator mask.
The Process:
-
Preparation is Paramount:
- Clean: Thoroughly clean and degrease the existing countertops. Any residue will prevent proper adhesion.
- Repair: Fill any imperfections.
- Sand (Optional but Recommended): Lightly sand the surface (especially laminate or solid surface) to create a better bond. Clean off all dust.
- Mask: Carefully tape off all edges, sinks, and backsplashes.
-
Mixing the Epoxy:
- This is the most critical step. Epoxy kits come with specific ratios of resin and hardener. Mix them precisely as instructed. Incorrect ratios can lead to the epoxy not curing properly.
- Mix slowly to avoid introducing too many air bubbles, but ensure thorough mixing. Many kits recommend mixing for a specific amount of time.
-
Adding Color/Effects (Optional):
- If you’re using pigments or metallic powders, add them to the mixed epoxy and stir gently until fully incorporated.
-
Application:
- Pour the mixed epoxy onto the countertop, starting in the center and working your way outwards.
- Use a squeegee or roller designed for epoxy to spread the material evenly across the surface. Aim for a consistent thickness.
- Work relatively quickly, as epoxy has a limited “pot life” – the time it remains workable after mixing.
-
Removing Air Bubbles:
- As the epoxy settles, small air bubbles may rise to the surface. Use a heat gun or a propane torch held at an angle and swept quickly across the surface to pop these bubbles. Be careful not to overheat or scorch the material.
-
Curing:
- Allow the epoxy to cure completely according to the manufacturer’s instructions. This typically takes 24-72 hours for light use and several days to a week for full hardness.
Choosing the Right Method for Your Kitchen
| Countertop Material | Best DIY Methods | Considerations |
|---|---|---|
| Laminate | Painting, Vinyl Wrap, Epoxy Coating | Painting: Requires good primer and sealant for durability. Vinyl Wrap: Easy, temporary, variety of looks. Epoxy: Durable, modern look, requires careful application. |
| Butcher Block | Refinishing (Sanding & Sealing/Oiling) | Requires sanding to bare wood. Finish choice depends on use (food-safe oil vs. durable sealant). Regular maintenance is needed. |
| Tile | Grout Cleaning & Sealing, Tile Painting | Grout: Regular cleaning and sealing prevent stains. Tile Painting: Requires specialized tile paint and sealant. Can chip if not properly prepped and sealed. |
| Solid Surface | Sanding & Polishing, Painting, Epoxy Coating | Sanding: Can restore original look if slightly scratched. Painting/Epoxy: Adds color and a new finish, but may hide the original material. |
| Granite/Quartz | Epoxy Coating, Specialized Countertop Paints/Kits | Limited DIY options. Epoxy/Kits: Can add color or a decorative effect. Ensure excellent adhesion. Might alter the natural stone appearance. |
| Concrete | Concrete Overlay, Polishing, Sealing | Overlay: Adds color/texture over existing surfaces. Polishing: Enhances natural concrete look. Both require good sealing for protection. |
Tips for a Professional-Looking DIY Finish
- Read All Instructions: Every product has specific usage guidelines. Read them thoroughly before starting.
- Ventilation: Ensure your workspace is well-ventilated, especially when using paints, sealants, or epoxy.
- Take Your Time: Rushing the process often leads to mistakes. Patience is key for a good result.
- Test a Small Area: If possible, test your chosen product on an inconspicuous area of the countertop first.
- Invest in Quality Tools: Good brushes, rollers, and applicators make a significant difference in the final finish.
- Cleanliness: Keep your workspace and tools clean throughout the process.
Frequently Asked Questions (FAQ)
Q1: How long do DIY countertop updates typically last?
A1: The lifespan of your DIY countertop makeover depends heavily on the materials used, the preparation, the application quality, and the level of maintenance. A well-executed epoxy coating or a properly sealed painted countertop can last for several years. A butcher block refinish will require periodic re-oiling or re-sealing.
Q2: Can I apply a new countertop material over my existing countertops?
A2: Yes, in many cases. Techniques like concrete overlays, epoxy coatings, and even some types of laminate or tile can be applied over existing countertops, provided the original surface is stable, clean, and properly prepared.
Q3: Is it safe to paint kitchen countertops?
A3: Yes, as long as you use paints and sealants that are non-toxic, water-resistant, and durable. Look for products specifically designed for kitchens or countertops, and ensure they are fully cured before using the kitchen.
Q4: What is the most durable DIY countertop option?
A4: Generally, an epoxy countertop coating is considered one of the most durable DIY options. It creates a very hard, non-porous, and seamless surface that is resistant to most common kitchen hazards.
Q5: Do I need to be an experienced DIYer to do this?
A5: Many of these DIY countertop makeover techniques are designed for beginners. Painting and vinyl wrapping are particularly beginner-friendly. More advanced techniques like concrete countertop overlay or epoxy countertop coating have a steeper learning curve but are still achievable with careful attention to detail and following instructions precisely.
By exploring these DIY methods, you can achieve a stunning kitchen countertop resurfacing and countertop refurbishment without the expense and hassle of a full replacement. Your kitchen will feel brand new, reflecting your personal style and creativity!