
Can you measure for kitchen countertops yourself? Yes, with a bit of care and the right tools, you can accurately measure for kitchen countertops. This guide will walk you through the entire process, from gathering your supplies to understanding what your measurements mean for your new countertops. Measuring kitchen cabinets for countertops is a crucial first step in achieving a perfect fit and a beautiful new look for your kitchen. Whether you’re opting for quartz countertop measurement, granite countertop measurement, laminate countertop measurement, or butcher block countertop measurement, precision is key. This DIY kitchen countertop measurement guide is designed to empower you with the knowledge to get it right.
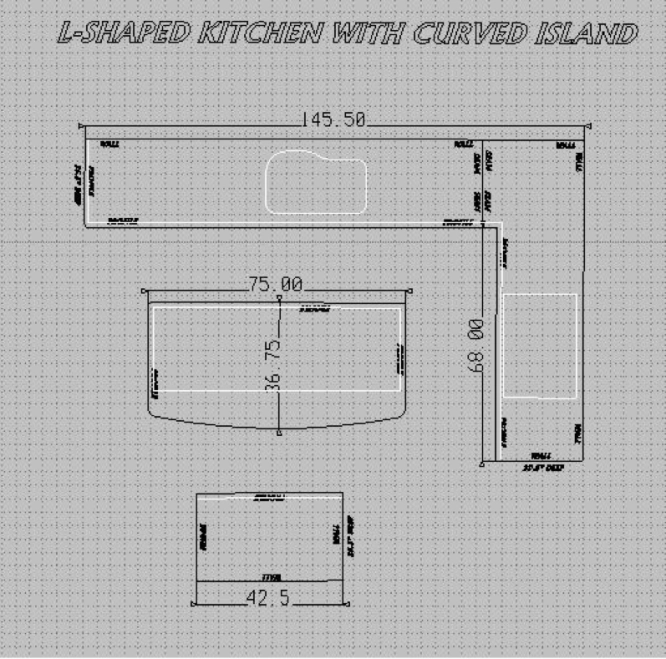
Image Source: www.archcitygranite.com
Why Precise Measurements Matter
Getting your kitchen countertop measurements spot-on is more than just a formality; it’s the foundation of a successful renovation or replacement project. Incorrect measurements can lead to a host of problems, including:
- Costly Mistakes: Ordering countertops that are too large or too small will result in wasted material and extra expenses for remakes or adjustments.
- Installation Issues: Countertops that don’t fit perfectly can be difficult, if not impossible, to install correctly. This can compromise their stability and appearance.
- Aesthetic Problems: Even slight inaccuracies can result in gaps, uneven edges, or countertops that don’t sit flush with your cabinets, detracting from the overall look of your kitchen.
- Delays: Measurement errors often mean waiting longer for correctly sized materials, delaying your kitchen project timeline.
What You’ll Need: Gathering Your Tools
Before you start, make sure you have the necessary tools. Having everything ready will make the measuring process smoother and more accurate.
- Measuring Tape: A high-quality, retractable metal measuring tape is essential. Look for one with clear markings in both inches and feet.
- Pen and Paper (or a Digital Device): To record your measurements. Consider using a dedicated notebook or a tablet app for easy organization.
- Graph Paper (Optional but Recommended): This helps in drawing a scale diagram of your kitchen layout.
- Helper: Having someone to hold the tape measure steady at the other end can significantly improve accuracy, especially for longer spans.
- Safety Glasses: Protect your eyes, especially if you’ll be working near existing countertops.
- Calculator: For double-checking calculations.
Step-by-Step Measurement Process
Let’s break down how to measure your kitchen cabinets for countertops. This process is similar for most countertop materials, though specific considerations might arise depending on your choice.
Step 1: Measure Cabinet Runs
A “cabinet run” is a continuous line of cabinets. You’ll need to measure each run separately.
Measuring Straight Runs
- Start at one end: Place the end of your measuring tape against the outermost edge of your cabinets.
- Extend to the other end: Pull the tape measure tautly along the front edge of the cabinets to the outermost edge of the cabinets on the other side.
- Record the measurement: Write down the total length to the nearest 1/8th of an inch. It’s always better to measure more than once to ensure accuracy.
- Repeat for each run: Measure every continuous section of cabinets.
Measuring L-Shaped and U-Shaped Runs
For corners, it’s important to measure to the point where the countertop will meet the corner.
- Measure each leg separately: Treat each leg of the “L” or “U” shape as a separate run and measure its length from the outermost edge of one end to the corner point.
- Measure the return leg: Measure the length of the second leg of the “L” or “U” shape from the corner point to the outermost edge of the other end.
- Corner Detail: For the corner itself, measure from the edge of one cabinet run to the edge of the cabinet run on the other side. This is where the countertop will turn. Note the depth of the corner as well.
Step 2: Measure Countertop Depth
This measures how far your countertop extends from the cabinet front.
- Measure from the front edge: Place the measuring tape at the front edge of your cabinets.
- Extend to the back wall: Pull the tape measure tautly towards the wall behind your cabinets.
- Record the depth: Note this measurement to the nearest 1/8th of an inch. Standard countertop depths are typically 25 to 25.5 inches, but yours may vary.
Step 3: Measure Countertop Height
This is usually determined by the height of your base cabinets.
- Measure from the floor: Place the measuring tape on the floor and extend it up to the top edge of your base cabinets.
- Record the height: Note this measurement. Standard base cabinet height is 34.5 inches, but custom heights exist. This measurement helps ensure your new countertops will be at the correct working height.
Step 4: Account for Overhangs
Overhangs are the parts of the countertop that extend beyond the cabinet base.
- Front Overhang: Typically, countertops have a front overhang of 1 to 1.5 inches beyond the cabinet face.
- Side Overhang: This is common on ends of runs that are not against a wall, usually around 1 to 1.5 inches.
- Sink and Cooktop Cutouts: You’ll need to provide precise measurements for any sink or cooktop cutouts. Measure the exact dimensions of the appliance and its placement on the countertop.
Important Note: When measuring for custom kitchen countertop sizes, the fabricator will usually add the standard overhangs to your cabinet measurements. It’s still good to note any specific overhang preferences you have.
Step 5: Measure for Backsplashes
If you’re having a backsplash fabricated from the same material, you’ll need to measure its height and length.
- Height: Measure the desired height of the backsplash from the countertop surface up to the underside of your wall cabinets or any upper shelving.
- Length: Measure the total length of each wall where the backsplash will be installed.
Step 6: Note Sink and Faucet Locations
Precisely locating your sink and faucet is critical for cutouts.
- Sink: Measure the exact dimensions of your sink (length, width, and depth). Also, measure the distance from the back wall to the back edge of the sink and from each side wall to the side edge of the sink.
- Faucet: Measure the distance from the back wall to the center of the faucet holes, and the distance between faucet holes if there are multiple.
Step 7: Document with a Diagram
Creating a simple diagram of your kitchen layout is highly recommended.
- Draw a rough outline: Sketch the shape of your kitchen and the placement of your cabinets.
- Label each section: Mark each cabinet run with its measured length and depth.
- Indicate corners and angles: Clearly show how runs connect.
- Mark cutouts: Draw the exact dimensions and locations for sink, cooktop, and faucet holes.
- Add notes: Include any specific details, like the placement of appliances or windows.
Specific Material Considerations
While the basic measurement process is universal, different materials have nuances:
Quartz Countertop Measurement
Quartz is a popular choice known for its durability and low maintenance.
- Accuracy is paramount: Quartz slabs are large and heavy, and seams are visible. Precise measurements minimize the need for seams and ensure a perfect fit.
- Edge profiles: Decide on your edge profile (e.g., eased, bullnose, ogee) as this can slightly affect the finished dimensions.
- Templating: Most quartz fabricators will come to your home to create a precise template after your cabinets are installed, especially for complex layouts or curves. This template is the master for cutting.
Granite Countertop Measurement
Granite offers natural beauty and is very heat resistant.
- Slab matching: If you’re using a granite with strong patterns, the fabricator will want to see the specific slabs you’ve chosen to ensure the pattern flows correctly across seams and cutouts. Measurements must account for this pattern matching.
- Weight: Granite is heavy, so precise measurements ensure a secure fit and proper support.
Laminate Countertop Measurement
Laminate is a more budget-friendly option, often mimicking stone or wood.
- Standard sizes: Laminate countertops often come in standard widths and lengths. Your measurements will determine which standard sizes you can use or if you need custom cuts.
- Seams: Laminate countertops are joined with specialized adhesives. Minimizing seams is generally preferred for aesthetics and durability.
- Edge banding: The edges of laminate countertops are usually finished with edge banding, which should be factored into the overall measurement.
Butcher Block Countertop Measurement
Butcher block brings warmth and a natural feel to the kitchen.
- Grain direction: If you have specific preferences for the grain direction, communicate this clearly. Measurements need to accommodate this.
- Finishing: Butcher block often requires sealing or oiling. The measurements should include any potential for slight expansion or contraction due to moisture.
- Thickness: Butcher block countertops are typically thicker than other materials. Ensure your measurements account for this added thickness, especially around sinks and cooktops.
When to Measure: Timing is Everything
The best time to take your initial DIY kitchen countertop measurements is after your base cabinets are installed and secured.
- Why after installation? Cabinets can settle, and their final placement can influence the exact dimensions needed for countertops. If you measure before cabinets are installed, you risk ordering countertops that won’t fit the final layout.
- Before ordering: While your DIY measurements are excellent for getting quotes and making initial selections, a professional templating service from your countertop fabricator will typically be scheduled after cabinet installation and before cutting begins. This ensures the absolute highest level of accuracy.
Countertop Template Creation: The Professional Touch
While a DIY measurement is a great starting point, professional templating is a critical step in the countertop installation guide.
- What is templating? A professional template is a precise, full-scale pattern of your countertop made from materials like thin plastic sheets, cardboard, or even digital scanning.
- Why it’s important: Fabricators use these templates to cut your countertop material with extreme accuracy. They account for:
- Slight imperfections in cabinet lines.
- Wall plumbness (how straight your walls are).
- Precise placement of sinks, faucets, and cooktops.
- Desired overhangs.
- Seamless transitions in corners.
- Who does it? Your chosen countertop supplier or fabricator will usually send a templating specialist to your home.
Frequently Asked Questions (FAQ)
Q: What if my cabinets aren’t perfectly square?
A: This is common. When measuring, always measure from the front edge of the cabinet face frame to the back wall, and from the side edge of the cabinet face frame to the adjacent wall or cabinet. Your diagram should clearly show any irregularities. A professional template will capture these precise nuances.
Q: How do I measure for a countertop with a sink cutout?
A: Measure the length and width of the sink opening itself. Then, measure the distance from the back wall to the back edge of the sink opening, and the distance from the left and right edges of the sink opening to the respective side walls or ends of the cabinet run. Also, note the required faucet hole locations and diameter.
Q: Do I need to measure the thickness of my existing countertop?
A: Not necessarily for ordering new countertops, unless you are aiming for a specific thickness to match existing elements. The thickness of your new countertop will be a material specification you choose (e.g., 3cm quartz, 2cm granite).
Q: What is the standard overhang for kitchen countertops?
A: A typical front overhang is 1 to 1.5 inches beyond the cabinet face. Side overhangs, if applicable, are usually similar. Always check with your fabricator for their recommendations.
Q: Should I order more material than I measured?
A: Your DIY measurements are for planning and quoting. The fabricator will account for any necessary waste when they cut from a larger slab. However, for butcher block or laminate, you might need to know standard slab sizes.
Q: What are custom kitchen countertop sizes?
A: These are countertops that are not made to standard dimensions. They are cut specifically to fit your unique kitchen layout and may involve complex shapes, curves, or special cutouts. Accurate measurements are critical for custom kitchen countertop sizes.
Final Checks and Tips for Accuracy
- Double-check everything: Measure each section at least twice. If possible, have your helper measure it as well.
- Measure to the wall, not to an old splash: If you have an old backsplash that sticks out, measure to the actual wall behind it, not to the surface of the old backsplash.
- Note any obstructions: Mark locations of electrical outlets, plumbing penetrations, or any other features that might affect countertop installation or placement.
- Communicate clearly: When you get quotes, provide your measurements and your diagram. If you have any specific design requests (e.g., a particular overhang, a specific seam location), write them down.
By following these steps, you can confidently take accurate kitchen countertop measurements. This meticulous approach will save you time, money, and headaches, ensuring your beautiful new countertops fit perfectly and enhance your kitchen for years to come. Remember, precision in your DIY kitchen countertop measurement is the first step towards a flawless countertop installation guide.