
Here’s an in-depth guide on how to regrout kitchen counter tiles, focusing on clarity and ease of execution for DIY enthusiasts.
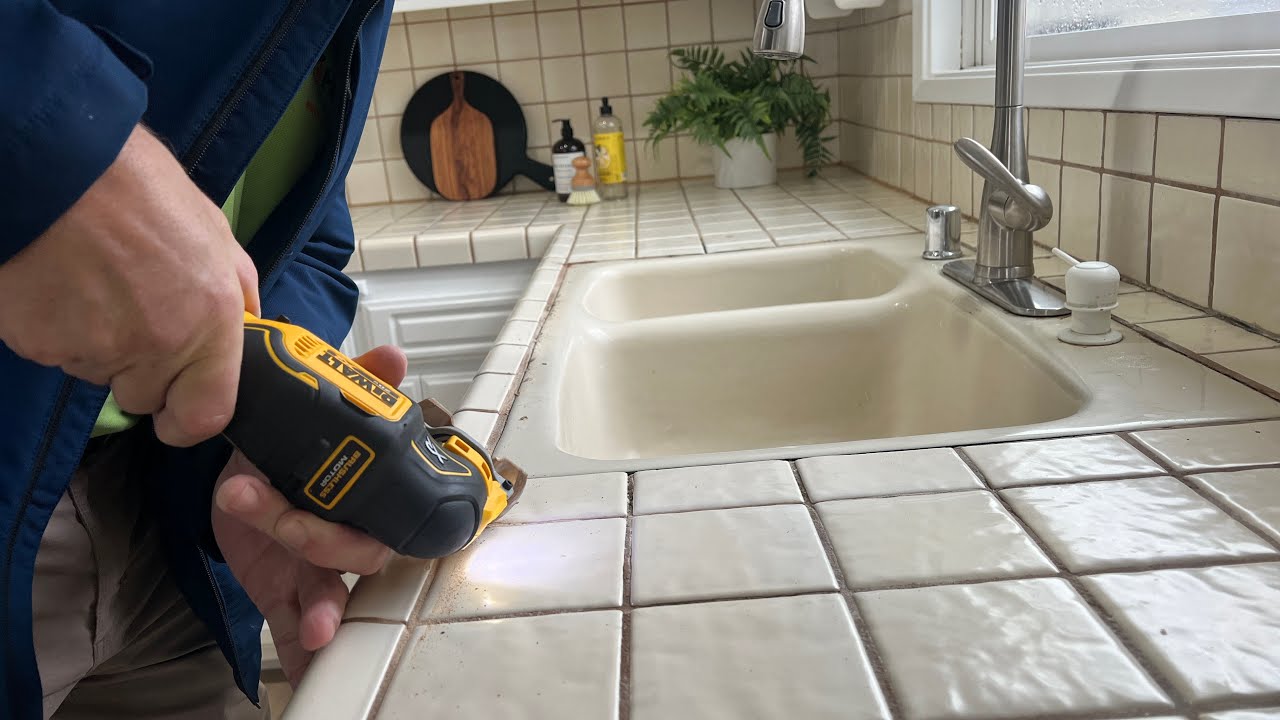
Image Source: i.ytimg.com
How To Regrout Kitchen Counter Tile: Easy Guide
Can you regrout kitchen counter tile yourself? Yes, absolutely! Regrouting kitchen counters is a very achievable DIY project that can significantly refresh the look and hygiene of your kitchen. This guide will walk you through the entire process, from preparation to the final touches, making kitchen tile regrouting a straightforward task.
Why Regrout Your Kitchen Counter Tiles?
Over time, the grout between your kitchen tiles can become stained, cracked, or even missing. This not only looks unsightly but can also harbor bacteria and moisture, leading to potential issues. Regrouting kitchen counters can:
- Improve Aesthetics: Fresh grout makes your tile look new again.
- Enhance Hygiene: Seals out dirt, grease, and moisture.
- Prevent Damage: Fills cracks and prevents water from seeping beneath tiles.
- Save Money: A much cheaper alternative to replacing the entire countertop.
Getting Started: What You’ll Need
Before you begin regrouting kitchen counters, gather all your supplies. Having everything ready will make the process much smoother.
Essential Tools and Materials for Kitchen Tile Regrouting:
- Safety Gear:
- Safety glasses
- Gloves (heavy-duty, chemical-resistant)
- Dust mask (especially when removing old grout)
- Grout Removal Tools:
- Grout saw or grout removal tool (manual or electric)
- Utility knife or putty knife (for tight corners)
- Wire brush
- Cleaning Supplies:
- Bucket
- Clean cloths or sponges
- Tile cleaner or a mild soap solution
- Vacuum cleaner with a brush attachment
- Shop vacuum (optional, but very helpful)
- New Grout and Grouting Tools:
- New grout (choose unsanded for narrow joints, sanded for wider ones; consider epoxy grout for maximum durability)
- Grout float or squeegee
- Small buckets for mixing grout
- Measuring cup or scale (for precise grout mixing)
- Mixing stick or drill with a grout mixing paddle
- Sponge for cleaning excess grout
- Grout sealer (for after the grout cures)
- Sealing applicator (brush or roller)
- Protection:
- Painter’s tape or masking tape
- Drop cloths or old newspapers
Step-by-Step Guide to Regrouting Kitchen Counter Tiles
Follow these steps carefully for successful kitchen tile regrouting.
Step 1: Prepare Your Workspace
Proper preparation is key to a clean and efficient DIY kitchen regrouting job.
- Clear the Countertop: Remove everything from the countertop. This includes small appliances, canisters, and any decorative items.
- Protect Surrounding Areas: Use painter’s tape to mask off the edges of the countertop where it meets the backsplash, cabinets, and walls. This prevents accidental damage to painted surfaces or delicate materials and makes cleanup much easier.
- Lay Drop Cloths: Place drop cloths or old newspapers on the floor in front of and around the countertop to catch any falling debris or spilled grout.
Step 2: Remove Old Grout
This is often the most labor-intensive part of regrouting kitchen counters, but it’s crucial for a good finish.
- Start with a Grout Saw: For manual removal, a grout saw is your best friend. Work the blade back and forth along the grout lines, aiming to remove about 1/8 to 1/4 inch of the old grout.
- Use a Utility Knife for Edges: A utility knife or a sharp putty knife can be helpful for getting into tight corners or around fixtures.
- Be Gentle: Apply steady pressure. You don’t want to chip or crack the tiles themselves. The goal is to remove the old grout, not damage the tiles.
- Consider an Oscillating Tool (with caution): For larger areas or very tough grout, an oscillating tool with a grout removal attachment can speed things up. However, these tools require a steady hand and can easily damage tiles if not used correctly. Practice on an inconspicuous area first if possible.
- Clean as You Go: As you remove grout, use your shop vacuum or a brush and dustpan to remove the dust and debris.
Step 3: Deep Clean the Grout Lines
Once the old grout is removed, the empty lines need to be meticulously cleaned. This ensures the new grout adheres properly.
- Vacuum Thoroughly: Use a vacuum with a crevice tool to suck up all the loose grout dust from the lines and the surrounding tile surface.
- Scrub the Lines: Use a stiff-bristled brush or a wire brush to scrub inside the grout lines. This will dislodge any remaining particles.
- Wipe Down: Dampen a clean cloth with water or a mild tile cleaner. Wipe down the entire tile surface, paying special attention to the grout lines, to remove any remaining dust and grime.
- Rinse and Dry: Rinse the cloth frequently, or use fresh cloths and water. Ensure the grout lines are completely clean and dry before proceeding to the next step. Any lingering dust or moisture can compromise the new grout’s bond.
Step 4: Mix the New Grout
This step requires careful attention to the manufacturer’s instructions.
- Read the Grout Packaging: Different types of grout have different mixing ratios and methods. Always follow the instructions on the grout container.
- Use a Clean Bucket: Start with a clean bucket. Add the grout powder first, then gradually add water.
- Mix to the Right Consistency: The ideal consistency is often described as like peanut butter or thick toothpaste. It should be smooth and free of lumps.
- Let it Slake (If Required): Some grouts need to “slake,” meaning you let the mixture sit for a few minutes after initial mixing to allow the chemicals to react. Check the packaging for this instruction.
- Mix Small Batches: It’s better to mix smaller batches that you can use within the grout’s working time (usually 20-30 minutes). Grout hardens quickly, and you don’t want to waste material or use grout that has started to set.
Step 5: Apply the New Grout
Now it’s time to fill those clean lines with fresh grout.
- Load the Grout Float: Scoop a generous amount of mixed grout onto your grout float or squeegee.
- Work at an Angle: Hold the float at about a 45-degree angle to the tile surface.
- Press and Spread: Press the grout firmly into the grout lines, spreading it across the tiles. Move the float diagonally across the grout lines. This helps to push the grout deep into the joints and scrape off excess from the tile surface.
- Fill All Lines: Ensure that all the grout lines are completely filled. Go over each line multiple times if necessary, working from different angles.
- Remove Excess Grout: After filling an area, use the edge of the grout float held at a steeper angle (almost 90 degrees) to scrape off as much excess grout as possible from the tile surface.
Step 6: Initial Cleaning (Removing Grout Haze)
This is a critical step for achieving a clean finish.
- Wait for Grouting to Set Slightly: Allow the grout to set for about 10-20 minutes. It should feel firm to the touch but not completely hard. This is often called the “haze” stage.
- Use a Damp Sponge: Dampen a clean sponge with clean water. Wring it out thoroughly so it’s barely damp, not wet.
- Wipe Diagonally: Gently wipe the sponge across the tiles in a diagonal motion, following the grout lines. This removes the bulk of the grout residue from the tile faces.
- Rinse the Sponge Frequently: Rinse your sponge in a bucket of clean water very frequently. Use a separate bucket for rinsing if possible to keep your cleaning water as clean as can be.
- Avoid Digging into Grout Lines: Be careful not to dig into the newly applied grout lines with the sponge. You want to clean the tile surface, not remove the grout.
- Work in Sections: Tackle the countertop in manageable sections to ensure you can clean the haze before it hardens.
Step 7: Final Cleaning and Buffing
After the initial cleaning, you’ll likely still have a faint haze.
- Wait for Grout to Cure Further: Let the grout cure for another hour or so.
- Use a Clean, Dry Cloth: Use a soft, dry microfiber cloth to buff the tile surface. This will remove any remaining grout haze and bring out the shine of your tiles.
- Repeat if Necessary: If you still see haze, you can use a slightly damp cloth followed by a dry cloth.
Step 8: Allow Grout to Cure
Patience is essential here. The grout needs time to harden fully.
- Check Grout Packaging: The curing time varies depending on the type of grout used. It can range from 24 hours to several days.
- Avoid Heavy Use: Do not use the countertop or expose it to moisture during the initial curing period.
Step 9: Seal the Grout
This is a crucial step for long-term kitchen countertop tile care and is highly recommended for resealing grout kitchen areas.
- Why Seal? Sealing protects the grout from stains, moisture, and mildew, especially important in a kitchen environment prone to spills and grease.
- Choose a Sealer: Select a high-quality grout sealer. There are penetrating sealers (which soak into the grout) and topical sealers (which form a protective film on top). For countertops, a penetrating sealer is often preferred for its durability and less noticeable finish.
- Apply the Sealer: Use an applicator brush, a small roller, or a clean cloth to apply the sealer to the grout lines. Make sure to cover all the grout evenly.
- Wipe Off Excess: Wipe any excess sealer off the tile surfaces immediately with a clean cloth. Most sealers are clear or slightly tinted.
- Follow Manufacturer Instructions: Allow the sealer to dry according to the product’s instructions. You may need to apply a second coat.
Tips for Specific Scenarios
- Regrouting Kitchen Counter Tiles with Narrow Gaps: For grout lines less than 1/8 inch wide, use unsanded grout. It’s smoother and doesn’t shrink as much in narrow spaces.
- Regrouting Kitchen Counter Tiles with Wider Gaps: For grout lines 1/8 inch or wider, use sanded grout. The sand particles provide strength and prevent shrinkage.
- Kitchen Grout Repair for Small Areas: If you only have a few damaged grout lines, you can use a grout repair caulk or a small tube of pre-mixed grout. These are easier to handle for spot repairs but may not last as long as fully regrouted areas.
- Regrouting Tile Backsplash: The process for regrouting a tile backsplash is very similar to regrouting countertops. You’ll want to protect the surrounding walls and cabinets thoroughly.
Maintaining Your Newly Grouted Countertops
Proper tile grout maintenance will keep your kitchen looking its best.
- Regular Cleaning: Clean your countertops regularly with a mild soap and water solution.
- Avoid Harsh Chemicals: Do not use abrasive cleaners or acidic products on grout, as they can break down the sealer and even the grout itself.
- Wipe Up Spills Immediately: This is especially important for acidic liquids like lemon juice or vinegar, which can etch grout.
- Re-Seal Periodically: Depending on traffic and cleaning habits, you may need to re-seal the grout every 6-12 months to maintain its protective barrier.
Common Problems and Solutions in DIY Kitchen Regrouting
| Problem | Cause | Solution
Frequently Asked Questions (FAQ)
-
Q: How long does it take to regrout kitchen counters?
A: For a typical kitchen countertop, it can take anywhere from 4 to 8 hours for the actual regrouting process, plus drying and curing time. The most time-consuming part is usually removing the old grout. -
Q: What type of grout should I use for my kitchen counter?
A: For kitchen counters, which experience a lot of wear and tear, epoxy grout is highly recommended for its durability, stain resistance, and water resistance. If you opt for cementitious grout, use sanded grout for joints wider than 1/8 inch and unsanded grout for narrower joints. -
Q: How do I clean grout haze from tiles?
A: Grout haze is best removed with a slightly damp sponge, wiping diagonally across the tiles. For stubborn haze, a specialized grout haze remover product can be used, followed by thorough rinsing. Always test in an inconspicuous area first. -
Q: Can I regrout over existing grout?
A: No, you should not regrout over existing grout. The old grout must be completely removed to ensure the new grout adheres properly and creates a strong, lasting bond. -
Q: How do I prevent grout from cracking in the future?
A: Using the correct type of grout (sanded for wider joints), mixing it according to instructions, and allowing it to cure properly are key. Sealing the grout also helps protect it from moisture and movement that can cause cracks. For areas prone to movement, consider using a grout that contains polymers for added flexibility.
By following these detailed steps and tips, you can confidently tackle the task of regrouting your kitchen counter tiles, giving your kitchen a fresh, clean, and hygienic makeover. Remember to always prioritize safety and follow manufacturer instructions for the best results.