
What is kitchen staging for selling a house? Kitchen staging for selling a house is the process of preparing your kitchen to look its absolute best for potential buyers. Can I use my own decor? Yes, you can use your own decor, but it should be carefully selected to appeal to a broad audience. Who is staging for? Staging is for potential buyers, aiming to create a warm, inviting, and aspirational space that helps them envision themselves living in your home.
The kitchen is often called the heart of the home, and when selling a house, it’s one of the most crucial rooms buyers will focus on. A well-staged kitchen can significantly boost your home’s appeal and, consequently, its selling price. It’s not just about cleaning; it’s about presenting your kitchen in a way that highlights its best features and makes a memorable impression. This guide will walk you through essential kitchen staging tips to prepare your kitchen for an open house and attract buyers.
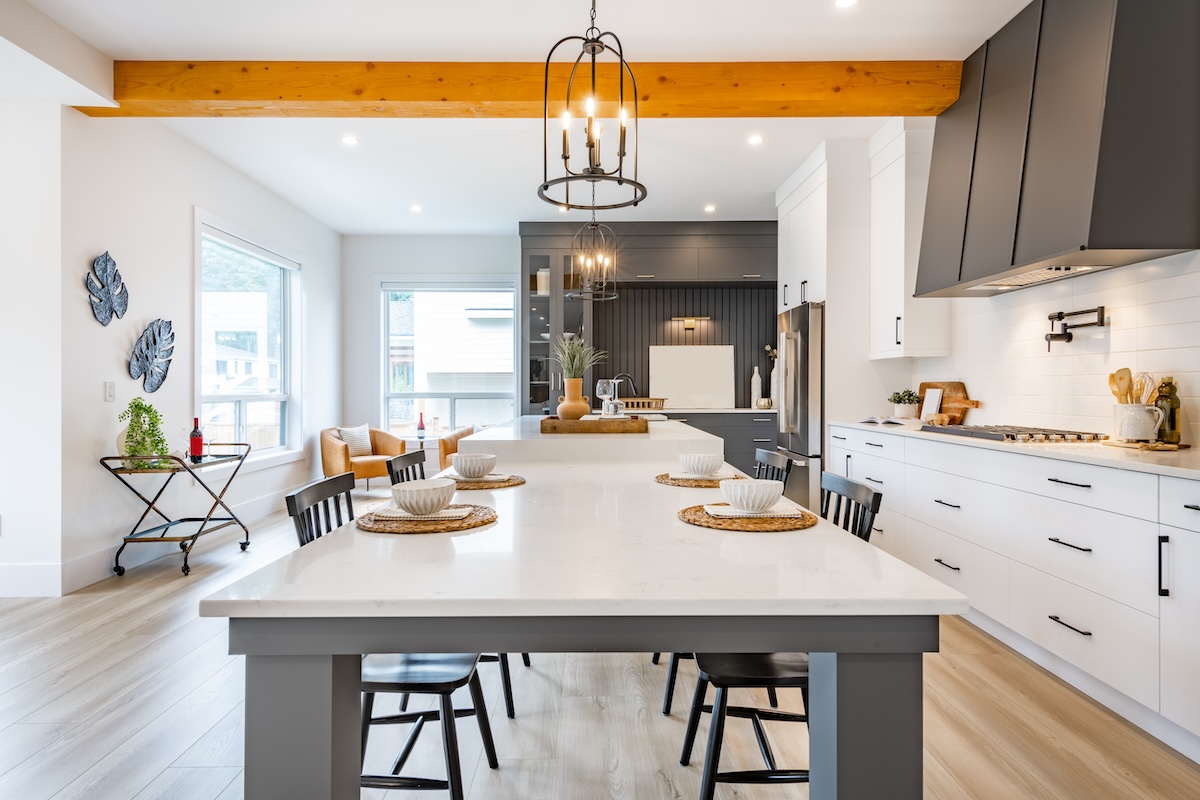
Image Source: nicolemickle.com
The Power of a Polished Kitchen
Why is the kitchen so important in selling a house? Buyers often make decisions about a home based on their feelings about the kitchen. They envision cooking meals, gathering with family, and entertaining friends. If your kitchen feels cluttered, outdated, or uninviting, it can be a major turn-off. Conversely, a sparkling, well-organized, and aesthetically pleasing kitchen can make buyers fall in love with your home. Effective kitchen staging for sale transforms a functional space into a desirable one.
Step 1: Deep Cleaning and Decluttering – The Foundation of Success
Before you even think about decor, a thorough cleaning and kitchen decluttering for sale are paramount. This is non-negotiable when preparing kitchen for open house. Buyers are looking for a clean slate, and any mess or clutter will distract them from your kitchen’s potential.
H4: Tackling the Clutter
Clutter is the enemy of a well-staged kitchen. Every surface needs to be cleared of unnecessary items.
- Countertops: Remove everything except for a few carefully chosen decorative items. Think a small bowl of fruit, a nice-looking utensil crock, or a small potted herb.
- Sink: Ensure the sink is spotless and free of dishes. A clean, empty sink makes the kitchen feel larger and more functional.
- Cabinets and Drawers: Organize the inside of your cabinets and drawers. While buyers may not open every single one, knowing that the storage is organized and ample is reassuring. Remove any excess, rarely used items. Consider organizing with shelf dividers or drawer organizers.
- Pantry: Similar to cabinets, tidy up your pantry. Remove half-empty boxes and expired items. Arrange remaining items neatly.
- Appliances: Clean the exterior of all appliances, including the refrigerator, oven, microwave, and dishwasher. Don’t forget the inside of the microwave and the stovetop.
H4: The Ultimate Clean
A deep clean goes beyond the surface. It involves getting into every nook and cranny.
- Surfaces: Wipe down all countertops, cabinets (inside and out), backsplash, and appliance fronts.
- Floors: Mop or steam clean all flooring. Pay attention to baseboards and corners.
- Fixtures: Polish faucets, handles, and light fixtures.
- Windows and Glass: Clean windows inside and out for maximum natural light. Wipe down glass cabinet doors and the microwave door.
- Grout: Scrub grout lines on countertops and floors to remove any stains or grime.
Step 2: Depersonalization – Making It Universal
Kitchen depersonalization is crucial for allowing buyers to imagine their own lives in your space. This means removing personal items that reflect your specific tastes and lifestyle.
H5: What to Remove
- Family Photos: All family photos, children’s artwork, and personal knick-knacks should be put away.
- Personalized Mugs and Utensils: Those mugs with funny sayings or your favorite quirky spatula set should be stored.
- Recipe Books and Notes: Unless they are strategically placed as decor, personal recipe books and handwritten notes should be cleared.
- Pet Items: Food bowls, pet toys, and beds must be completely removed from the kitchen area.
- Religious or Political Items: Any items with religious or political affiliations should be stored away.
The goal is to create a neutral canvas that appeals to the widest range of buyers.
Step 3: Enhancing Key Features – Cabinet and Countertop Staging
Your cabinets and countertops are major focal points in the kitchen. Strategic kitchen cabinet staging and kitchen countertop staging can make a significant difference.
H4: Cabinet Staging
- Cleanliness: Ensure cabinets are spotless, both inside and out.
- Organization: If cabinets are visible (e.g., glass fronts), ensure the contents are neatly organized. Use attractive containers or baskets if needed.
- Hardware: Clean or update cabinet hardware if it looks dated or tarnished. New hardware can be a small investment with a big impact.
- Open Shelving: If you have open shelving, arrange a few attractive items like matching dishes, glassware, or decorative jars. Avoid overcrowding.
H4: Countertop Staging
- Minimalism is Key: As mentioned earlier, keep countertops as clear as possible.
- Strategic Decor: Place only a few well-chosen items.
- Fruit Bowl: A bowl of fresh, colorful fruit (apples, oranges, lemons) adds a pop of color and suggests freshness.
- Potted Herb: A small potted herb (like basil or rosemary) adds a touch of life and greenery.
- Decorative Tray: A stylish tray can corral a few essentials like a nice soap dispenser and a hand towel.
- High-Quality Dish Towel: A neatly folded, attractive dish towel can add a touch of elegance.
- Avoid Clutter Magnets: Keep coffee makers, toasters, and blenders stored away unless they are particularly sleek and modern and you have ample counter space.
Step 4: Lighting – Creating Ambiance
Good kitchen lighting for sale is essential for making the space feel warm, bright, and inviting.
H5: Maximize Natural Light
- Clean Windows: Ensure windows are sparkling clean.
- Open Blinds/Curtains: Open all blinds, shutters, and curtains to let in as much natural light as possible.
- Remove Heavy Drapes: If you have heavy, dark drapes, consider temporarily removing them to allow more light to enter.
H5: Artificial Light
- Turn on All Lights: Before any showing, turn on all the lights in the kitchen, including under-cabinet lighting, overhead lights, and any task lighting.
- Consider a New Fixture: If your main light fixture is dated or unappealing, consider replacing it with a more modern and attractive option. This can be a worthwhile investment.
- Clean Fixtures: Ensure all light fixtures are clean and bulbs are working.
Step 5: Kitchen Decor Staging – The Finishing Touches
Kitchen decor staging adds personality and style, making the kitchen more appealing. The key is to be subtle and inviting.
H4: Color and Freshness
- Fresh Flowers or Plants: A small vase of fresh flowers or a well-maintained potted plant can instantly liven up the space.
- Bowl of Fruit: As mentioned, a bowl of colorful fruit is a classic staging element.
- Color Accents: Introduce small pops of color with items like a decorative bowl, a new set of tea towels, or a small piece of artwork.
H4: Practical Elegance
- High-Quality Dish Towels: Use fresh, attractive dish towels, neatly folded.
- Appealing Utensil Holder: If you keep utensils on the counter, use a clean, attractive holder.
- Small Appliance Appeal: If a small appliance must stay out, ensure it’s clean and in good working order.
- Staging the Dining Area (if applicable): If your kitchen includes a dining nook or island seating, set the table with placemats, simple tableware, and a small centerpiece.
Step 6: Addressing Potential Issues
Sometimes, even after staging, there might be underlying issues that need attention.
H4: Minor Updates for Big Impact
- Paint: A fresh coat of paint can dramatically transform the kitchen. Neutral, light colors are generally best.
- Cabinet Hardware: As mentioned, updating hardware can modernize the look.
- Faucets: A tarnished or outdated faucet can detract from the overall appeal. Consider replacing it.
- Backsplash: If your backsplash is dated or damaged, consider a quick refresh with peel-and-stick tiles or a fresh grout cleaning.
H4: Kitchen Cabinet Staging – Details Matter
When staging kitchen cabinets, think about what buyers want to see: ample storage and neatness.
- Visible Storage: If you have open shelving or glass-front cabinets, ensure the items displayed are attractive and uniform. Matching sets of dishes or glassware look best.
- Hidden Clutter: Make sure drawers and cabinets are not overstuffed. Buyers might subtly check the capacity of your storage.
H4: Kitchen Countertop Staging – Balancing Form and Function
The goal for kitchen countertop staging is to showcase ample, clean workspace.
- Create Zones: If you have a large island, you can create small “zones” – perhaps a small decorative vignette on one end and clear space for food prep on the other.
- Avoid Over-Styling: Too many decorative items can make the countertops look cluttered again. Less is often more.
Table: Kitchen Staging Checklist
Here’s a handy checklist to ensure you cover all your bases:
| Task | Done | Notes |
|---|---|---|
| Deep Clean Entire | Sink, stovetop, oven, microwave, floors, etc. | |
| Declutter All | Counters, cabinets, drawers, pantry | |
| Depersonalize | Remove photos, personal items | |
| Clean Appliances | Inside and out | |
| Polish Fixtures | Faucets, handles | |
| Clean Windows | Maximize natural light | |
| Stage Countertops | Minimal decor, fruit bowl, herb plant | |
| Stage Cabinets | Organized, clean, consider hardware | |
| Enhance Lighting | Turn on all lights, check bulbs | |
| Add Fresh Touches | Flowers, plants, clean towels | |
| Address Minor | Paint, hardware, faucets if needed |
The Importance of Neutrality in Kitchen Decor Staging
When it comes to kitchen decor staging, the aim is to appeal to as many people as possible. This means steering clear of strong, personal design choices.
- Color Palette: Stick to neutral colors for larger items. If you introduce color, do so through accessories like a small vase or a bowl of fruit.
- Artwork: If you choose to display artwork, opt for abstract pieces or landscapes with broad appeal. Avoid personal portraits or overly specific themes.
- Textiles: If you have placemats, chair cushions, or window treatments, ensure they are clean, in good condition, and in neutral or universally pleasing colors.
Preparing Kitchen for Open House – The Final Touches
Leading up to an open house, you’ll want to do a quick refresh.
- Wipe Down Surfaces: A quick wipe of countertops and the sink.
- Empty Trash Cans: Ensure trash and recycling bins are empty and clean.
- Ventilation: Open windows for a short period before the showing to air out the space, then close them and turn on lights.
- Pleasant Aroma: Avoid strong air fresheners. A subtle scent like vanilla or citrus can be pleasant, but often, a truly clean kitchen needs no artificial scent.
Kitchen Staging Tips: A Recap
To effectively stage your kitchen for sale, remember these key points:
- Cleanliness is paramount.
- Declutter every surface and storage space.
- Depersonalize to allow buyers to envision themselves in the space.
- Highlight key features like cabinets and countertops with strategic styling.
- Ensure lighting is bright and inviting.
- Use minimal, attractive decor to add warmth.
- Address any minor cosmetic issues that could detract from the sale.
By investing time and effort into preparing kitchen for open house, you are investing in the perceived value of your home. A beautifully staged kitchen can be the deciding factor for buyers, leading to a faster sale and a higher offer. Remember, the goal of selling a house kitchen staging is to create an aspirational space that buyers can’t resist.
Frequently Asked Questions (FAQ)
Q1: How much does kitchen staging cost?
The cost of kitchen staging can vary widely depending on whether you do it yourself or hire a professional. DIY staging can be very affordable, primarily costing money for cleaning supplies, fresh flowers, and perhaps a few new decorative items or updated hardware. Professional staging services can range from a few hundred dollars for a consultation and guided DIY plan to several thousand dollars for full staging services, furniture rental, and professional design.
Q2: Should I remove all my dishes and cookware from cabinets?
No, you don’t need to remove all your dishes and cookware. However, you should organize them neatly and ensure cabinets are not overcrowded. If you have a lot of mismatched or chipped items, consider donating or discarding them. For cabinets with glass fronts or open shelving, displaying a few matching, attractive sets of dishes can be beneficial.
Q3: Is it okay to leave a coffee maker on the counter?
This depends on your counter space and the overall aesthetic. If you have a sleek, modern coffee maker and ample counter space, it might be acceptable. However, for maximum impact, it’s generally best to store small appliances like coffee makers, toasters, and blenders away unless they are very high-end and contribute to the staging. The goal is to create as much clear counter space as possible.
Q4: What are the most important kitchen staging tips?
The most critical kitchen staging tips include:
1. Deep Cleaning: A spotless kitchen is non-negotiable.
2. Decluttering: Remove all unnecessary items from countertops, tables, and visible storage.
3. Depersonalization: Remove family photos and personal touches.
4. Bright Lighting: Maximize natural light and ensure all artificial lights are on and clean.
5. Minimal, Attractive Decor: Add a few strategic items like a fruit bowl or fresh flowers.
6. Organized Storage: Ensure cabinets and drawers appear clean and spacious.
Q5: Should I update my kitchen before selling if it’s very outdated?
For minor updates like fresh paint, new cabinet hardware, or a new faucet, these are often excellent investments that can significantly boost appeal. Major renovations, such as replacing all cabinets or countertops, are usually only recommended if the kitchen is truly dilapidated and the cost of renovation is justified by the expected increase in sale price and market conditions. Often, excellent staging can mask minor imperfections and make an older kitchen feel more charming and well-maintained.
Q6: How should I stage the kitchen island?
Stage your kitchen island by keeping it largely clear. A simple centerpiece, like a bowl of fruit or a small potted plant, is usually sufficient. If the island has seating, ensure the stools or chairs are clean and neatly arranged. Avoid cluttering it with mail, keys, or other everyday items.
Q7: What kind of scents are best for a staged kitchen?
A truly clean kitchen often needs no artificial scent. If you feel a scent is necessary, opt for very subtle, natural aromas. Think a hint of vanilla, cinnamon, or citrus. Avoid overpowering or artificial air fresheners, as these can be off-putting. Baking a batch of cookies shortly before a showing can create a warm, inviting aroma, but ensure the kitchen is also clean and tidy.