
Can I use my KitchenAid food processor for more than just chopping? Yes, absolutely! Your KitchenAid food processor is a versatile kitchen powerhouse capable of far more than simple chopping. With the right techniques and understanding of its various functions, you can slice, shred, purée, mix dough, emulsify, and even make nut butters. This guide will delve deep into unlocking the full potential of your KitchenAid food processor, transforming it from a single-task gadget into an indispensable culinary companion. We’ll explore its attachments, settings, and provide practical tips to elevate your cooking and baking.
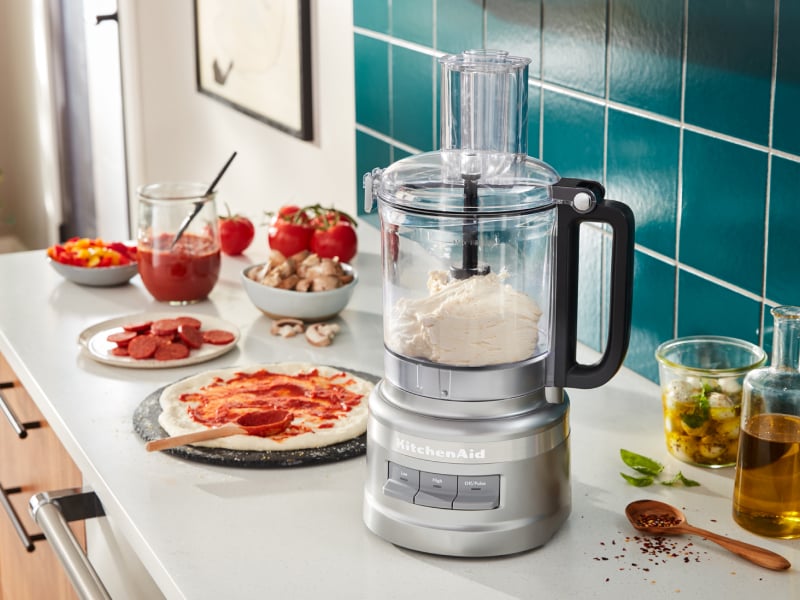
Image Source: www.kitchenaid.com
Getting Started with Your KitchenAid Food Processor
Before you dive into elaborate recipes, it’s crucial to get acquainted with the basics of your KitchenAid food processor. This includes setting it up correctly, identifying the different parts, and understanding what each component does.
Assembling Your KitchenAid Food Processor
Assembly is straightforward, but following these steps ensures proper function and safety:
- Base Unit: Place the motor base on a stable, flat surface. Ensure it’s plugged into a power outlet but the unit is switched off.
- KitchenAid Food Processor Bowl: The food processor comes with a robust KitchenAid food processor bowl, typically made of durable plastic. Locate the central post in the bowl – this is where the motor from the base will connect.
- Lid: The lid usually has a feed tube and a locking mechanism to secure it to the bowl. Align the lid with the bowl and twist until it clicks into place, ensuring it’s fully locked for safety.
-
KitchenAid Food Processor Blades: This is where the magic happens. Your food processor will come with several KitchenAid food processor blades and discs.
- S-Blade (Chopping Blade): This is the most common blade, used for chopping, mincing, puréeing, and mixing. It has two sharp edges that rotate at high speeds.
- Dicing Disc: For perfectly uniform cubes, ideal for vegetables in salads or stews.
- Shredding Disc: Great for shredding cheese, vegetables like carrots and zucchini, and even potatoes.
- Slicing Disc: For uniform slices of fruits and vegetables, perfect for potatoes, cucumbers, and onions.
-
Feed Tube and Pusher: Once the lid is secured, insert the feed tube. The pusher fits snugly inside the feed tube and is used to guide food towards the rotating blades or discs.
Essential KitchenAid Food Processor Attachments Explained
KitchenAid offers a range of KitchenAid food processor attachments and KitchenAid food processor accessories that expand its capabilities even further. Let’s break down some of the most popular ones:
KitchenAid Food Processor Attachment for Stand Mixers
This is a fantastic option if you already own a KitchenAid stand mixer. The KitchenAid food processor attachment connects directly to the mixer’s power hub, turning your stand mixer into a powerful food processor. It typically includes:
- Food Processor Bowl: A dedicated bowl that attaches to the mixer.
- S-Blade: For chopping and puréeing.
- Slice/Shred Discs: Interchangeable discs for slicing and shredding.
- Food Pusher: To safely guide ingredients.
This attachment is especially useful for smaller tasks or when you need to use your stand mixer’s main bowl for something else.
KitchenAid Food Processor Attachments for Sale – Expanding Your Toolkit
Beyond the standard attachments, you can find specialized KitchenAid food processor attachments for sale that cater to specific culinary needs. These can include:
- Dicing Kits: For those who love perfectly uniform diced vegetables.
- Bread Kneading Attachments: Some models offer attachments that can handle simple dough kneading.
- Additional Blades and Discs: Extra sets of blades or specialized discs for finer chopping or different slicing thicknesses.
It’s always a good idea to check your model’s compatibility when purchasing new KitchenAid food processor accessories.
Mastering the KitchenAid Food Processor Blades and Discs
The key to versatility lies in knowing which blade or disc to use for each task.
Using the S-Blade (Chopping Blade)
The S-blade is your workhorse. Here’s how to use it effectively:
- Chopping: For onions, garlic, herbs, nuts, and vegetables. Pulse the motor for coarse chops, and run continuously for finer results or purées.
- Tip: Don’t over-process. For onions, pulse until they reach your desired consistency. Over-processing can turn them mushy.
- Puréeing: Excellent for making sauces, baby food, hummus, and smooth dips. Ensure ingredients are cut into manageable pieces.
- Mixing Dough: For pie crusts, cookies, and quick breads. Add dry ingredients first, then pulse in cold butter or fat until the mixture resembles coarse crumbs. Add wet ingredients and pulse until just combined.
- Caution: Avoid overmixing dough, especially for bread, as this can develop the gluten too much, resulting in tough bread.
- Emulsifying: Making mayonnaise or salad dressings. Start with the egg yolk and oil in the KitchenAid food processor bowl, and slowly drizzle in the oil while the processor is running.
Utilizing the Slicing and Shredding Discs
These discs typically sit above the S-blade, mounted on a spindle.
-
Slicing Disc:
- Preparation: Wash and trim your produce. Cut larger items like potatoes or cucumbers into pieces that fit comfortably in the feed tube.
- Operation: Place the disc onto the spindle. Secure the lid. With the processor running, gently push the food down the feed tube with the pusher.
- Consistency: The thickness of your slices is often determined by the specific disc you are using. Some models come with adjustable slicing discs.
- Best for: Potatoes for gratins, zucchini for salads, cucumbers for sandwiches, onions for rings.
-
Shredding Disc:
- Preparation: Wash and trim produce. Grate cheese by placing the block down the feed tube.
- Operation: Similar to the slicing disc, place the shredding disc on the spindle, secure the lid, and push food through the feed tube.
- Best for: Shredding cheese (cheddar, mozzarella), carrots for salads or cakes, potatoes for hash browns, cabbage for coleslaw.
- Tip: For cheese, ensure it’s cold, as this will make it firmer and easier to shred without becoming gummy.
The Dicing Disc
This attachment is a game-changer for meal prep. It includes a cutting grid and a blade that works with the spinning discs to create uniform dice.
- Preparation: Ensure the food is cut to a size that fits the feed tube and will pass through the grid.
- Operation: Assemble the dicing disc, grid, and blade according to your manual. Secure the lid firmly.
- Best for: Onions, bell peppers, potatoes, celery for mirepoix, salsa, or uniform vegetable toppings.
Exploring KitchenAid Food Processor Settings and Techniques
While most KitchenAid food processors have a simple on/off switch and a pulse function, mastering these KitchenAid food processor settings is key to controlling the outcome of your food.
The Power of Pulsing
The pulse function is your best friend for controlling texture. It delivers short bursts of power, allowing you to:
- Achieve Coarse Chops: Pulse a few times for roughly chopped ingredients like nuts or vegetables for a chunky salsa.
- Prevent Over-Processing: It gives you more control, preventing ingredients from turning into a paste when you want them chopped.
- Incorporate Ingredients Gradually: Use pulses to add ingredients slowly while the machine is running, like adding butter to flour for pie crust.
Continuous Running
For purées, smooth sauces, or finely ground ingredients, allow the processor to run continuously.
- Purées: Run until the desired smoothness is achieved.
- Nut Butters: Start with pulsing to break down the nuts, then run continuously until the butter forms. Be patient; this can take several minutes.
- Emulsifying: Drizzle liquids slowly into the running processor for smooth emulsions like mayonnaise.
Feed Tube Techniques
How you use the feed tube and pusher significantly impacts the results.
- Uniformity: Using the pusher to guide food evenly into the blades or discs ensures consistent slicing or shredding.
- Safety: Always use the pusher to keep your fingers away from the blades. Never force food down the feed tube; cut larger items to fit.
- Adding Liquids: For recipes like mayonnaise or salad dressings, the feed tube is where you’ll slowly drizzle in liquids while the processor is running.
Delicious KitchenAid Food Processor Recipes to Try
Now that you’re familiar with your machine, let’s explore some KitchenAid food processor recipes that showcase its versatility.
1. Classic Hummus
Ingredients:
- 1 (15-ounce) can chickpeas, drained and rinsed
- 1/4 cup tahini
- 1/4 cup fresh lemon juice
- 2 cloves garlic, minced
- 2 tablespoons olive oil (plus more for drizzling)
- Salt to taste
- 1/4 teaspoon cumin (optional)
- Water, as needed
Instructions:
- Place chickpeas, tahini, lemon juice, garlic, olive oil, salt, and cumin (if using) into the KitchenAid food processor bowl fitted with the S-blade.
- Process until smooth and creamy. You may need to scrape down the sides of the bowl a few times.
- If the hummus is too thick, add water, one tablespoon at a time, and process until you reach your desired consistency.
- Serve with pita bread, vegetables, or as a spread. Drizzle with olive oil and a sprinkle of paprika or chopped parsley before serving.
2. Quick Pie Crust
Ingredients:
- 2 1/2 cups all-purpose flour
- 1 teaspoon salt
- 1 cup (2 sticks) cold unsalted butter, cut into cubes
- 1/2 cup ice water
Instructions:
- In the KitchenAid food processor bowl with the S-blade, combine flour and salt. Pulse a few times to mix.
- Add the cold butter cubes. Pulse until the mixture resembles coarse crumbs with some pea-sized pieces of butter remaining.
- With the processor running on low, gradually add the ice water through the feed tube, just until the dough starts to come together.
- Turn the dough out onto a lightly floured surface and gently gather it into a disc. Do not overwork.
- Wrap in plastic wrap and refrigerate for at least 30 minutes before rolling out.
3. Shredded Zucchini for Zucchini Bread
Ingredients:
- 2 cups shredded zucchini
Instructions:
- Wash and trim the ends off your zucchini.
- Cut the zucchini into pieces that fit into the feed tube of your KitchenAid food processor.
- Fit the shredding disc onto the spindle. Secure the lid.
- With the processor running, push the zucchini pieces through the feed tube.
- Once shredded, you can gently press the zucchini in a paper towel-lined colander to remove excess moisture before adding it to your recipe.
KitchenAid Food Processor Cleaning and Maintenance
Proper KitchenAid food processor cleaning ensures its longevity and hygienic operation.
Daily Cleaning
- Disassemble: After each use, unplug the unit. Carefully remove the KitchenAid food processor bowl, lid, and blades.
- Wash Parts: Most components (bowl, lid, pusher, blades, discs) are top-rack dishwasher safe. However, handwashing is often recommended for blades and discs to maintain their sharpness and prevent damage. Use warm, soapy water.
- Motor Base: Never immerse the motor base in water. Wipe it clean with a damp cloth.
Deep Cleaning and Maintenance
- Blades: For stubborn residue on blades, soak them briefly in warm, soapy water. Use a soft brush to clean around the sharp edges carefully.
- Bowls and Lids: Check for any trapped food particles in seams or crevices.
- Motor Base: Periodically check the ventilation slots on the motor base for dust buildup. Use a soft brush or the brush attachment of a vacuum cleaner to gently clean them.
- Storage: Store your food processor with the blades and discs disassembled to prevent damage and ensure they remain sharp. Store them safely in a container or the KitchenAid food processor bowl itself.
KitchenAid Food Processor Troubleshooting – Common Issues and Solutions
Even the most reliable appliances can have hiccups. Here’s some KitchenAid food processor troubleshooting to help you resolve common issues:
| Problem | Possible Cause | Solution |
|---|---|---|
| Processor won’t turn on | Not plugged in. | Ensure the power cord is securely plugged into a working outlet. |
| Lid not locked correctly. | Make sure the KitchenAid food processor bowl and lid are properly aligned and locked into place. Most models have a safety interlock. | |
| Overheating protection activated. | Allow the unit to cool down for 10-15 minutes. Avoid overloading the KitchenAid food processor bowl. | |
| Motor stops mid-operation | Overloaded KitchenAid food processor bowl. | Turn off the unit. Remove some of the food. Cut ingredients into smaller pieces. Do not fill the KitchenAid food processor bowl beyond the maximum fill line. |
| Overheating. | Turn off the unit and let it cool down. Ensure the ventilation slots on the motor base are not blocked. | |
| Uneven chopping/shredding | Ingredients cut too large. | Cut ingredients into smaller, uniform pieces that fit the feed tube and are manageable for the blades. |
| Food not pushed evenly through the feed tube. | Use the pusher to guide food smoothly and evenly towards the blades or discs. | |
| Wrong blade or disc for the task. | Ensure you are using the appropriate KitchenAid food processor blades or discs for the desired result. | |
| Food processed too finely/mushy | Processed for too long. | Use the pulse function for better control over texture. Stop processing as soon as the desired consistency is reached. |
| Leaking from the bowl | Lid not sealed properly. | Ensure the lid is fully locked onto the KitchenAid food processor bowl. Check for any obstructions on the rim of the bowl or lid. |
| KitchenAid food processor bowl overfilled. | Do not fill the KitchenAid food processor bowl beyond the marked maximum fill line. | |
| Center post on the bowl is dirty or damaged. | Clean the center post thoroughly. If it appears damaged, contact customer support. | |
| Discs or blades not spinning | Not assembled correctly. | Ensure the spindle and the appropriate KitchenAid food processor blades or discs are properly seated and locked in place. |
| Motor base connection issue. | Ensure the KitchenAid food processor attachment (if applicable) is securely attached to the stand mixer’s power hub. For standalone units, ensure the bowl is correctly seated on the base. |
Frequently Asked Questions (FAQ)
Q: Can I make nut butter in my KitchenAid food processor?
A: Yes, you can! Start with nuts that have been roasted and cooled. Process them using the S-blade, pulsing initially to break them down, then running continuously until they reach a smooth, creamy consistency. This can take several minutes, and you’ll need to scrape down the sides periodically.
Q: How do I get perfectly uniform diced vegetables?
A: Use the dicing disc attachment. Ensure your vegetables are cut to a size that fits the feed tube and will pass through the dicing grid. Push them through evenly with the pusher.
Q: Is it safe to put blades in the dishwasher?
A: While many parts are dishwasher-safe, it’s generally recommended to handwash the KitchenAid food processor blades and discs. Dishwashers can sometimes dull sharp edges or cause damage to the blades over time.
Q: What is the maximum capacity of the KitchenAid food processor bowl?
A: The capacity varies by model. Always check your user manual for the specific maximum fill line of your KitchenAid food processor bowl to prevent overloading and ensure optimal performance.
Q: Can I use my KitchenAid food processor to grind coffee beans?
A: While technically possible, it’s not ideal. The blades are designed for chopping and slicing, not fine grinding. Grinding coffee beans can dull the blades and may not produce a consistent grind. It’s best to use a dedicated coffee grinder for the best results.
Q: Where can I find replacement parts or additional KitchenAid food processor accessories?
A: You can typically find replacement parts and a wide range of KitchenAid food processor attachments for sale on the official KitchenAid website, authorized appliance retailers, and online marketplaces. Always ensure you are purchasing genuine KitchenAid parts for compatibility and quality.
By familiarizing yourself with the various KitchenAid food processor attachments, mastering the KitchenAid food processor settings, and following these tips, you’ll unlock a world of culinary possibilities. From quick weeknight meals to elaborate entertaining, your KitchenAid food processor is ready to help you create delicious dishes with ease. Happy processing!